How can we help you?
Browse Categories
Importing Contacts from Salesforce into Contactzilla
This guide explains how to sync contacts from Salesforce into Contactzilla. Once connected, your Salesforce contacts will stay up to date across all connected devices using Contactzilla’s CardDAV sync.
Prefer to follow along by video? Watch the step-by-step walkthrough here
Step 1: Install the Contactzilla Salesforce Connector
Before anything else, you’ll need to install the Contactzilla Salesforce Connector — this is a one-time setup that enables secure syncing between the two systems.
1) Click the link below to open the installation page for the Salesforce Connector. You will need to log into your Salesforce account:
👉 Install the Salesforce Connector
2) When prompted, choose Install for Admins Only, tick the confirmation box to acknowledge that this is a third-party application, and click Install.

3) Once the installation is complete, click Done. The connector will now show up as an installed package in your Salesforce account, and you’re ready to begin syncing contacts through Contactzilla.

Step 2: Create an Address Book in Contactzilla
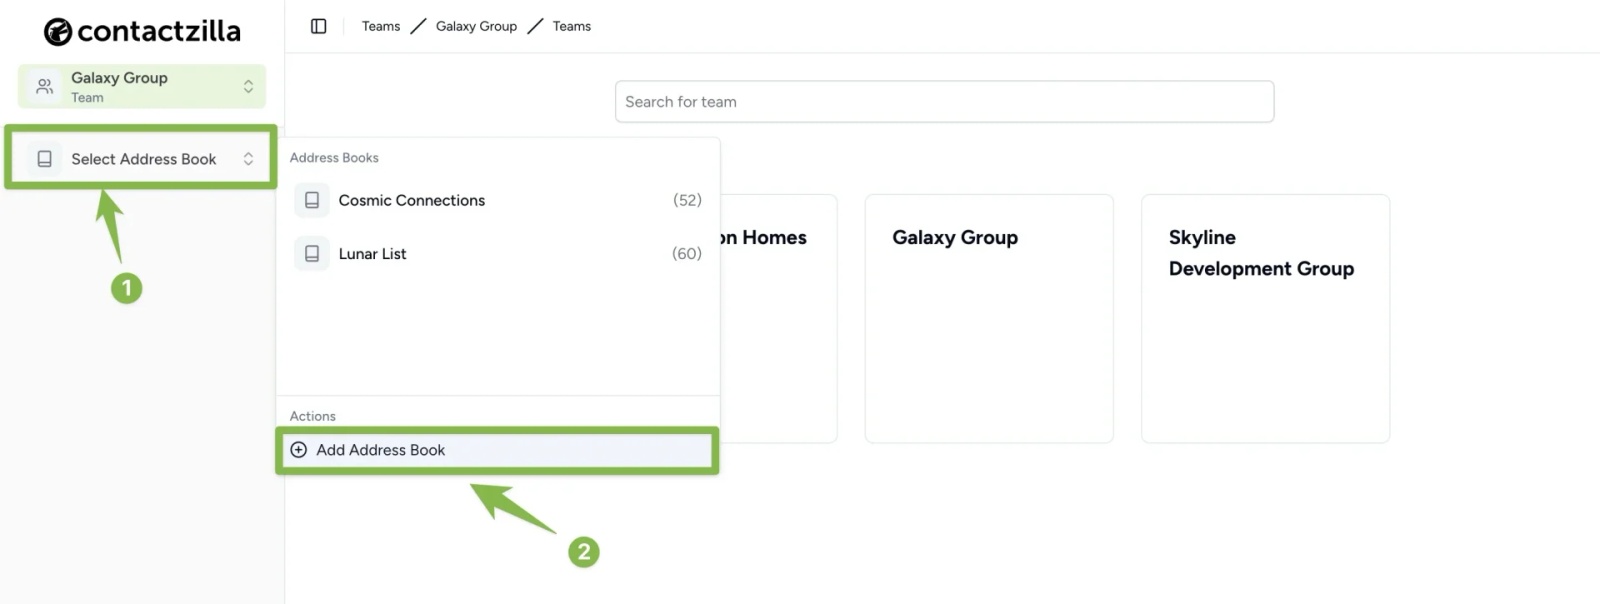
1) Log into Contactzilla, make sure you are in the correct team and click the Address book drop down and chose ‘Add address book’.
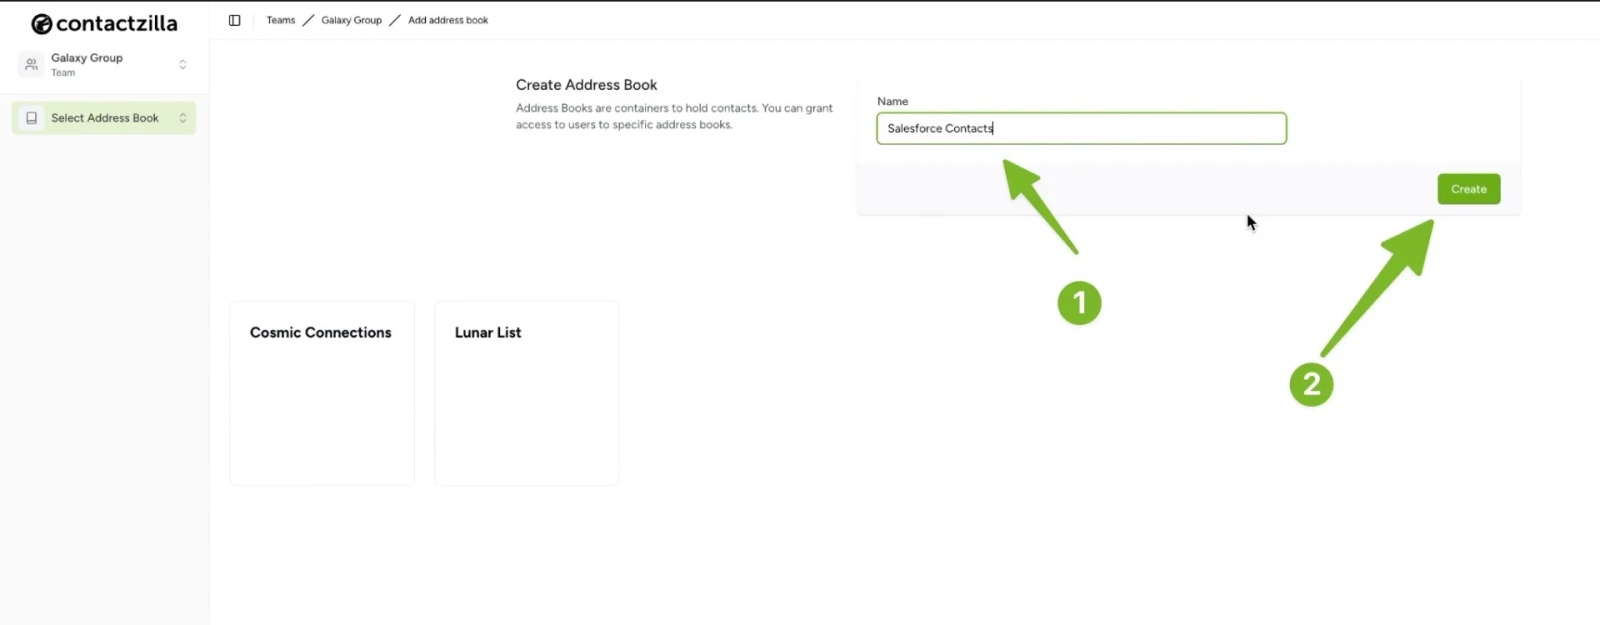
2) Type the name of your new address book (e.g. “Salesforce Contacts”) and hit ‘Create’
Step 3: Start the Salesforce Import
1) Navigate to the Import menu on the left followed by ‘Salesforce’
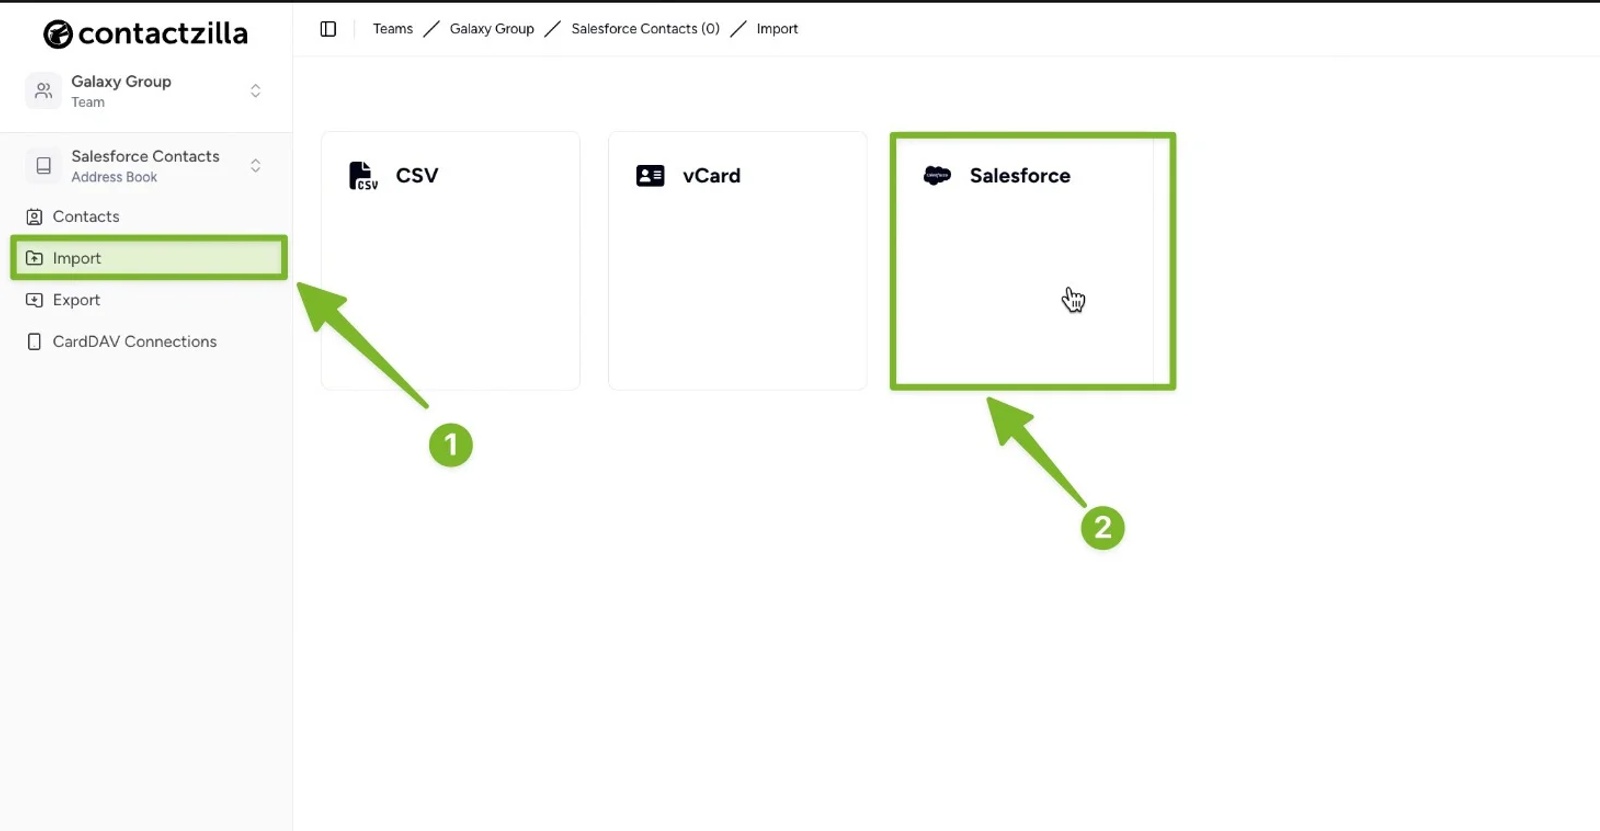
2) Hit the ‘+ Import Salesforce’ button.

3) Leave the first drop down menu as is (it will say ‘Contactzilla Salesforce Default Connector’). Under the second dropdown, click Add New Connection and then hit ‘Connect’.

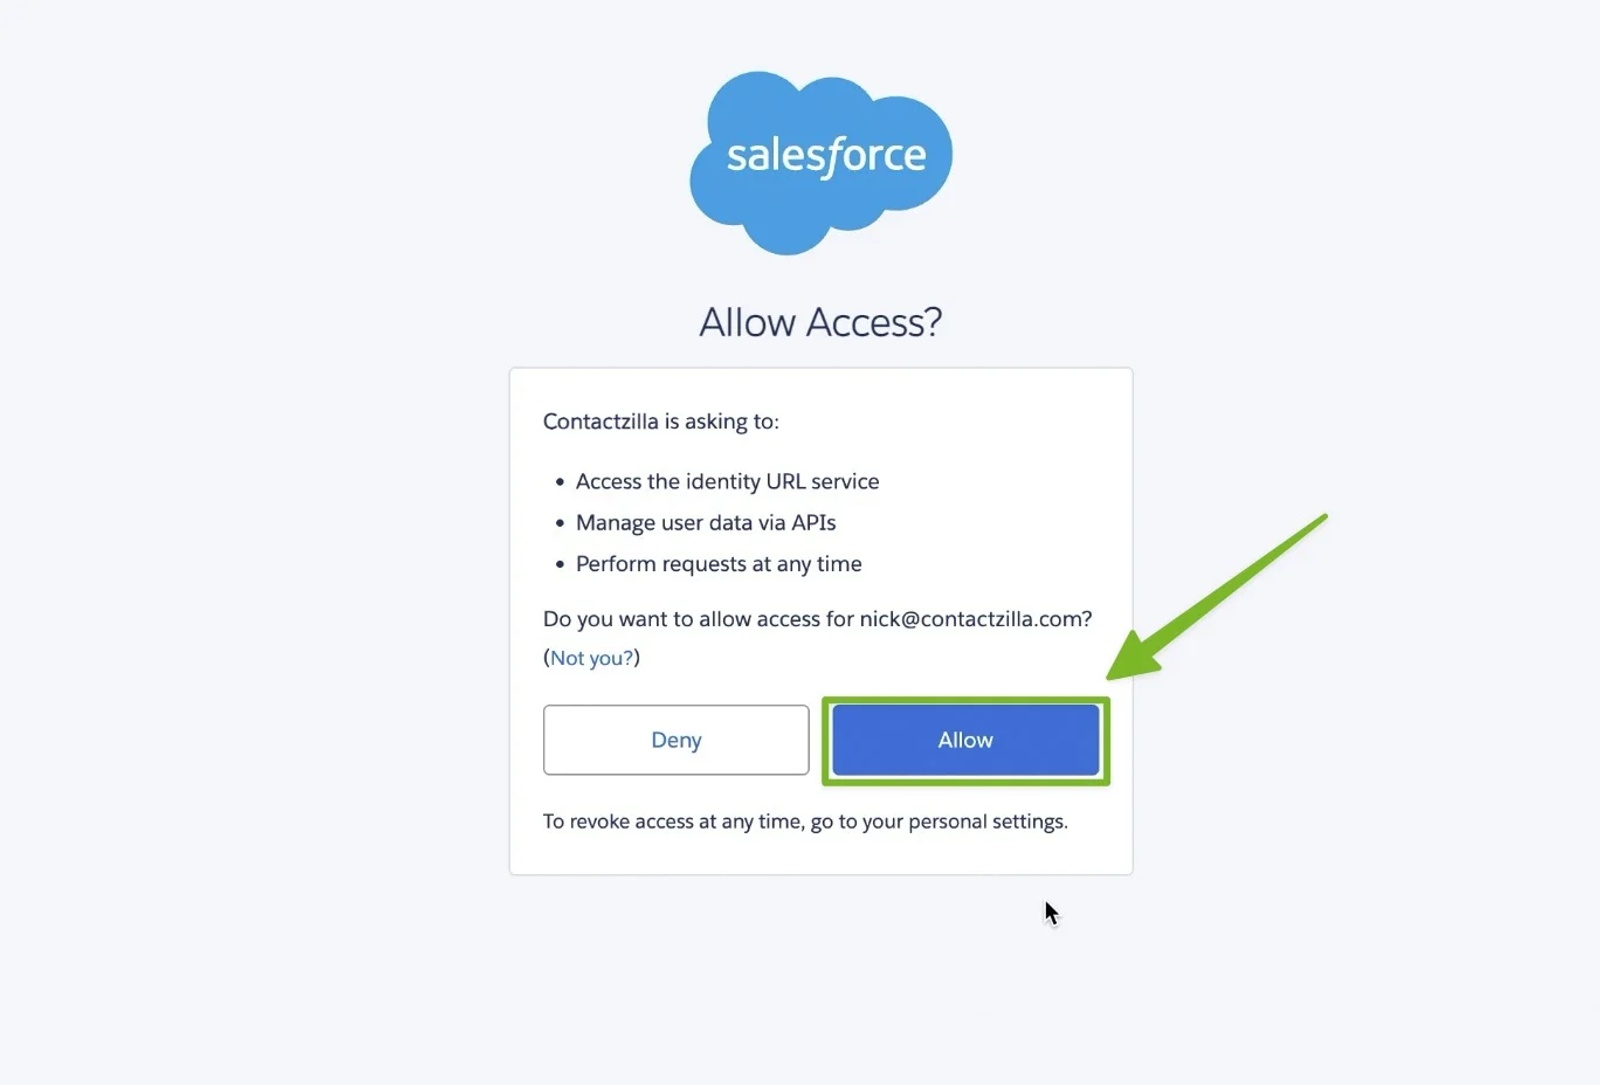
4) Log in with your Salesforce credentials and grant access when prompted. Youl then be taken back to the OIDC screen in Contactzilla where you can hit ‘Continue’.
Step 4: Set Your Sync Preferences
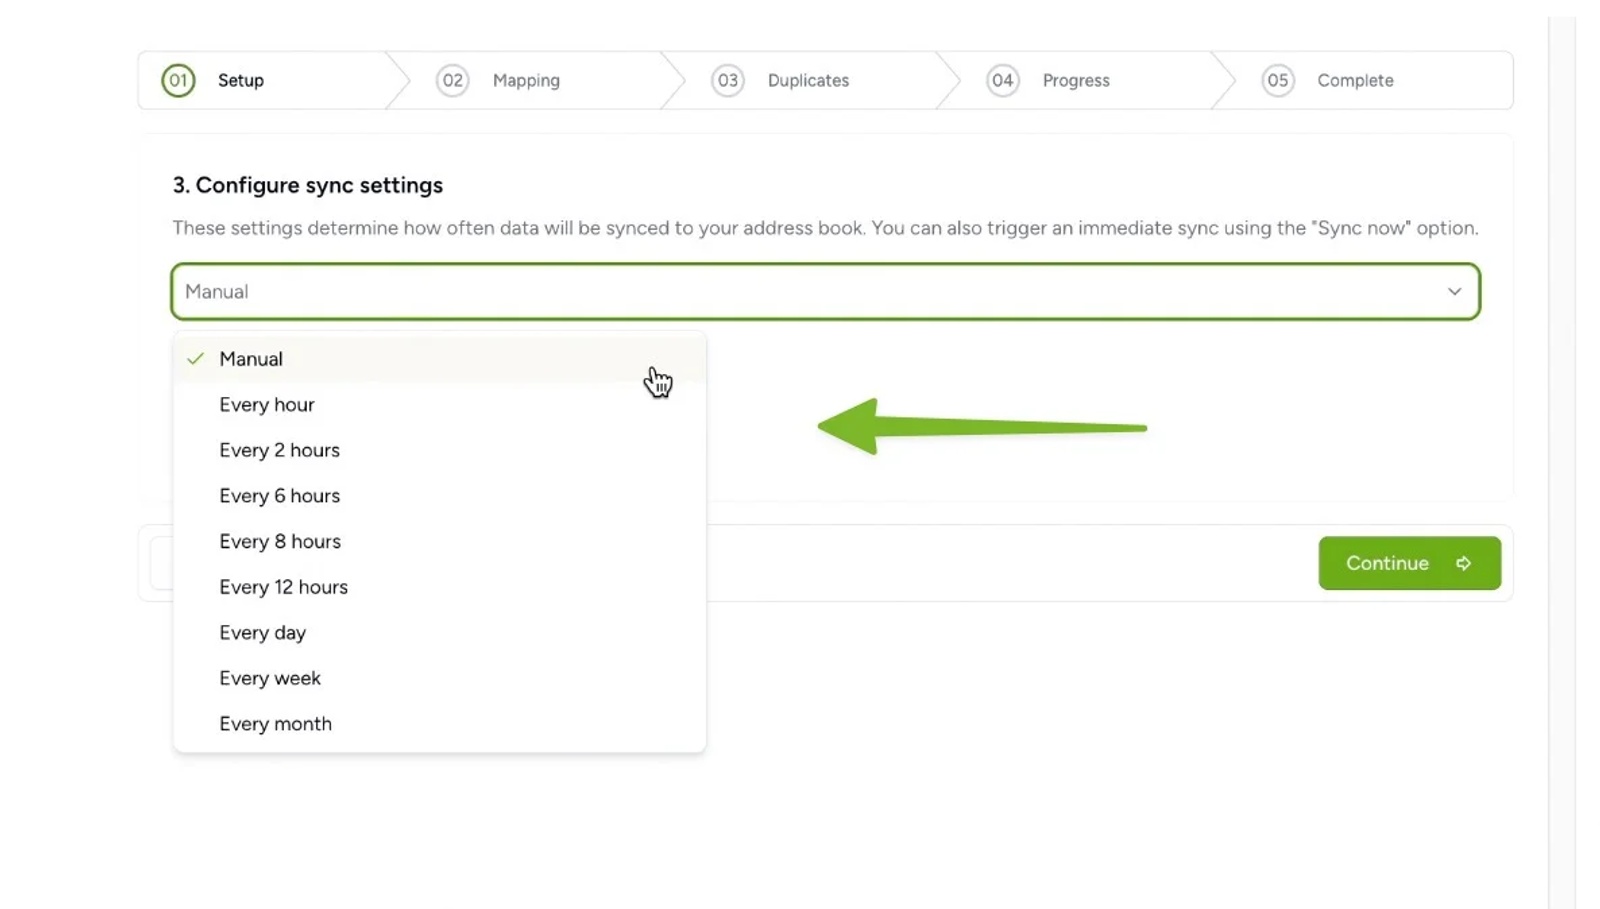
1) Choose how frequently Contactzilla should sync with Salesforce. You can adjust this later based on your needs. For example:
- Manual: Run syncs manually
- Daily: Sync every 24 hours
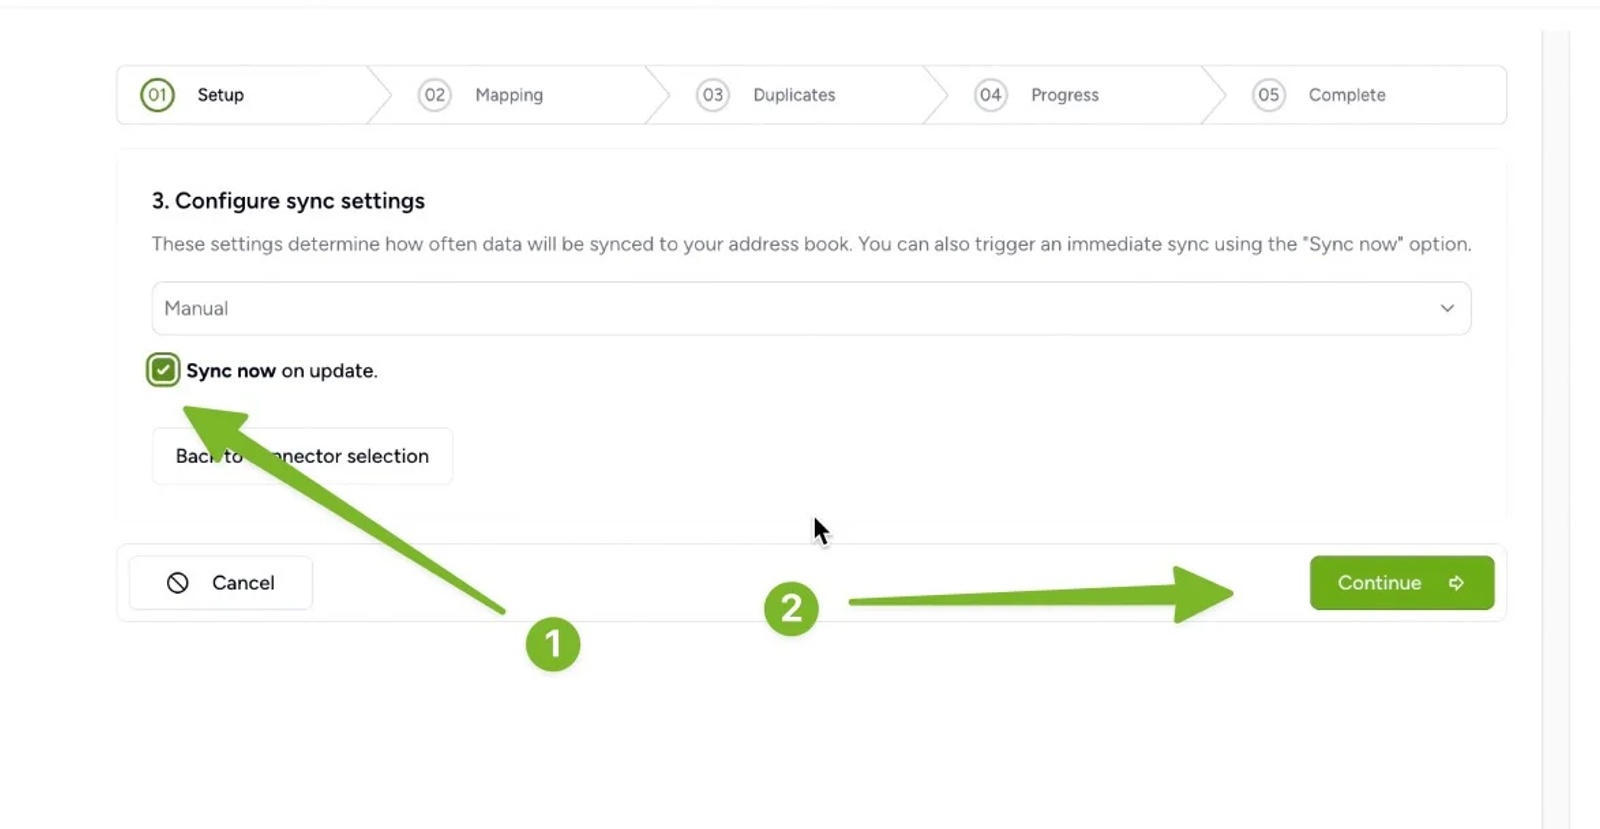
2) Tick the box if you’d like the sync to start immediately after setup.
Step 5: Map Fields
Once Contactzilla has fetched the data from Salesforce, you’ll move to the field mapping screen.
1) The very first field is a Salesforce ID. Map this to a Contactzilla ‘Custom unique field’ which can be names Salesforce ID, SFID or whatever makes sense to you. This ensures future updates correctly target existing contacts.

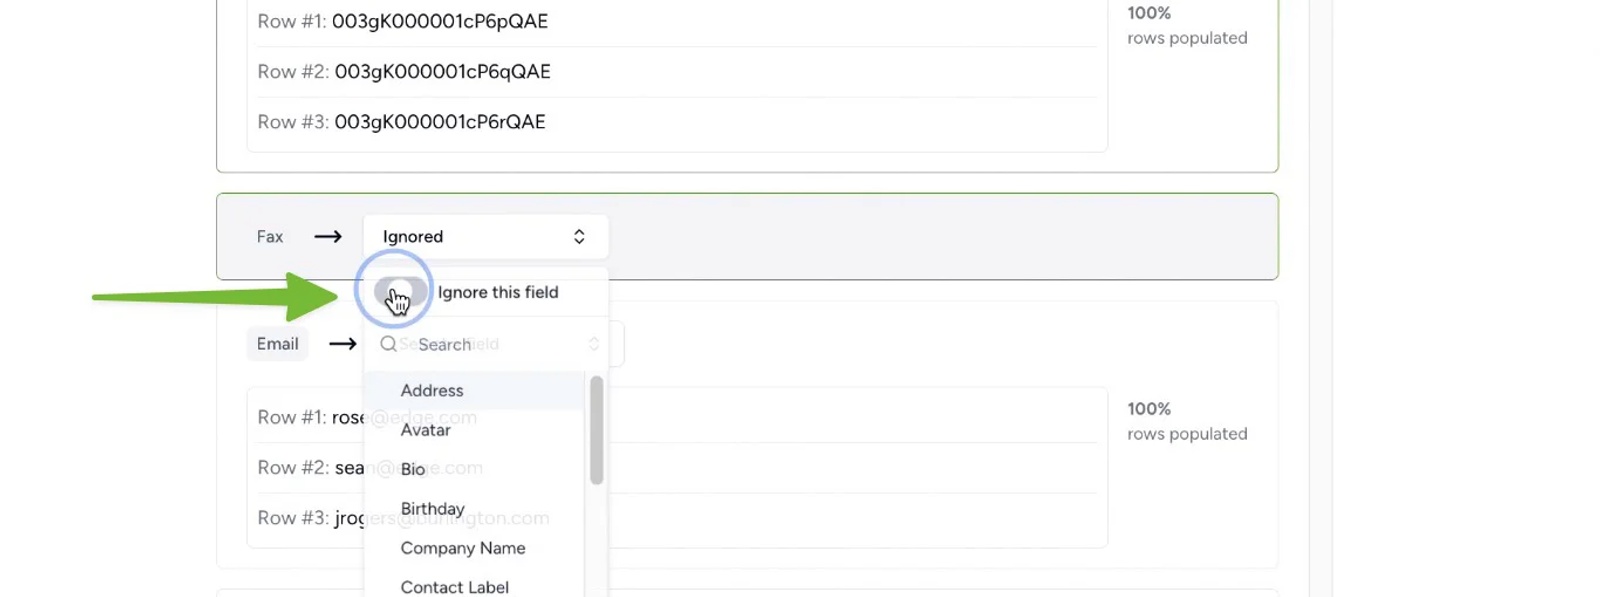
2) Map any Salesforce fields that you wish to keep in Contactzilla such as Firstname, Last name, by choosing from the ‘Select a field’ drop down menus.

3) Use the ‘Ignore’ toggle switch for any fields you will not need, (e.g. fax no, lead source, etc).
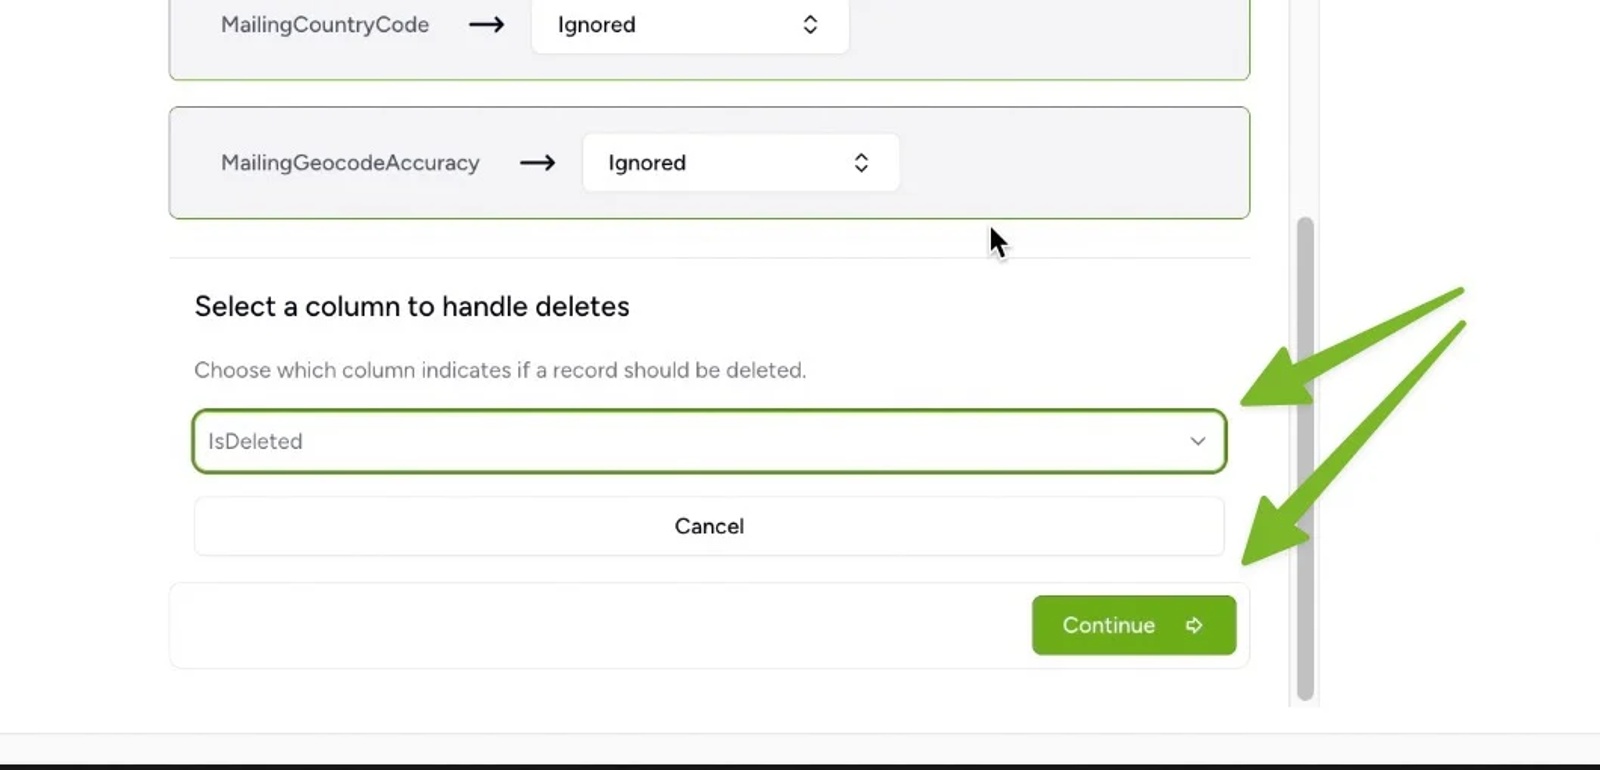
Step 6: Handle Deletions (Optional)
1) If you want contacts deleted in Salesforce to also be removed from Contactzilla tick the ‘Yes’ box under ‘Would you like to handle deletes?’
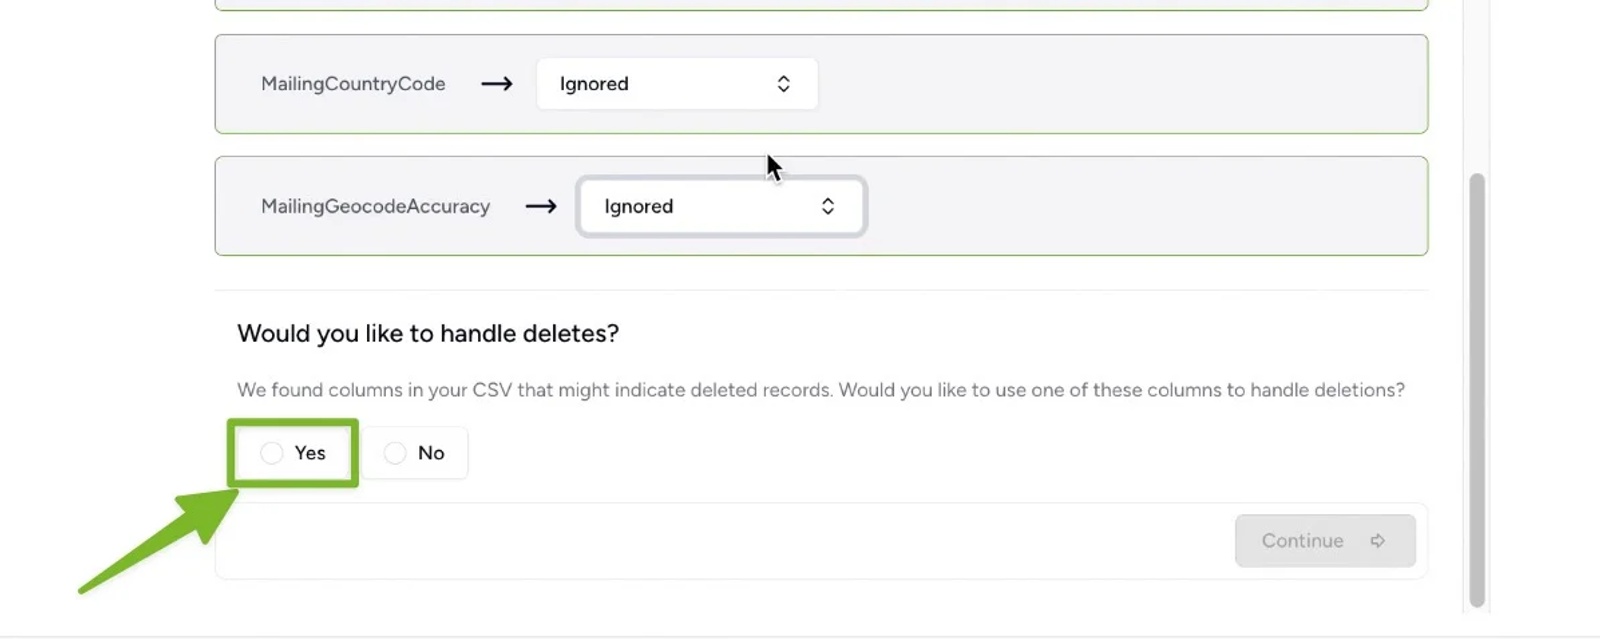
2) Select the isDeleted field that appears (used by Salesforce to flag deleted records). Leave the isDeleted field ignored in the mapping section — it doesn’t need to be stored. Hit Continue.
Step 7: Handle Duplicates
1) Choose how to handle duplicates by picking an option from the drop down and then hit Continue to start the import
- Skip – Leaves existing Contactzilla contacts untouched
- Replace – Overwrites them with Salesforce data (recommended if Salesforce is your main system)
- Merge – Combines data from both sources

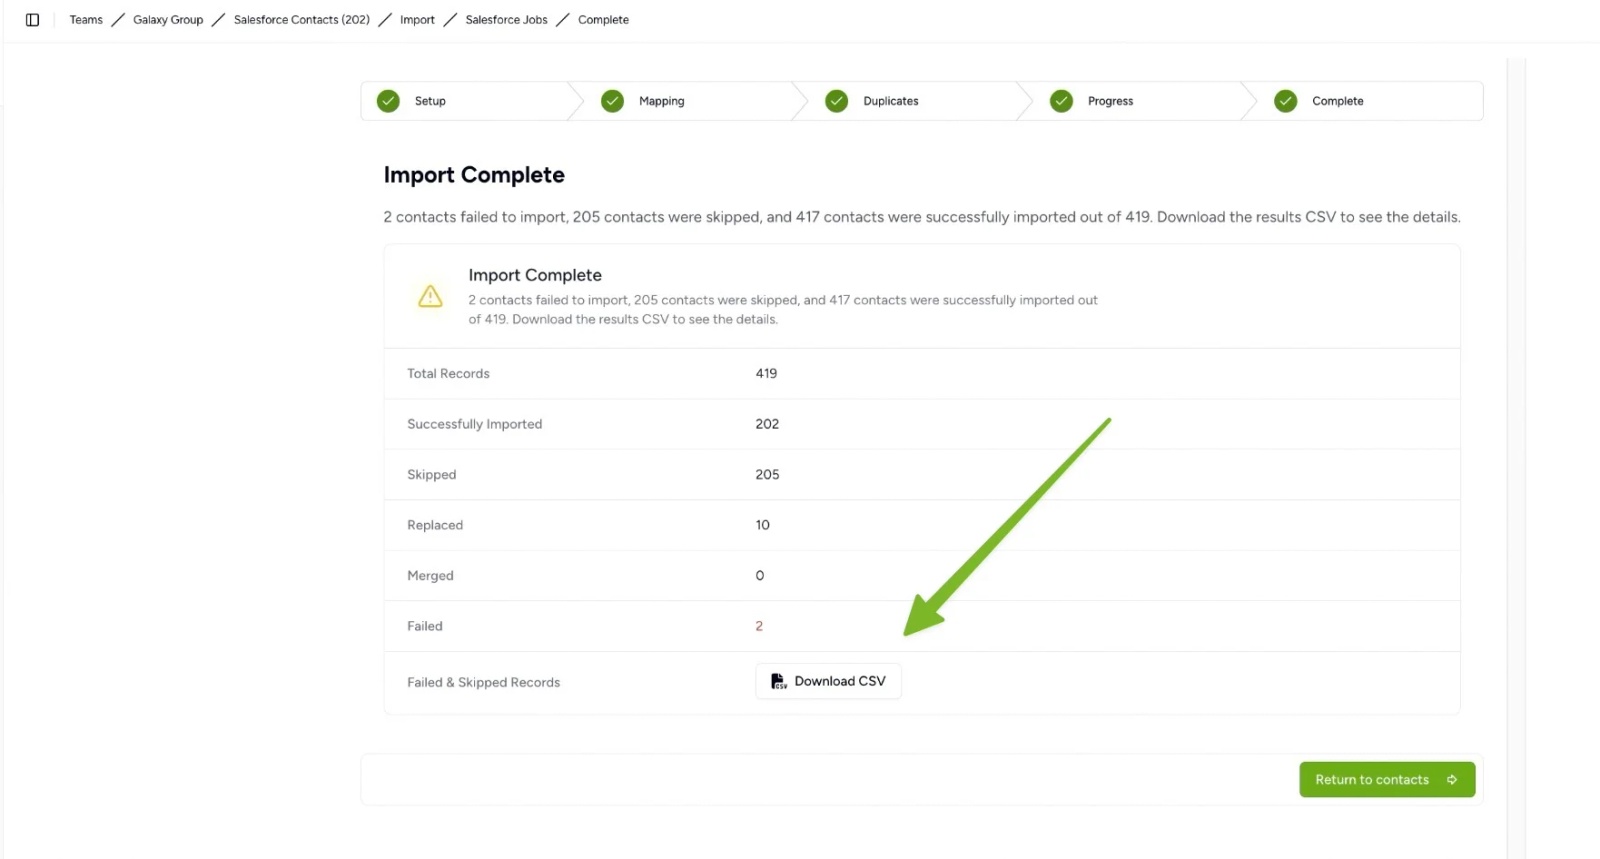
Step 8: Import and Review
You can now leave the import process running in the background and once it’s finished you can view some details about the imports
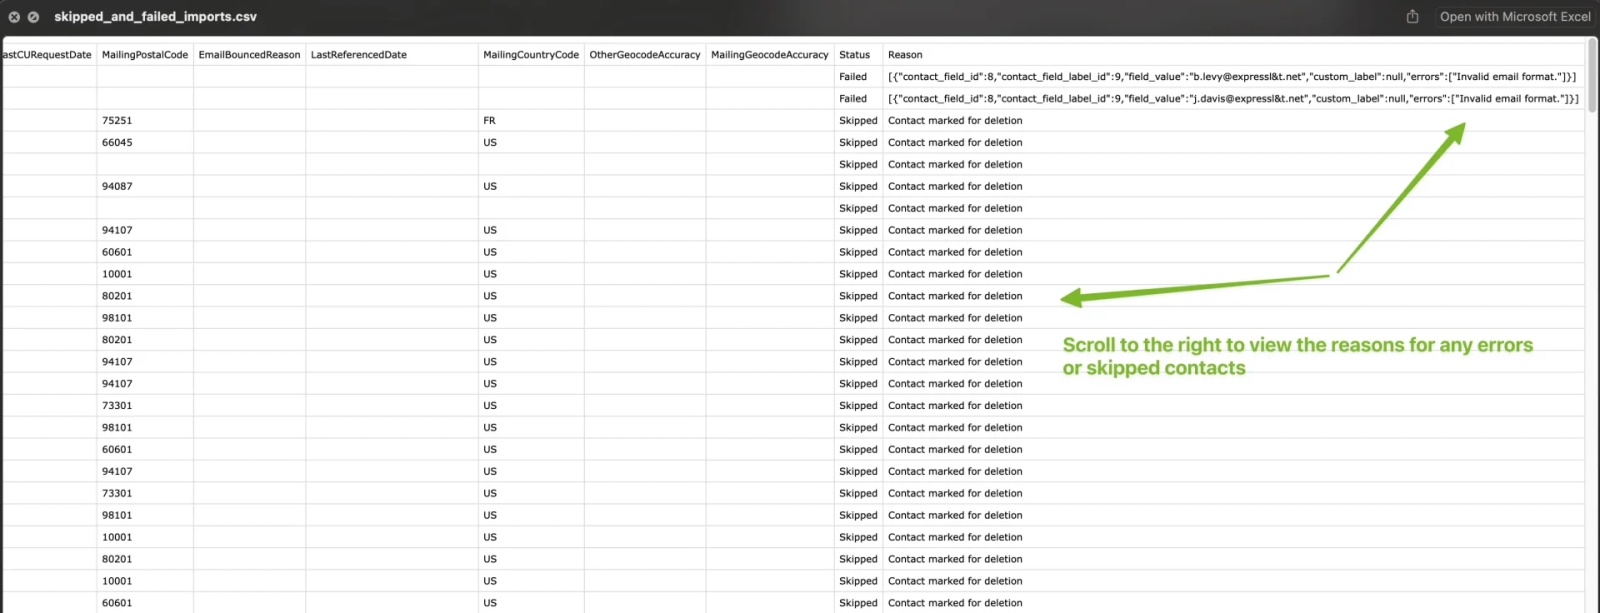
1) If there are any errors, or skipped contacts, download the results CSV
2) Scroll all the way to the right on the CSV file and you can view the reason for failed or skipped imports such as invalid email addresses or marked as deleted in Salesforce.
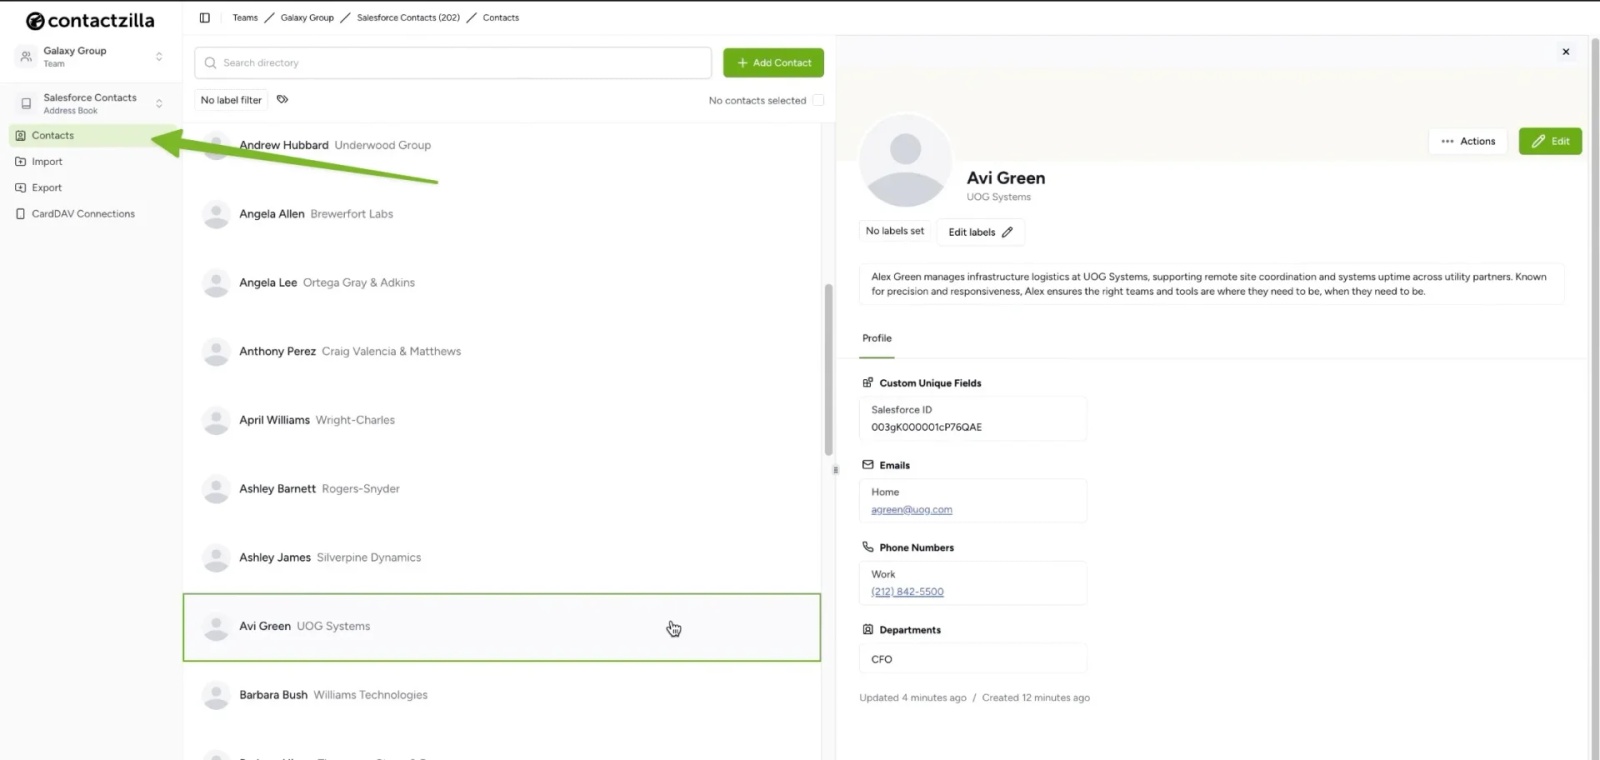
3) View the imported contacts by choosing ‘Contacts’ from the left hand menu in Contactzilla.
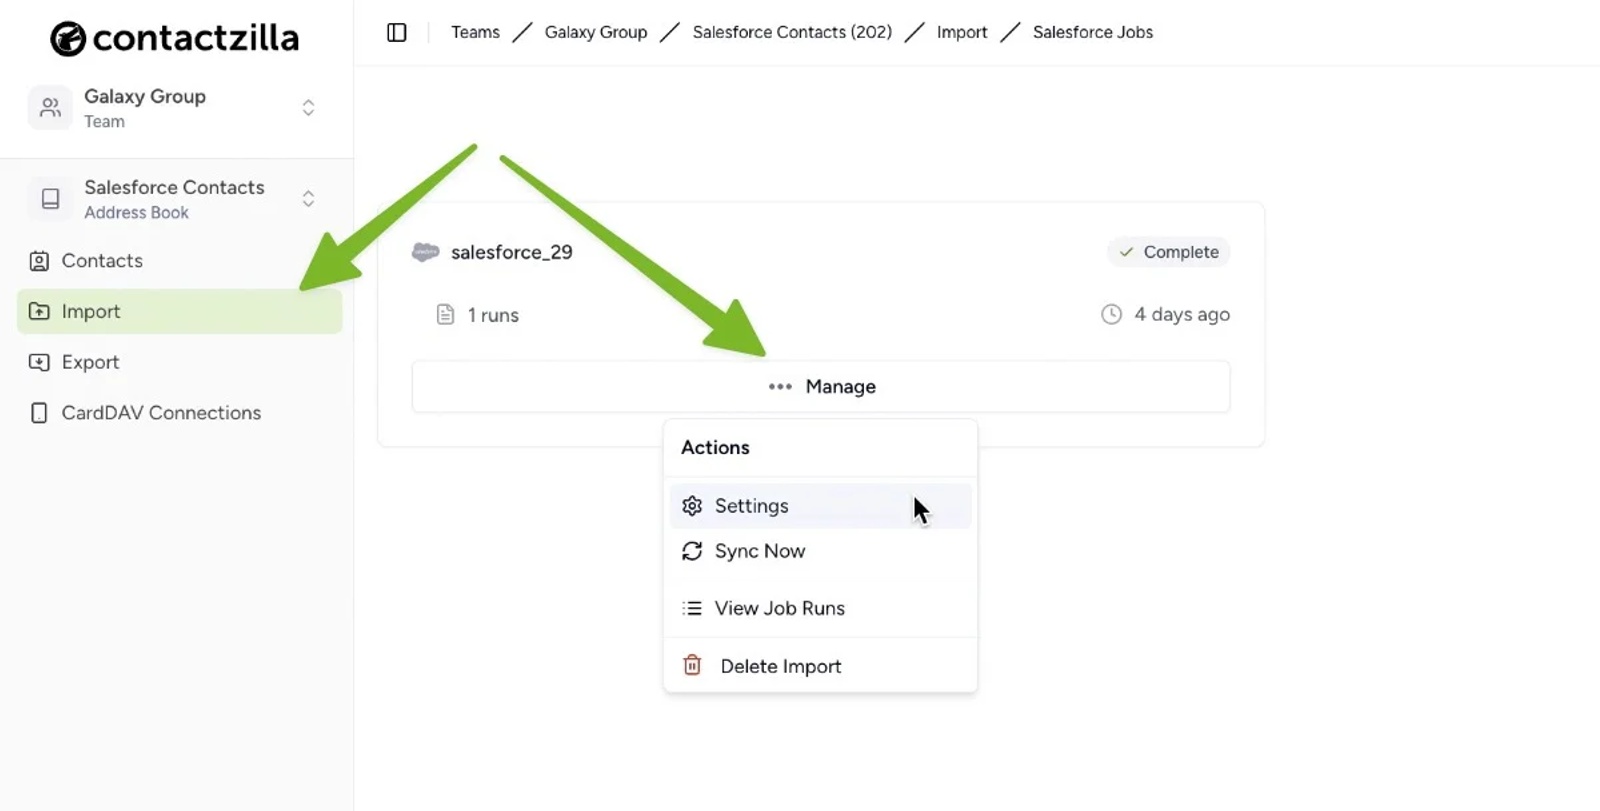
Step 9: Manage Future Syncs
Go to Imports > Manage to:
- Trigger a manual sync
- View previous sync jobs and logs
- Adjust sync frequency
Still need help?
Our support team is available to assist you with any questions or issues you may have.

