Contactzilla Logo
  • Features
  • Pricing
  • Blog
  • Contact Us
Login
Start FREE Trial
Contactzilla Logo
Contact management for teams

How to Sync Your Contactzilla Address Book with Android Devices

Getting Started

2
  • Getting started: Setting up a team and address book
  • Managing Team Members and Permissions

Contact Organization

4
  • Using Labels to Organize and Filter Contacts
  • Understanding Group Labels
  • Custom Fields in Contactzilla
  • Color Coding Labels in Contactzilla

Deployment and Device Integration

6
  • Setting Up CardDAV Connections
  • Setting Up MDM Deployments in Contactzilla
  • How to Sync Your Contactzilla Address Book with Android Devices
  • Adding a Contactzilla address book to OSX Contacts: Using the provisioning Profile
  • Adding Contacts from Your iOS Device (or OSX contacts) to Contactzilla
  • Adding a Contactzilla address book on your iPhone: Using the provisioning Profile

Platform Specific

3
  • How to Deploy Contactzilla Address Books to iOS Devices using Microsoft Intune MDM
  • How to Sync Contactzilla with BusyContacts (CardDAV Two‑Way Setup)
  • Setting up Outlook with CalDAV Synchronizer
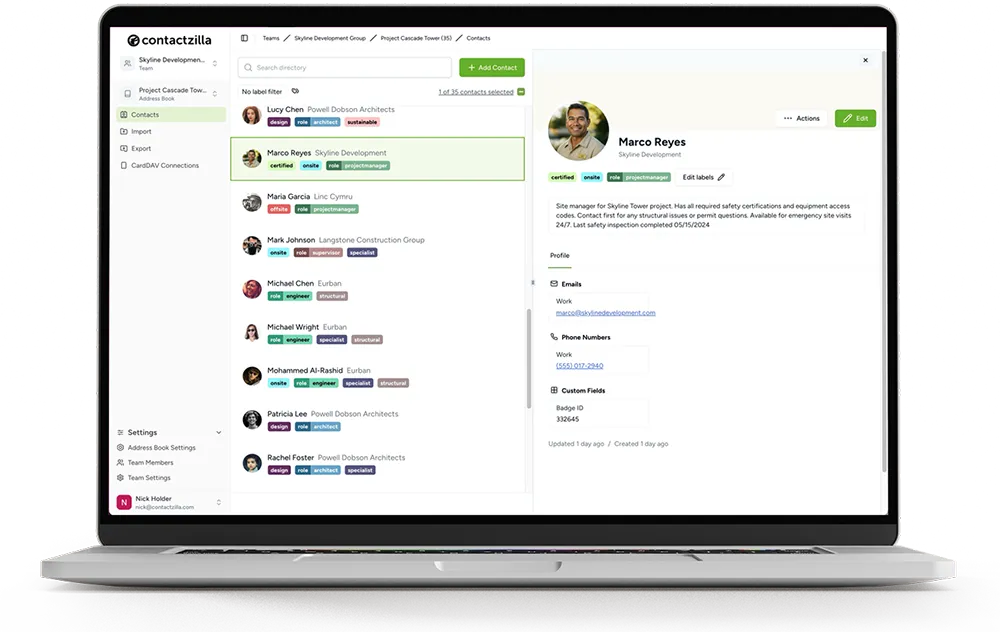
Laptop showing different contacts that have been imported.

Importing contacts

2
  • Importing Contacts from Salesforce into Contactzilla
  • Import contacts from a CSV to a Contactzilla address book

Exporting Contacts

1
  • How to setup Google oAuth/OIDC for Google Shared Contacts Export
View Categories
  • Home
  • Help
  • Deployment and Device Integration

How to Sync Your Contactzilla Address Book with Android Devices

1 min read

While Contactzilla works seamlessly with Apple devices using native CardDAV, Android devices require a third-party app called PeopleSync to enable contact synchronization. This guide will walk you through both creating the connection in Contactzilla and setting it up on your Android device through Peoplesync.

Creating the CardDAV Connection in Contactzilla

1) Select the address book that you wish to sync, then navigate to the CardDAV Connections section.
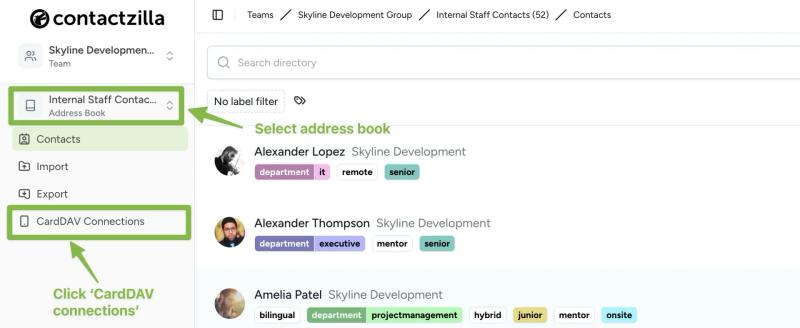
Screenshot from the Contactzilla web app showing the selection of an address book labeled “Internal Staff Contacts” under a team called “Skyline Development Group.” Two green-highlighted boxes mark the chosen address book and the “CardDAV Connections” menu item in the sidebar, illustrating Step 1: selecting the address book and navigating to the CardDAV Connections section.

2) From the ‘Create New CardDAV Connection’ screen choose ‘Android’ from the Connection Type drop down.

Screenshot from the Contactzilla “Create New CardDAV Connection” screen. A dropdown labeled Connection Type is open, and the Android option is highlighted in green—illustrating the step where the user selects Android as the connection type.

3) Select the team member who will use this connection
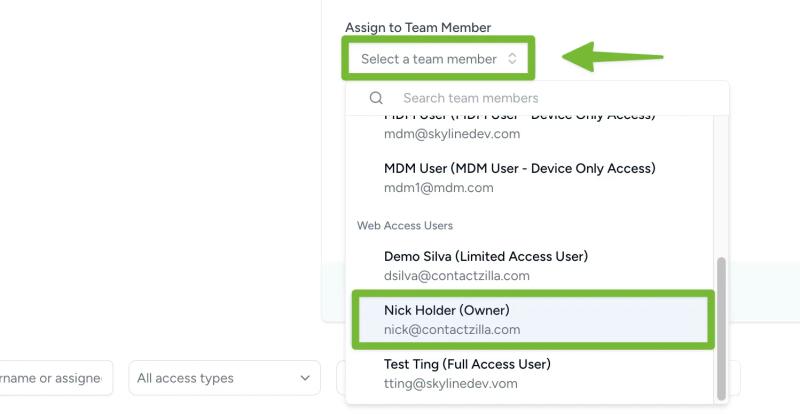
Screenshot from Contactzilla’s “Create New CardDAV Connection” interface. A dropdown labeled Assign to Team Member is open, and the option Nick Holder (Owner) is highlighted in green—illustrating Step 3: selecting which team member the Android CardDAV connection will be assigned to.

Learn about different team member roles and access levels

4) You can leave the Label sync method as the default ‘As categories’ if you want your labels to be recognized on the Android device.

Dropdown menu from Contactzilla’s CardDAV connection settings, showing the Label Sync Method set to “As Categories”, highlighted in green, illustrating Step 4: keeping labels recognized on Android devices.

5) Choose the access type for this user.
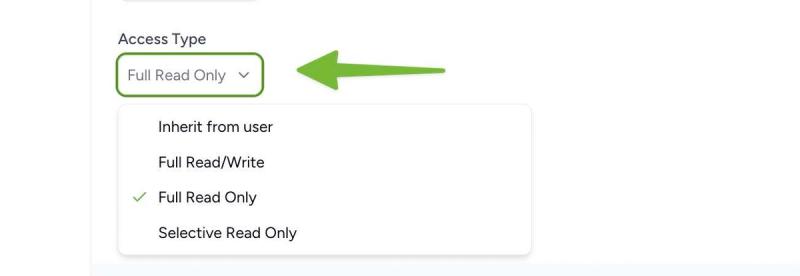
Dropdown from Contactzilla’s CardDAV setup showing the Access Type menu with “Full Read Only” selected and highlighted in green, illustrating Step 5: choosing a read-only access level.

Explore the different access types and their features in detail

6) Select the number of device connections and hit create. The new cardDAV connection will be created below.
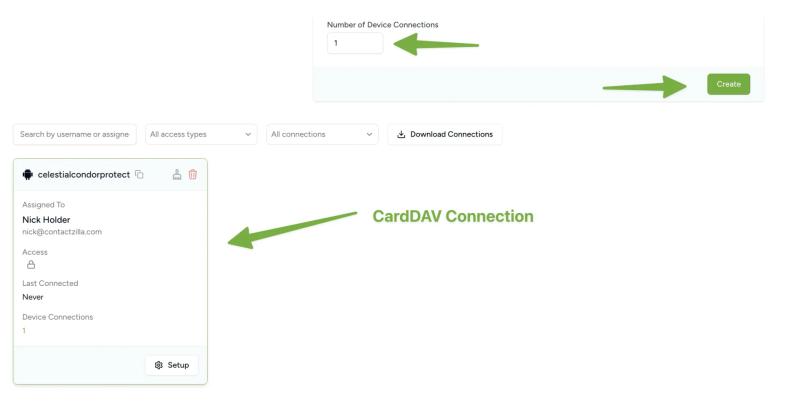
Screenshot showing the Contactzilla interface for creating a CardDAV connection. The user interface includes options to specify the number of device connections, a “Create” button, and a generated connection assigned to a user with connection details and a "Setup" button. Green arrows highlight the process flow and label it as a “CardDAV Connection.

7) In the following steps we will install the Contactzilla App on the device and import the Contactzilla address book into the phone’s native Contacts app using the QR code in just a few clicks. To show the QR code hit the Setup button on the newly created CardDAV connection panel and choose
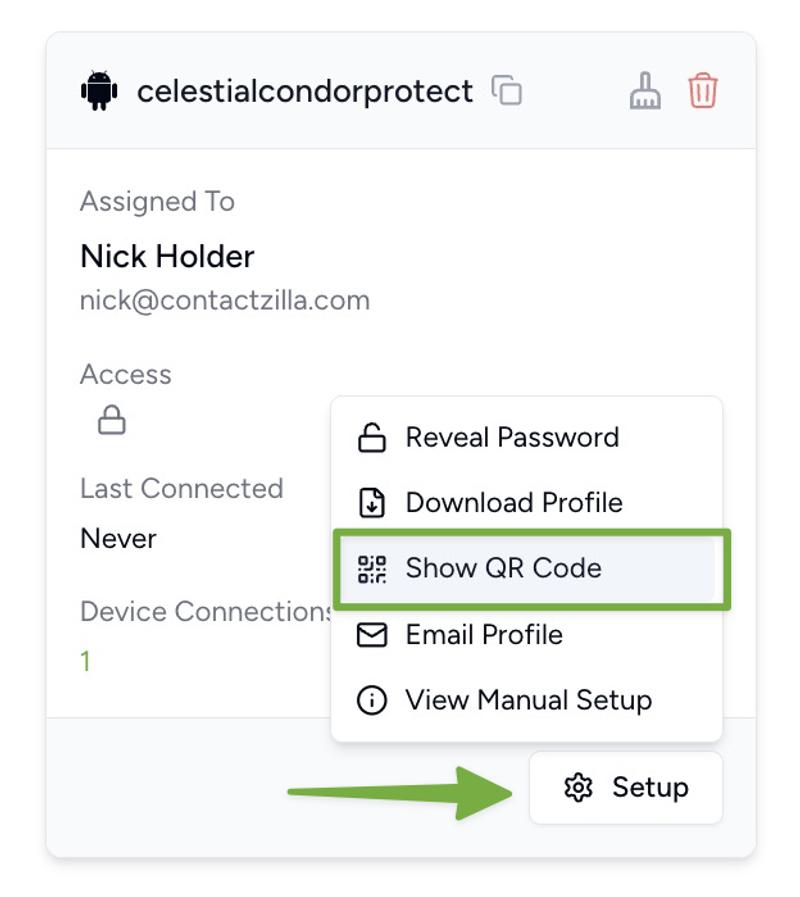
Setuo button is pressed to reveal an option to show the QR code.

Tip 💡: If you did want to do this manually however you can obtain the email address/username and password from this newly created CardDAV connection panel:
Press the setup button on the new CardDAV connection panel and choose ‘View Manual Setup’. This will reveal the email and password to us in the Contactzilla App if you are not using the QR code.
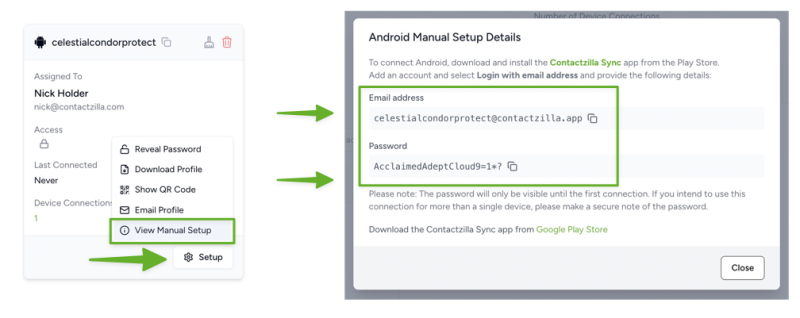
Screenshot from the Contactzilla dashboard showing a created CardDAV connection with the option View Setup Details highlighted. This illustrates the step where the user clicks to reveal the server address, username, and password needed to configure the connection in PeopleSync.

Using the Contactzilla Sync App to import the contacts to the phone

Step 1: Install Contactzilla Sync from the Google Play Store

Step 2: Launch the App and sync the contacts with the QR code

a. Launch the Contactzilla Sync app and allow the permissions
b. Hit the ‘Add account’ button
c. Select ‘Scan Contactzilla QR setup code’ and hit continue. Your phone will automatically open the QR scanner. Scan the QR code found in the Setup > Show qr code menu in your CardDAV connections panel (See step 7 above).
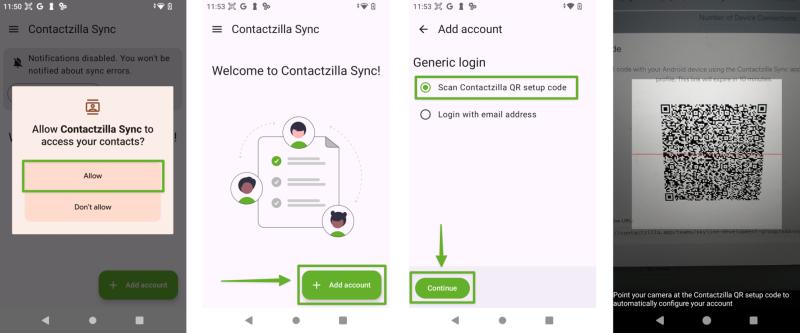
Four screenshots from the Contactzilla Sync app for Android, showing how to connect a device using a QR code. The first screen prompts the user to allow access to contacts. The second screen welcomes the user with an option to add an account. The third screen shows the login method selection, with "Scan Contactzilla QR setup code" selected. The final screen displays the phone scanning a QR code from the Contactzilla web app to auto-configure the sync connection.

Step 3: Contacts are now automatically installed in your phones native contacts app

a. Your Contactzilla address book has been successfully imported
b. Navigate to the contacts app to see the contacts
c. Your Contactzilla labels now show up as lists in the contacts app.
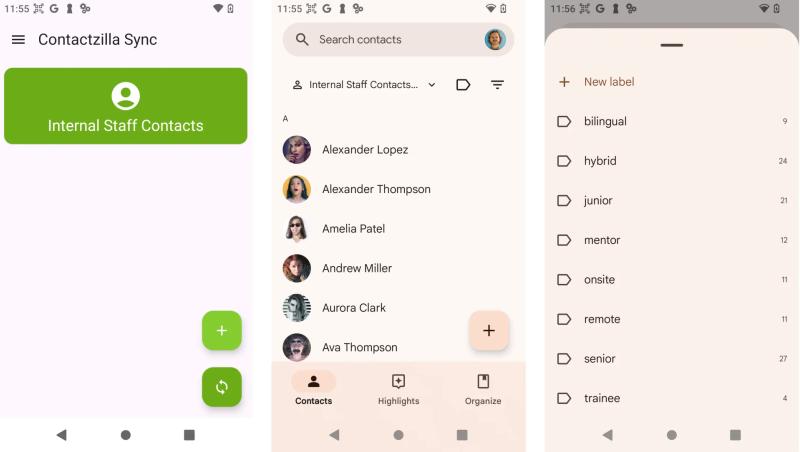
Three screenshots from an Android device showing contacts successfully synced via the Contactzilla Sync app. The first screen displays the Contactzilla Sync home screen with a synced address book titled “Internal Staff Contacts.” The second screen shows the native Contacts app, listing synced contact names like Alexander Lopez and Amelia Patel. The third screen reveals a set of labels (such as “bilingual,” “remote,” and “senior”) used to categorize the synced contacts on the device.
Updated on July 24, 2025
Setting Up MDM Deployments in ContactzillaAdding a Contactzilla address book to OSX Contacts: Using the provisioning Profile

Get your contacts in order today. Sync across devices.

Start FREE Trial
Get in touch
  • hello@contactzilla.com
  • Live Chat
  • Help
Follow us on socials

© Contactzilla. All Rights Reserved. 2025.

  • Trust Site
  • Terms & Conditions
  • Privacy Policy
  • Cookie Policy
Close
Contactzilla Logo
  • Features
  • Pricing
  • Blog
  • Contact Us
  • Features
  • Pricing
  • Blog
  • Contact Us
Login
Start FREE Trial
We use cookies to ensure that we give you the best experience on our website. If you continue to use this site we will assume that you are happy with it.