How can we help you?
Browse Categories
Import contacts from Google Workspace directory to Contactzilla
If your organisation uses Google Workspace, you can import your entire domain directory directly into a Contactzilla address book.
Once connected, your Google Workspace directory syncs into your chosen Contactzilla Address book on the schedule you choose: for example hourly, daily manually etc
Tip 💡: If you haven’t already created a team and address book, follow our guide on setting up your first Contactzilla team and address book.
The process for importing your Google Workspace Directory contacts into Contactzilla is also covered in this video walkthrough below if you prefer
Step 1: Create Your Google Workspace Connector (Required Before Importing)
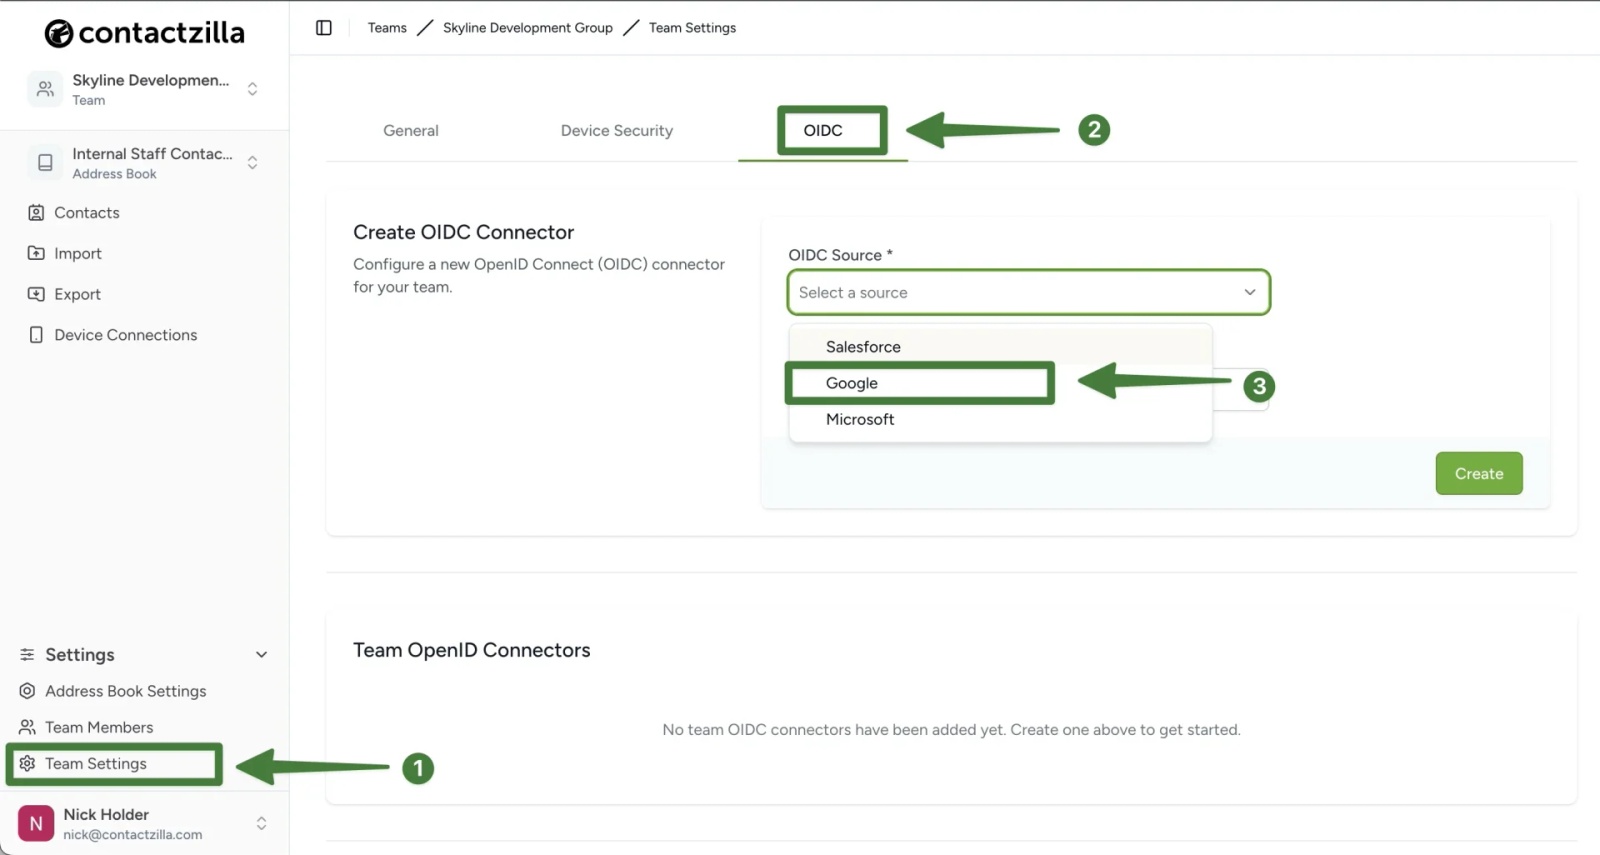
Before you can run a Google Workspace import, you must set up a Google OpenID (OIDC) connector inside Contactzilla. Without this step, the “Add Google Workspace Connection” button in the Import menu will not open the Google authorisation flow.
1) Go to Team Settings from the left-hand menu and click the OIDC tab at the top of the page. > Click the OIDC drop down and select Google
Google Cloud Project setup
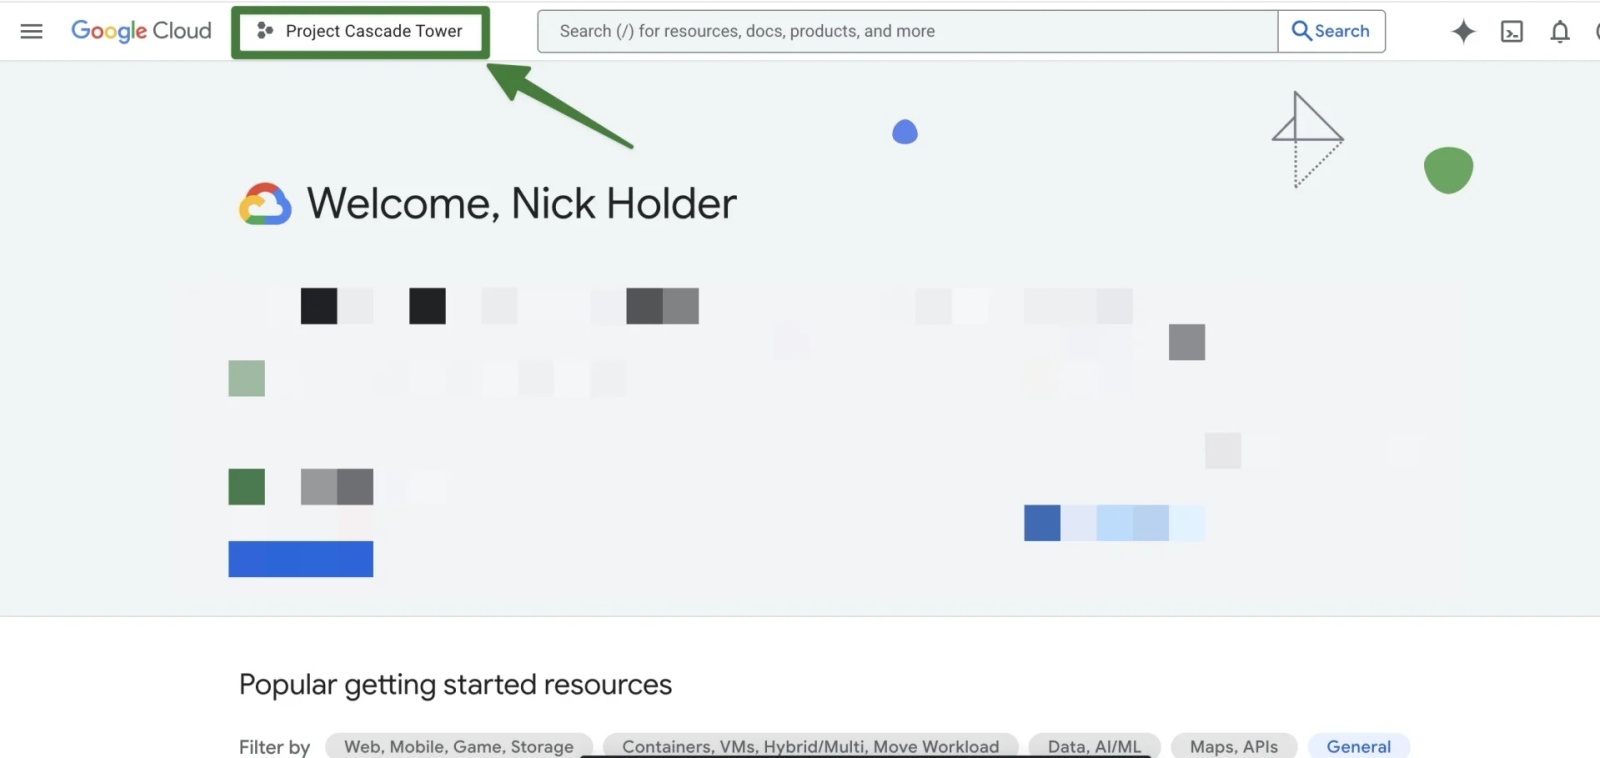
The next step is to create a Google Cloud Project.
This project acts as the secure link between your Google Workspace directory and Contactzilla.
Google requires every organisation to create its own Cloud Project so that the correct permissions, OAuth credentials, and directory access can be granted safely to Contactzilla.
👉 https://console.cloud.google.com/
1) From the top bar click on whatever existing project is currently selected
2)Click New project

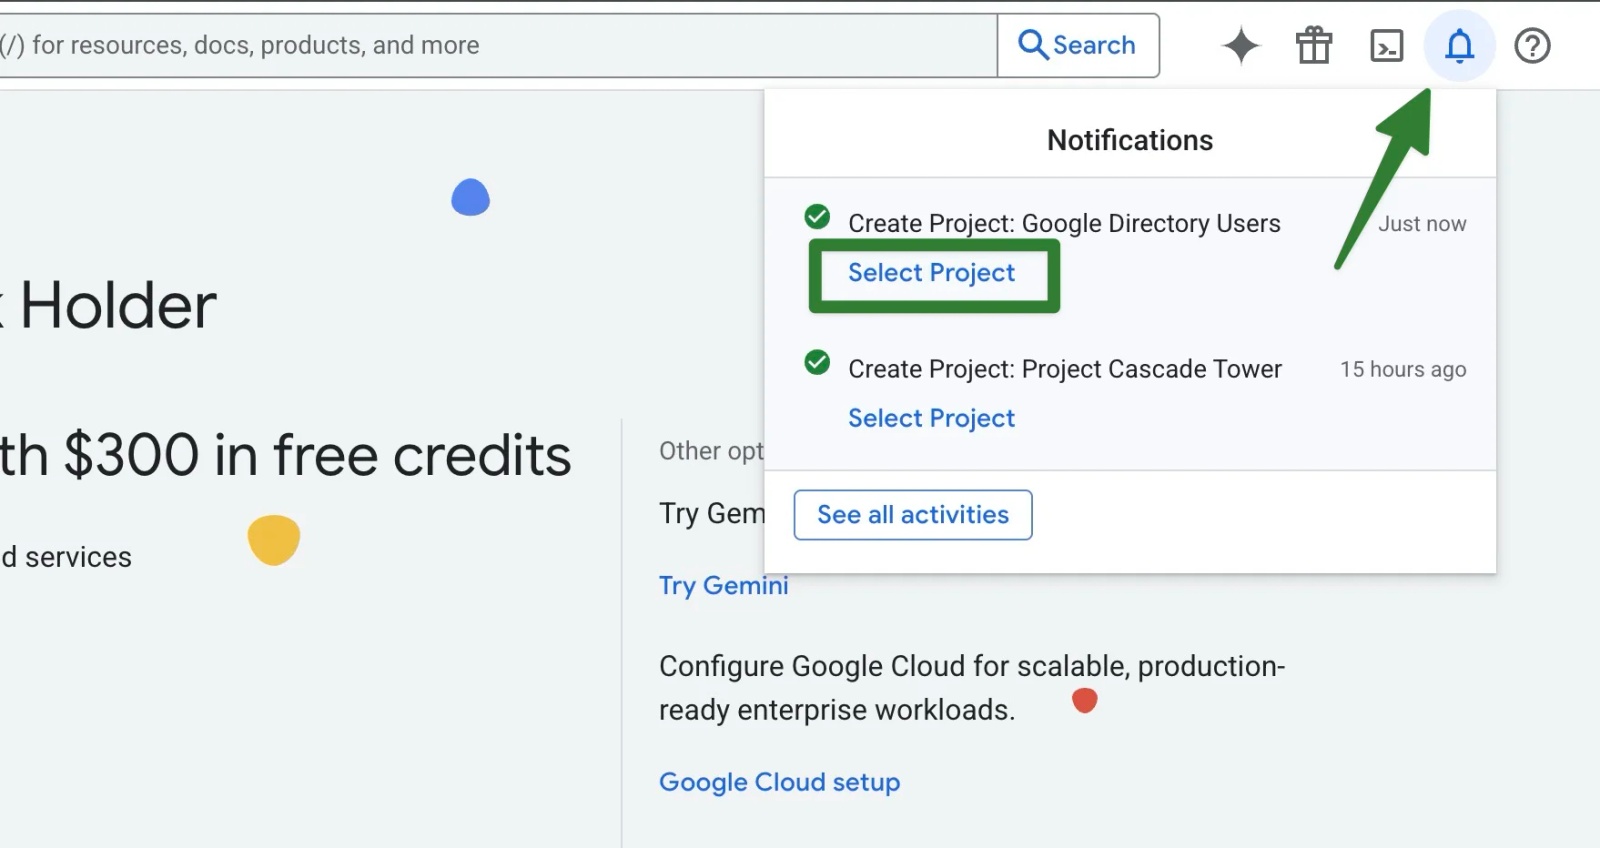
3) Give the project a name such as ‘Google Directory Users’ > Keep the Organization and Location the same > Hit Create

4) After a few seconds you will receive a notification that the new project has been created > Select the new project from there (or go back to the project selctor in the top left of the screen > Ensure you have opened the new project before continuing
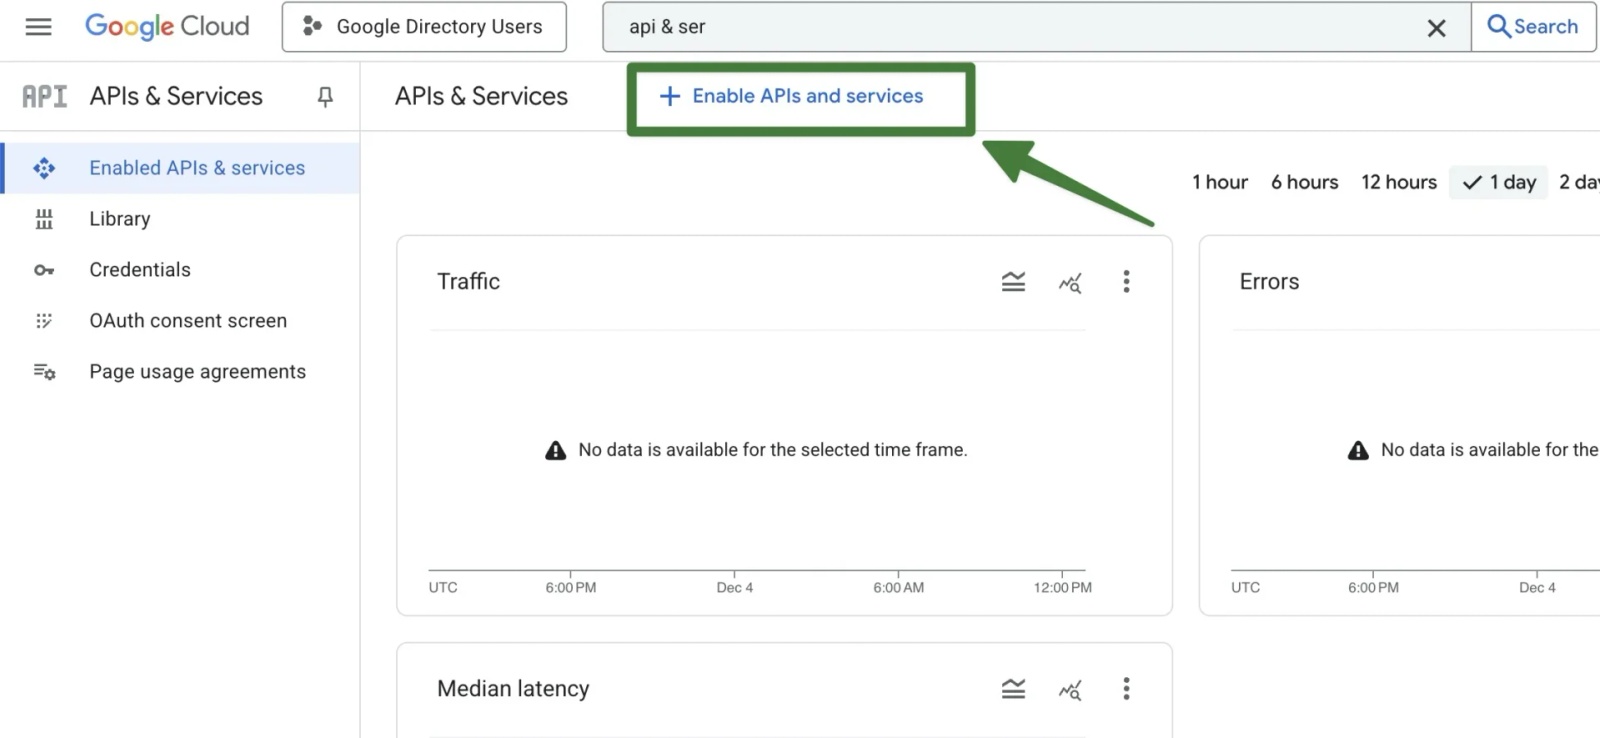
5) From the search bar at the top of the interface start typing API & Services > Click API & Services which will appear in the search results.

6) From the API & Services page click the + Enable API & Services button.
7) From the API Library screen that follows start typing in the search bar ‘admin sdk api‘ and click on the admin sdk api result that appears.
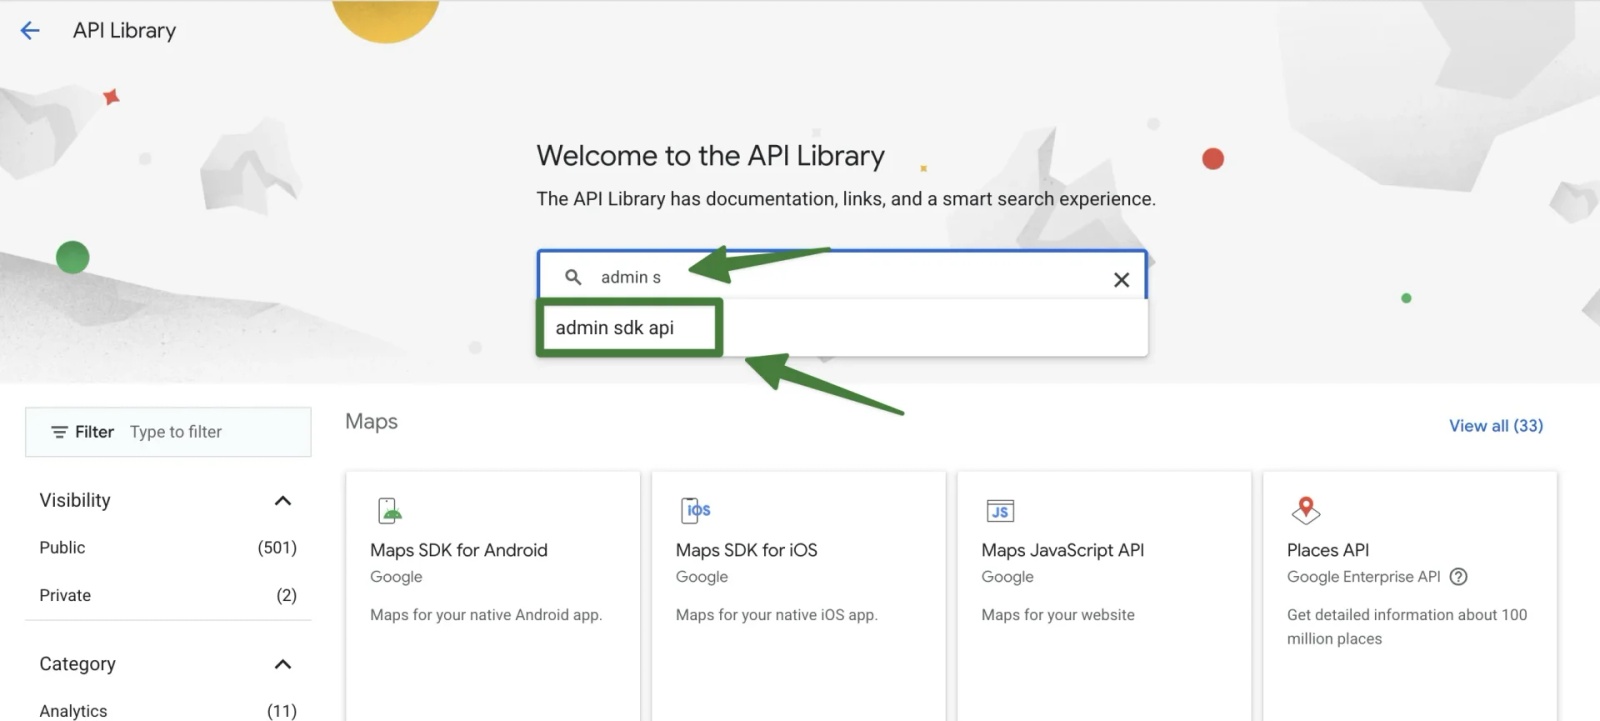
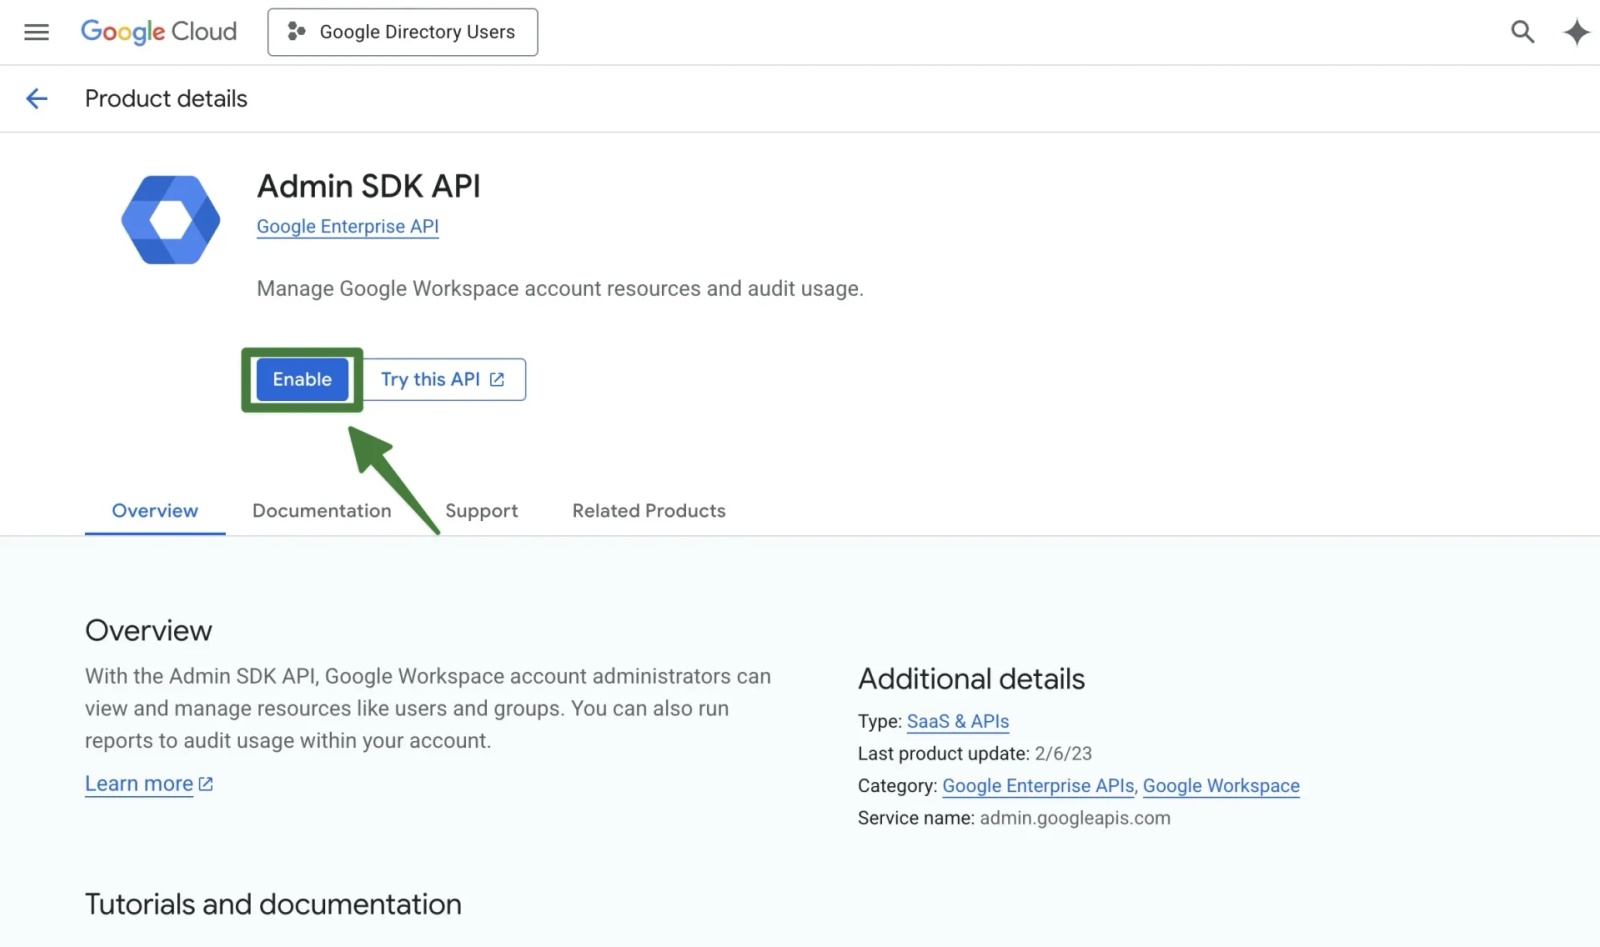
8) Click on the Admin SDK API logo/button and then click the Enable button
OAuth Consent Screen & Credentials Setup
Once the Admin SDK API has been enabled, the next step is to configure the OAuth consent screen and create the OAuth credentials that Contactzilla will use to authenticate with Google.
Google requires every organisation to publish an OAuth “app” inside their Cloud Project.
This app represents the Contactzilla importer and controls which permissions (scopes) it can request. Creating a separate app for this importer keeps directory access clearly separated from any other integrations you may add later.
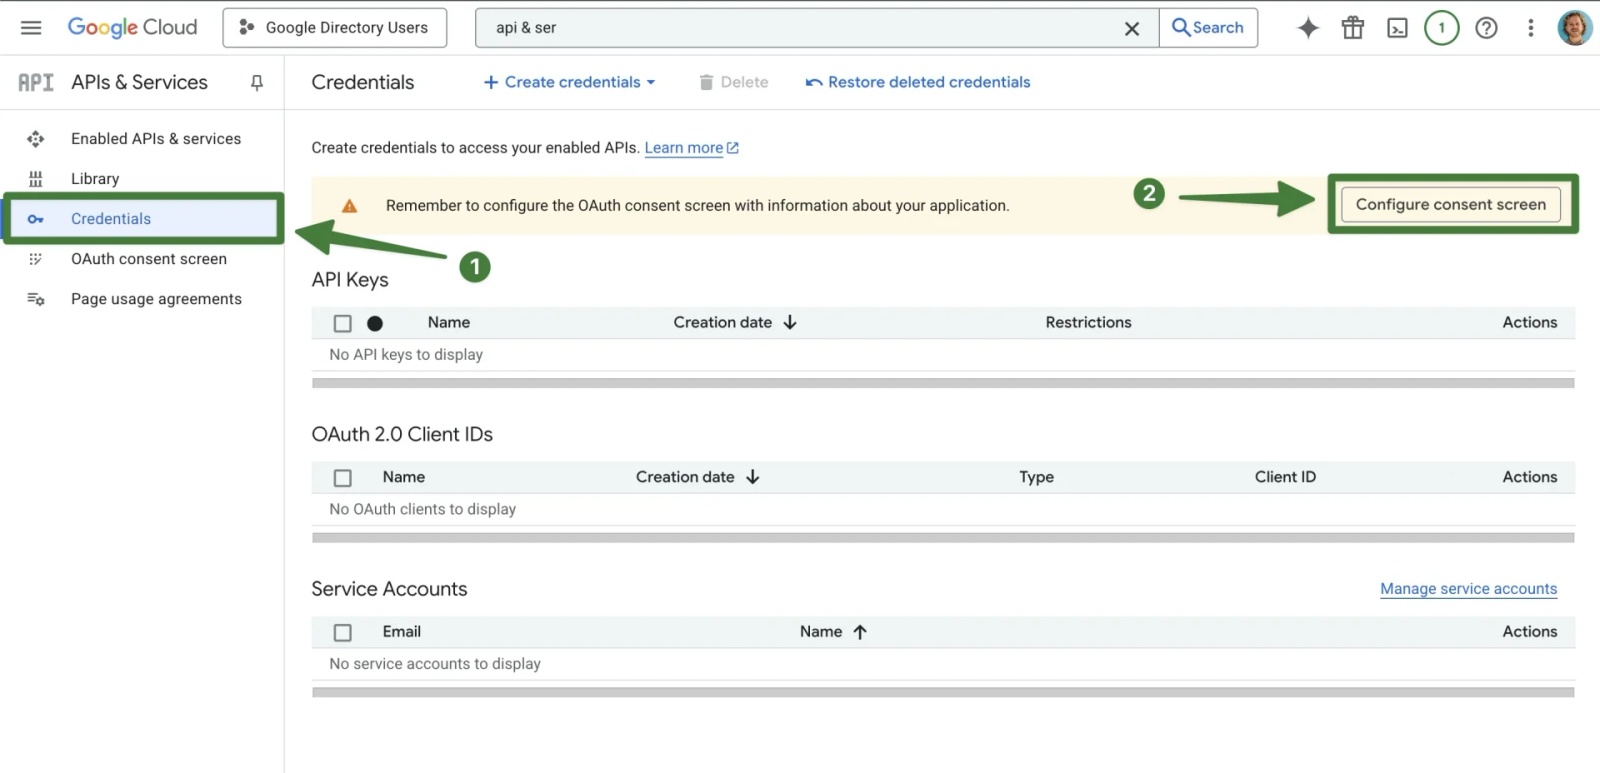
1) From the left menu inside your Cloud Project, click Credentials > At the top right of the Credentials screen, click Configure Consent Screen.
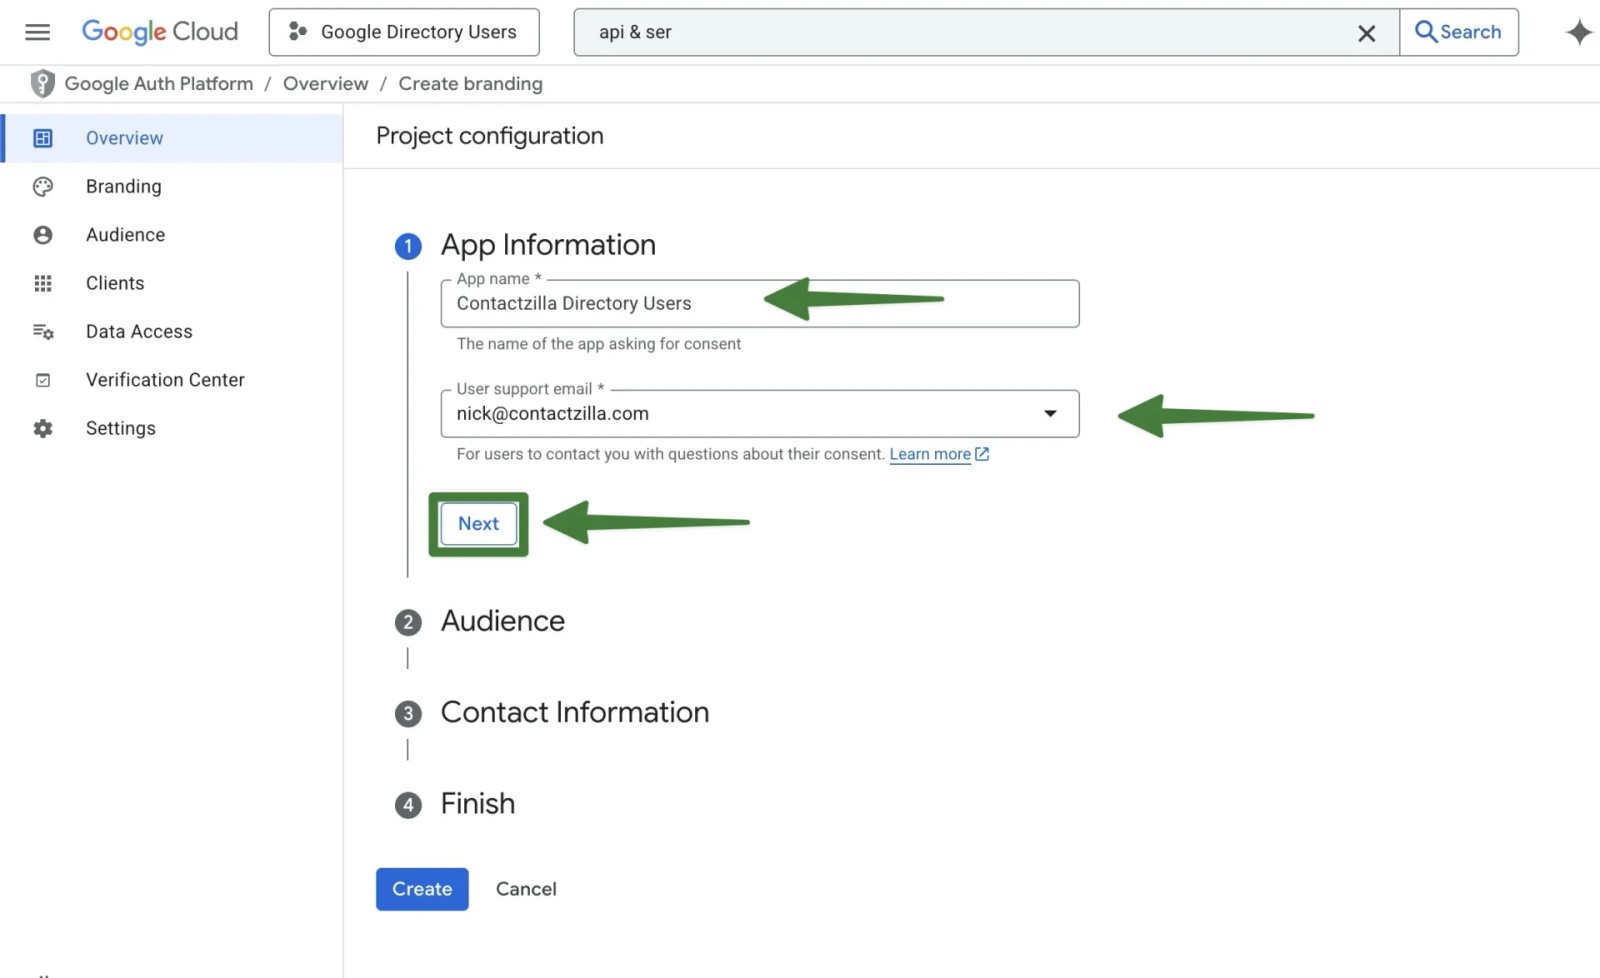
2) Click Get Started on the OAuth overview screen that follows > The Project configuration screen appears > Enter an App name – In this example we are using Contactzilla Directory Users > Select an email address from the drop down > Hit Next.
3) For Audience, choose Internal > press Next.
(Internal means only users in your Google Workspace can approve access. It avoids Google’s external app verification process.)

4) For Contact information you can enter a support or admin email address and hit Continue
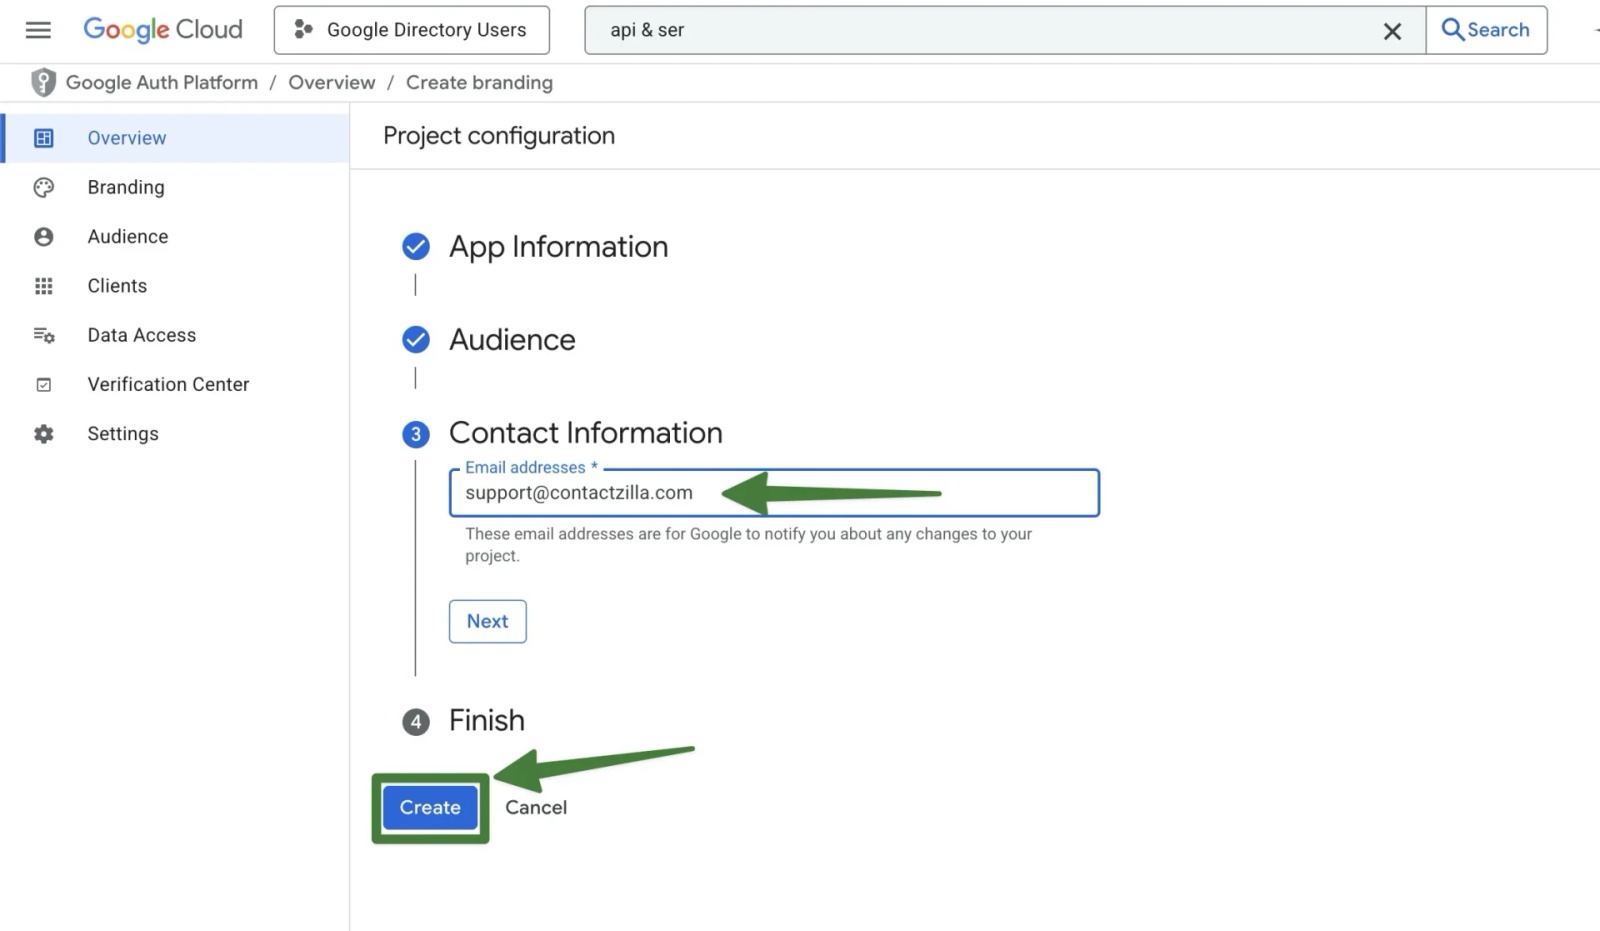
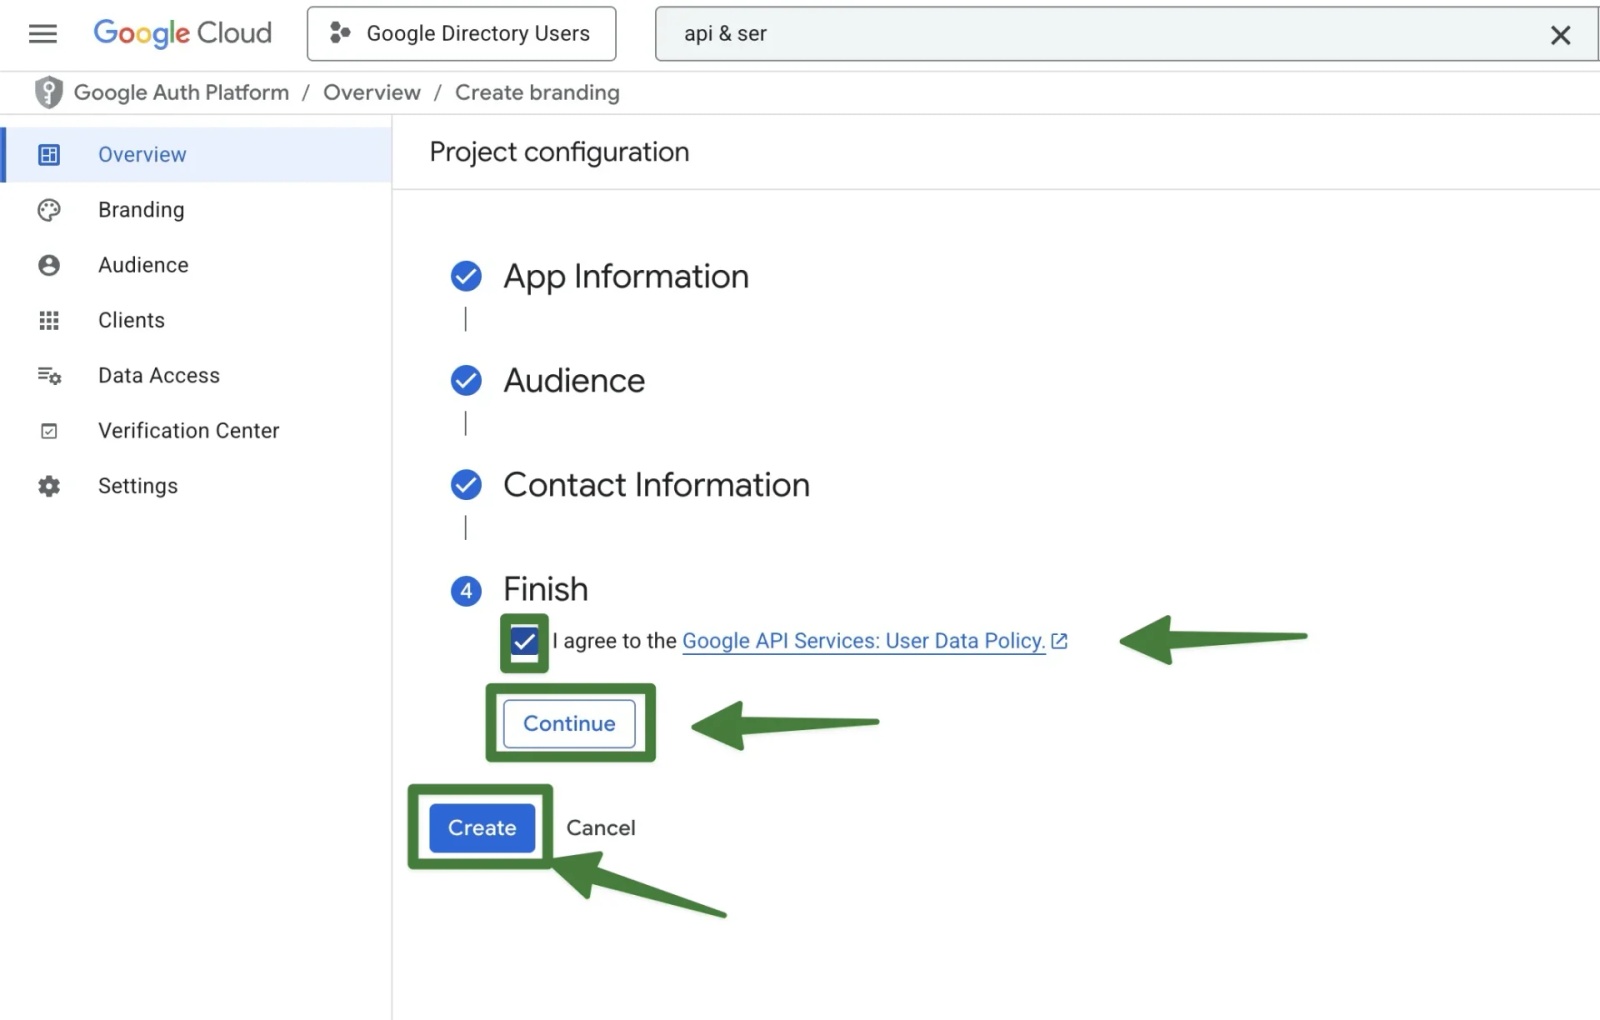
5) Agree to the terms > Hit Continue > Hit Create.
6) We now need to create an OAuth client. Click Create OAuth client from the right side

7) Choose Web application from the first drop down > The default name of Web client 1 is fine but feel free to name it as you wish > Hit the + Add URI button.
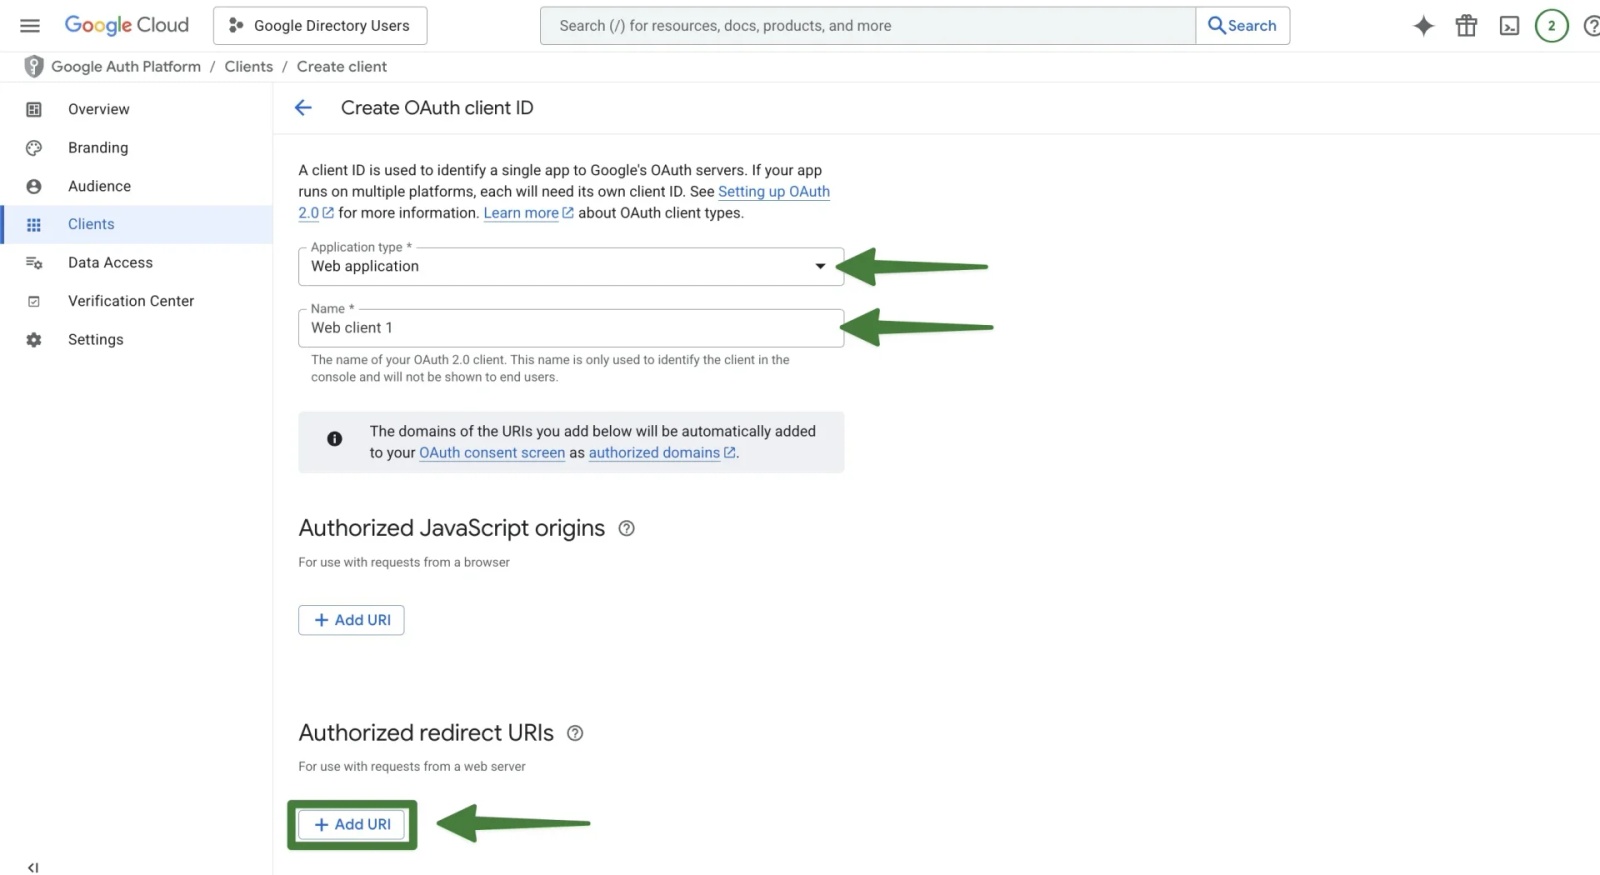
8) We also need to create an Authorized Redirect URI. This tells Google where to send the user after they approve access.
Copy this:
https://contactzilla.app/oauth2/google/callback
https://contactzilla.app/oauth2/google/callback
And paste it into the URIs 1 box > Hit Create

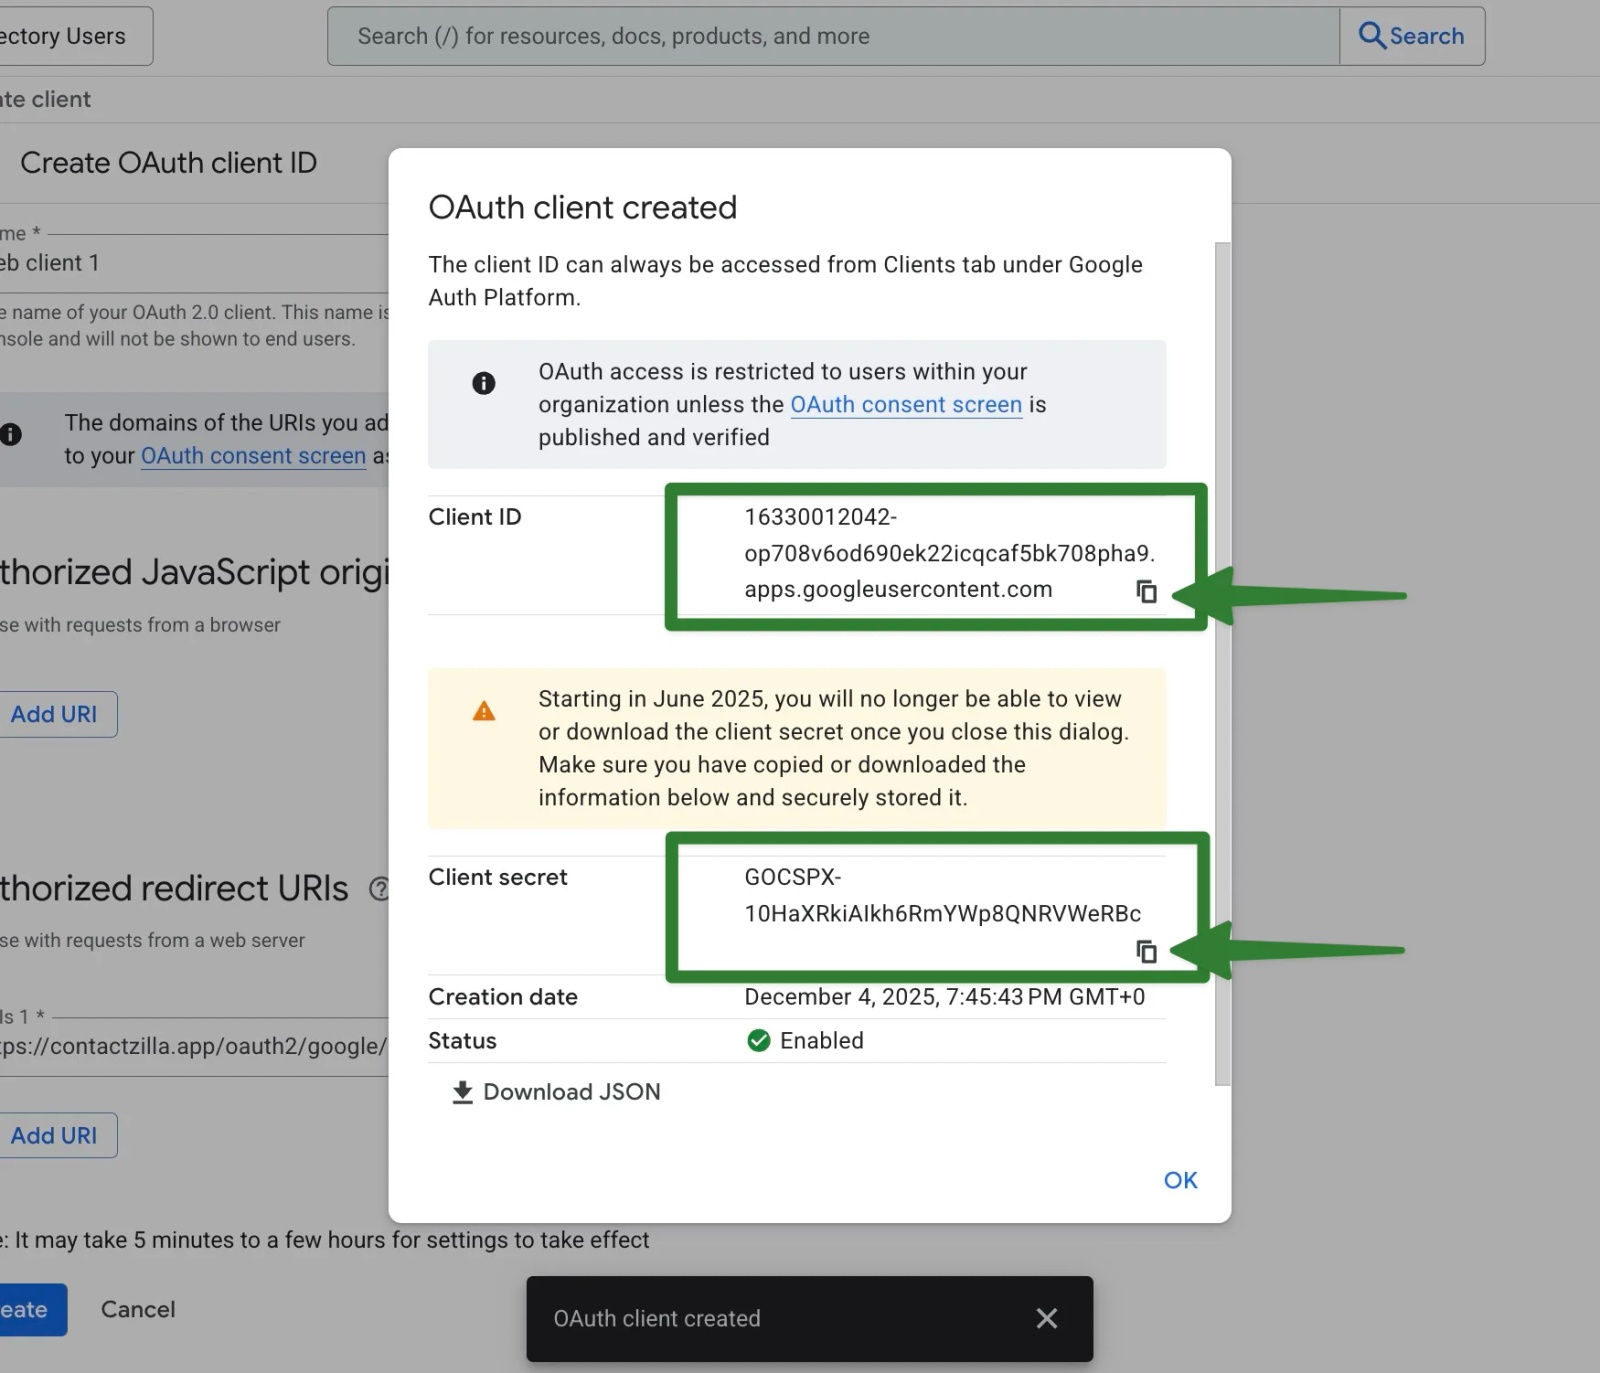
9) After hitting Create, Google will display your new Client ID and Client secret.
Copy both these details to a note pad as we will shortly be pasting them into Contactzilla > Hit OK on the OAuth client created dialog box.
Add the Required Admin SDK Scope
1) Click on the Data Access tab on the left hand side
We now need to grant this OAuth app permission to a specific Admin SDK scope so that Google will allow it to read your directory users. This scope must be added under the “Sensitive scopes” section.
2) Click the the Add or remove scopes button > In the selected scopes pane that opens on the RHS and search User in the top search bar > Select the following result that appears in the search list
https://www.googleapis.com/auth/admin.directory.user.readonly

3) Select the check box next to the Admin SK API value that has now appeared and hit Update. This now pulls this across to the Sensitive scopes area in the data access area. We now have everything we need to finish setting up the Google importer

Add the Credentials to Contactzilla
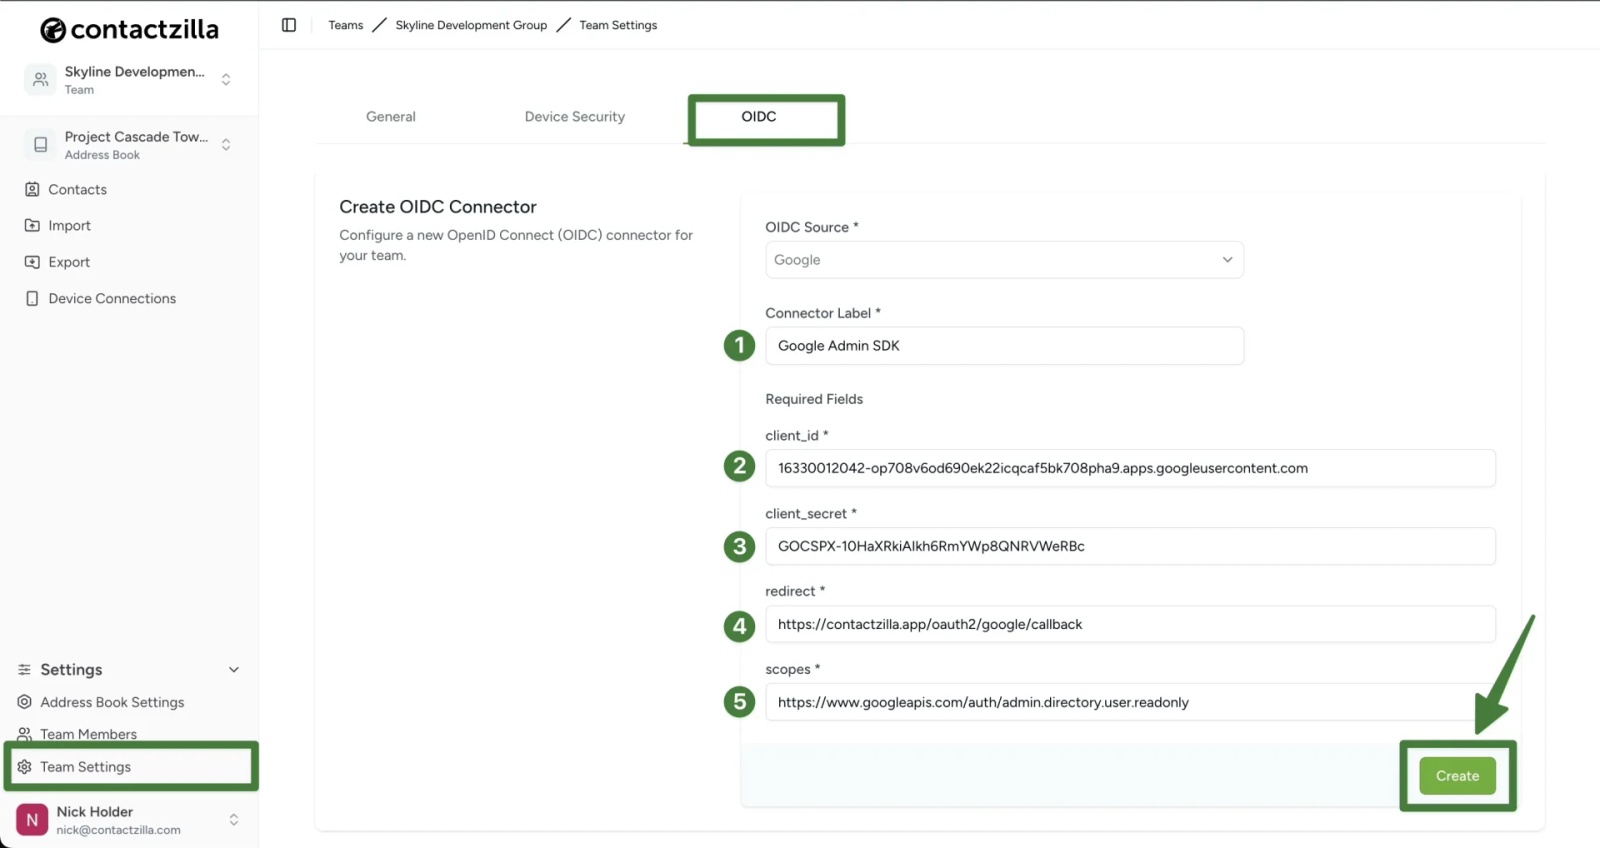
Return to the Contactzilla Team Settings tab where you selected Google from the OIDC drop-down.
1) Add a name in the Connector Label field – ‘Google Admin SDK’ or similar is fine.
2) Paste the Client ID into the Client ID field.
3) Paste the Client Secret into the Client Secret field.
4) For the Redirect URI enter the same redirect URI you added in Google Cloud:
https://contactzilla.app/oauth2/google/callback
5) In the scopes field add the following:
Scope: https://www.googleapis.com/auth/admin.directory.user.readonly
We now have a Team based Open ID connector > Hit view connections on the RHS
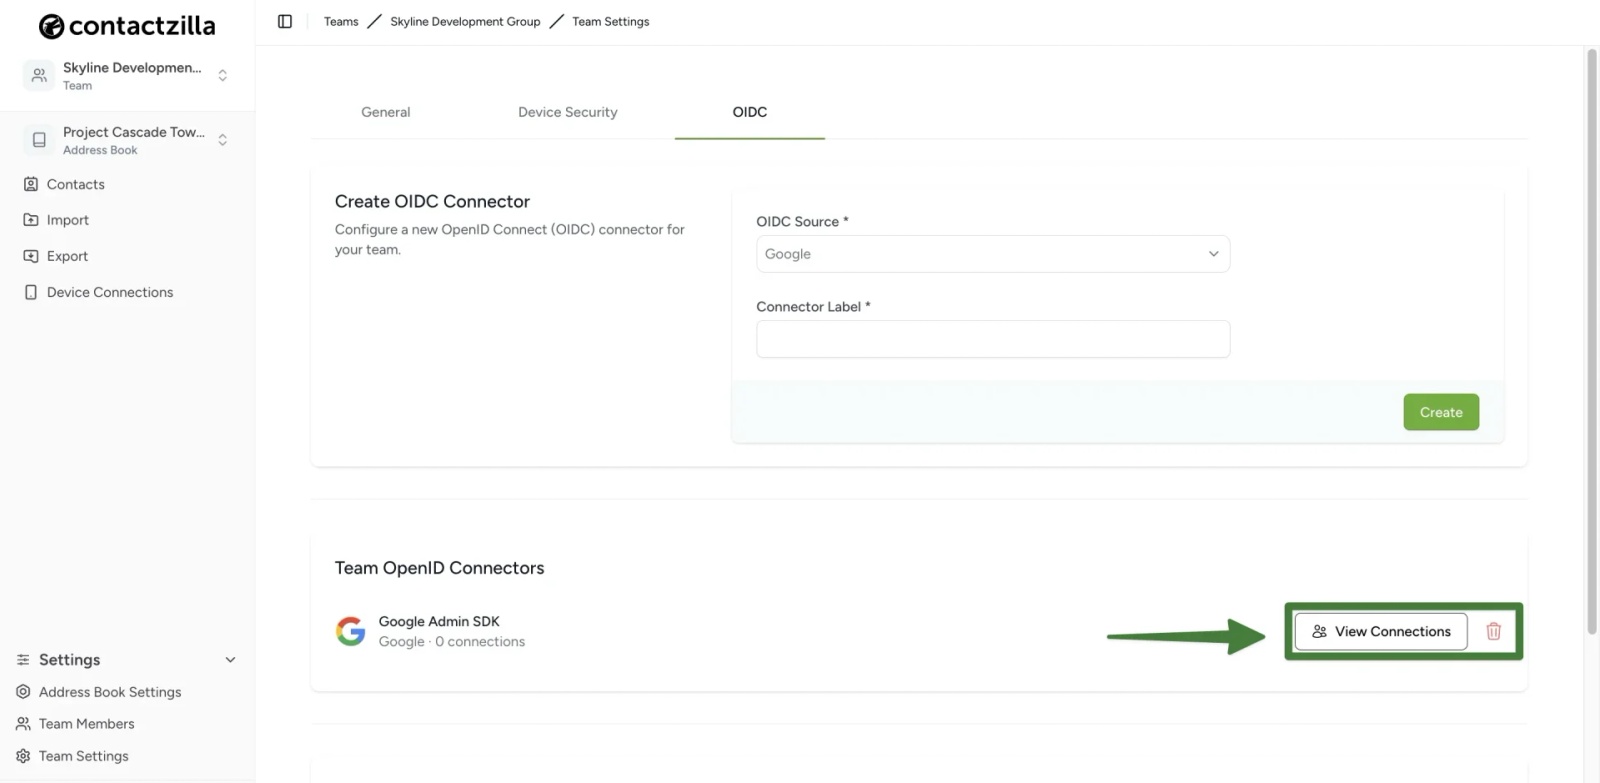
Hit Connect from the screen that follows and you will then be guided through the OAuth flow


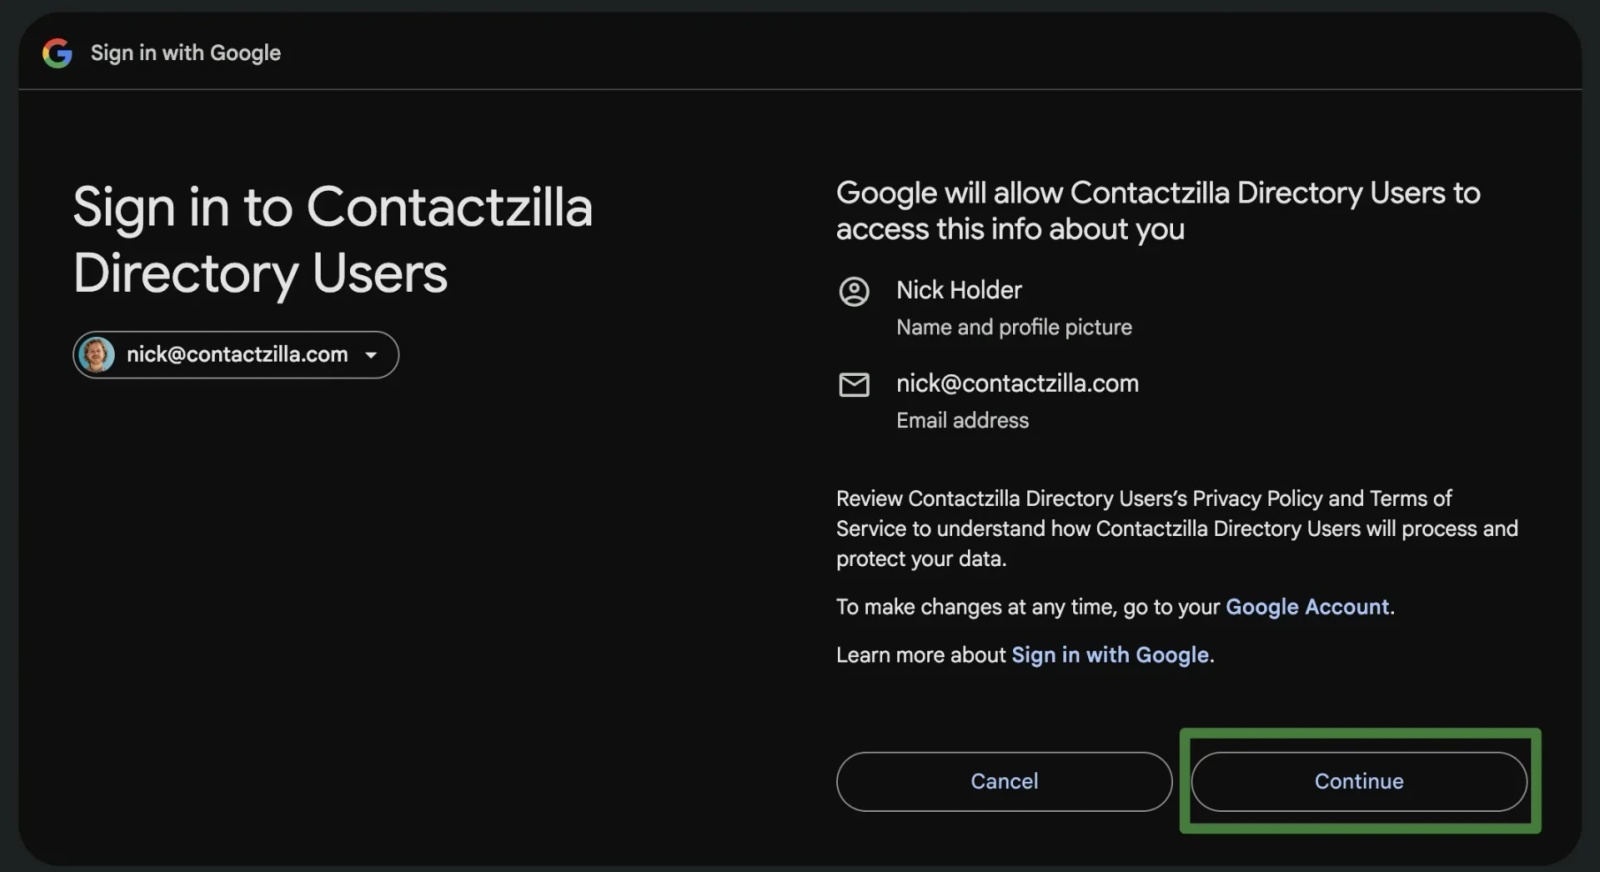
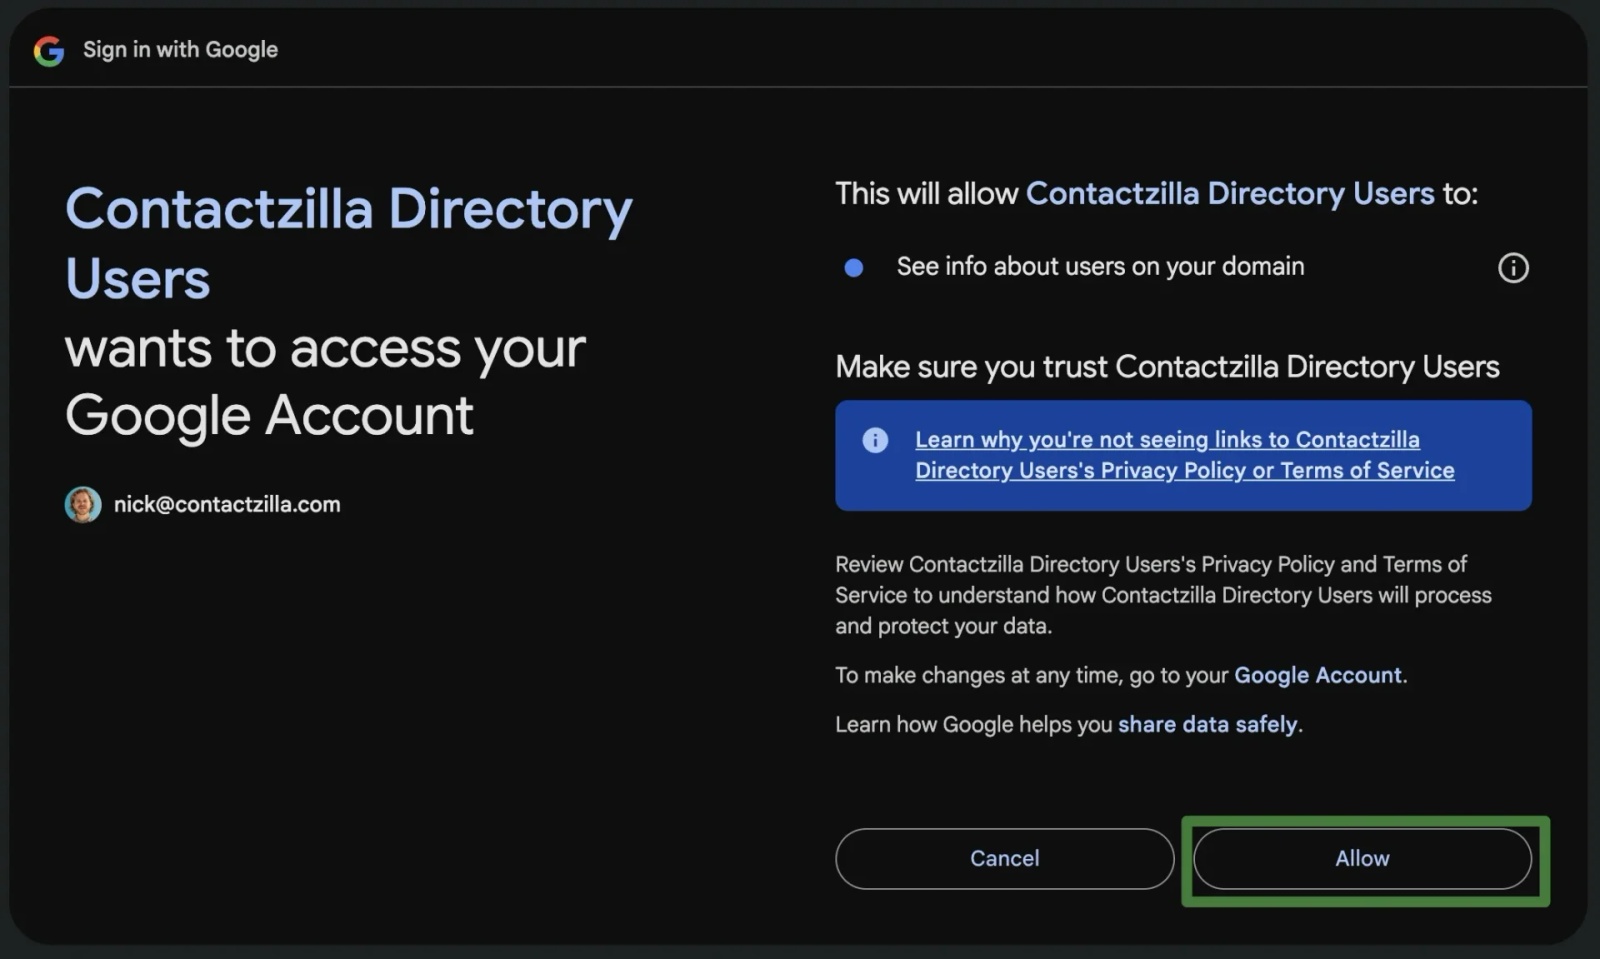
Once you have allowed access to Contactzilla Directory Users your Google Workspace Directory is now active.

Importing contacts from Google Workspace Directory
We can now go ahead and import contacts from our Google Workspace Directory
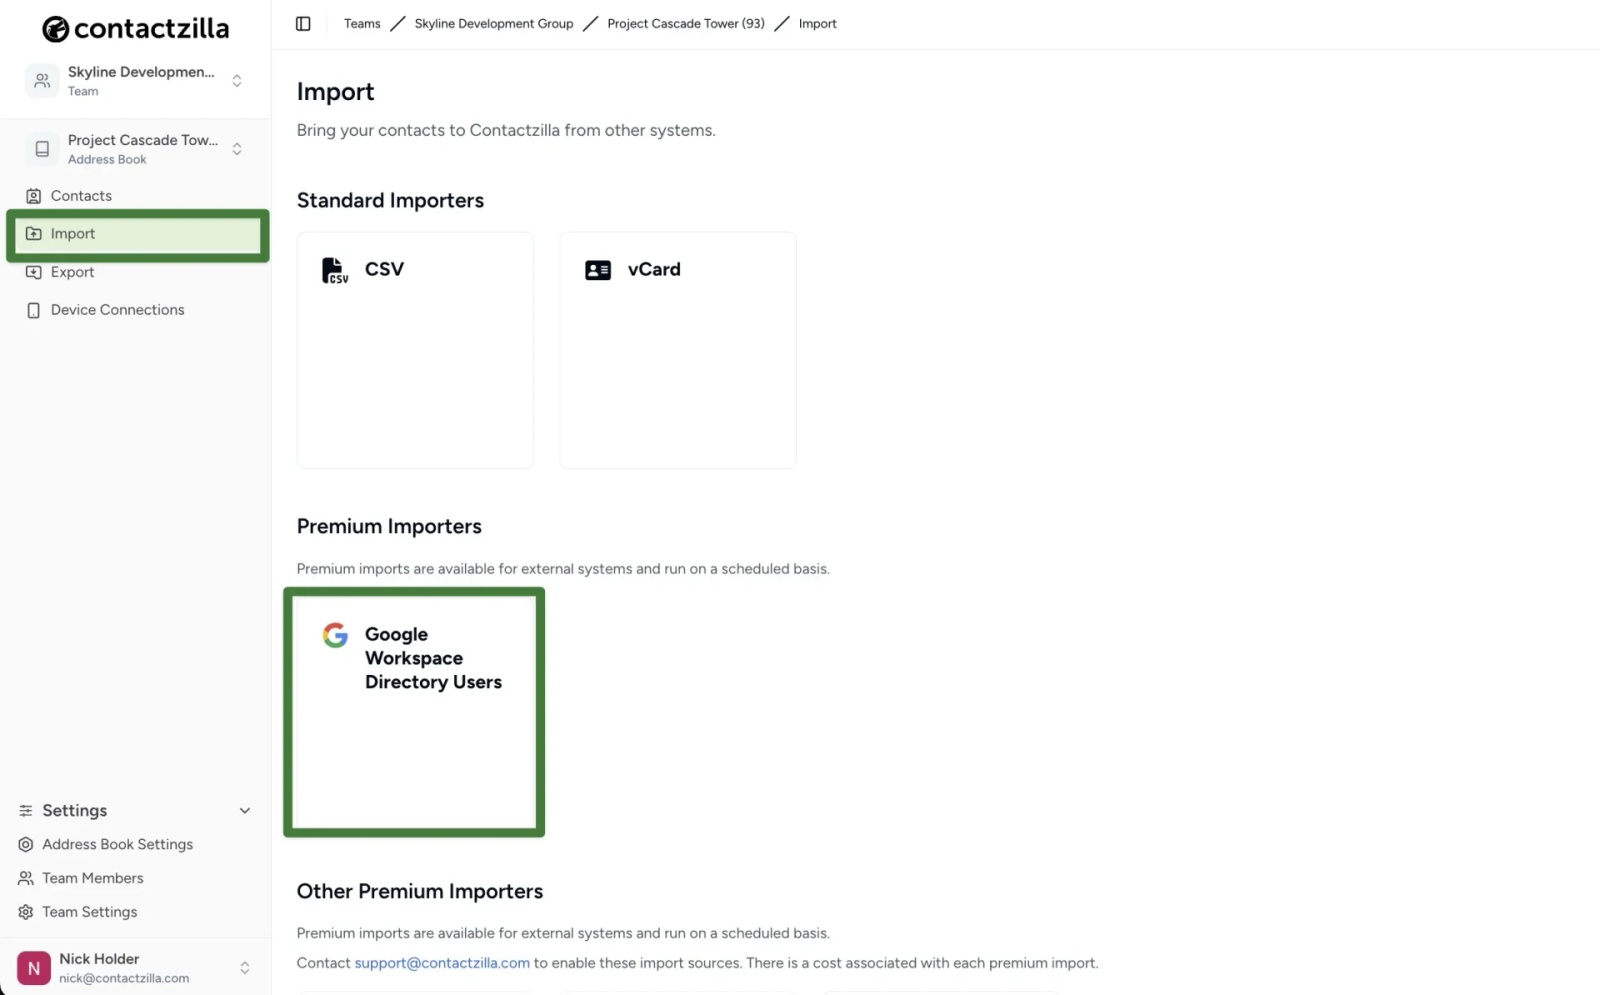
1) Click the import menu from the left side of your Contactzilla dashboard > Choose Google Workspace Directory Users under the Premium Importers section > Hit Import on the screen that follows.
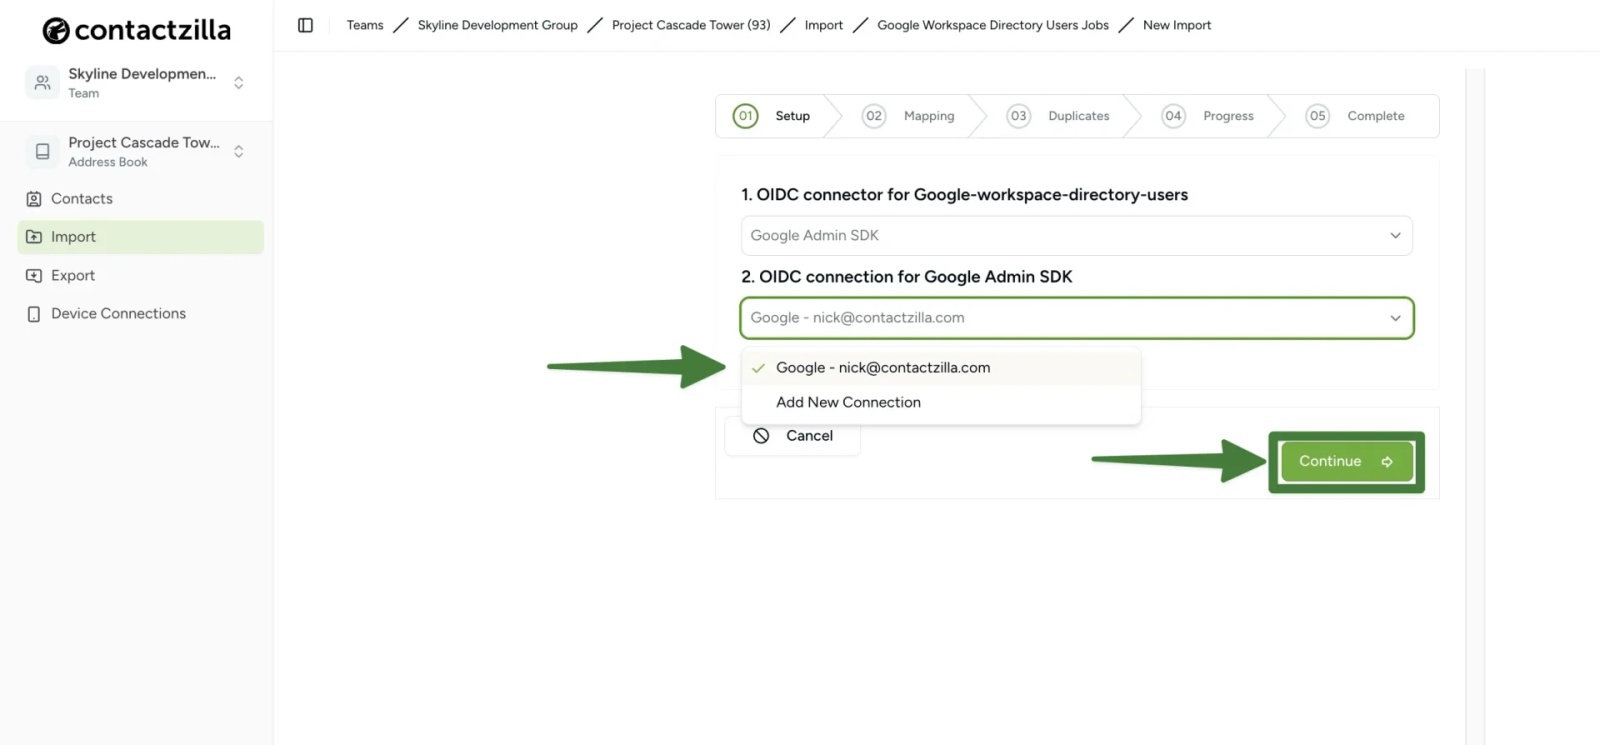
2) From the screen that follows leave OIDC connector for Google workspace directory users as Google Admin SDK (or whatever you named it originally) > Choose your newly created connection from the drop down > Select Continue
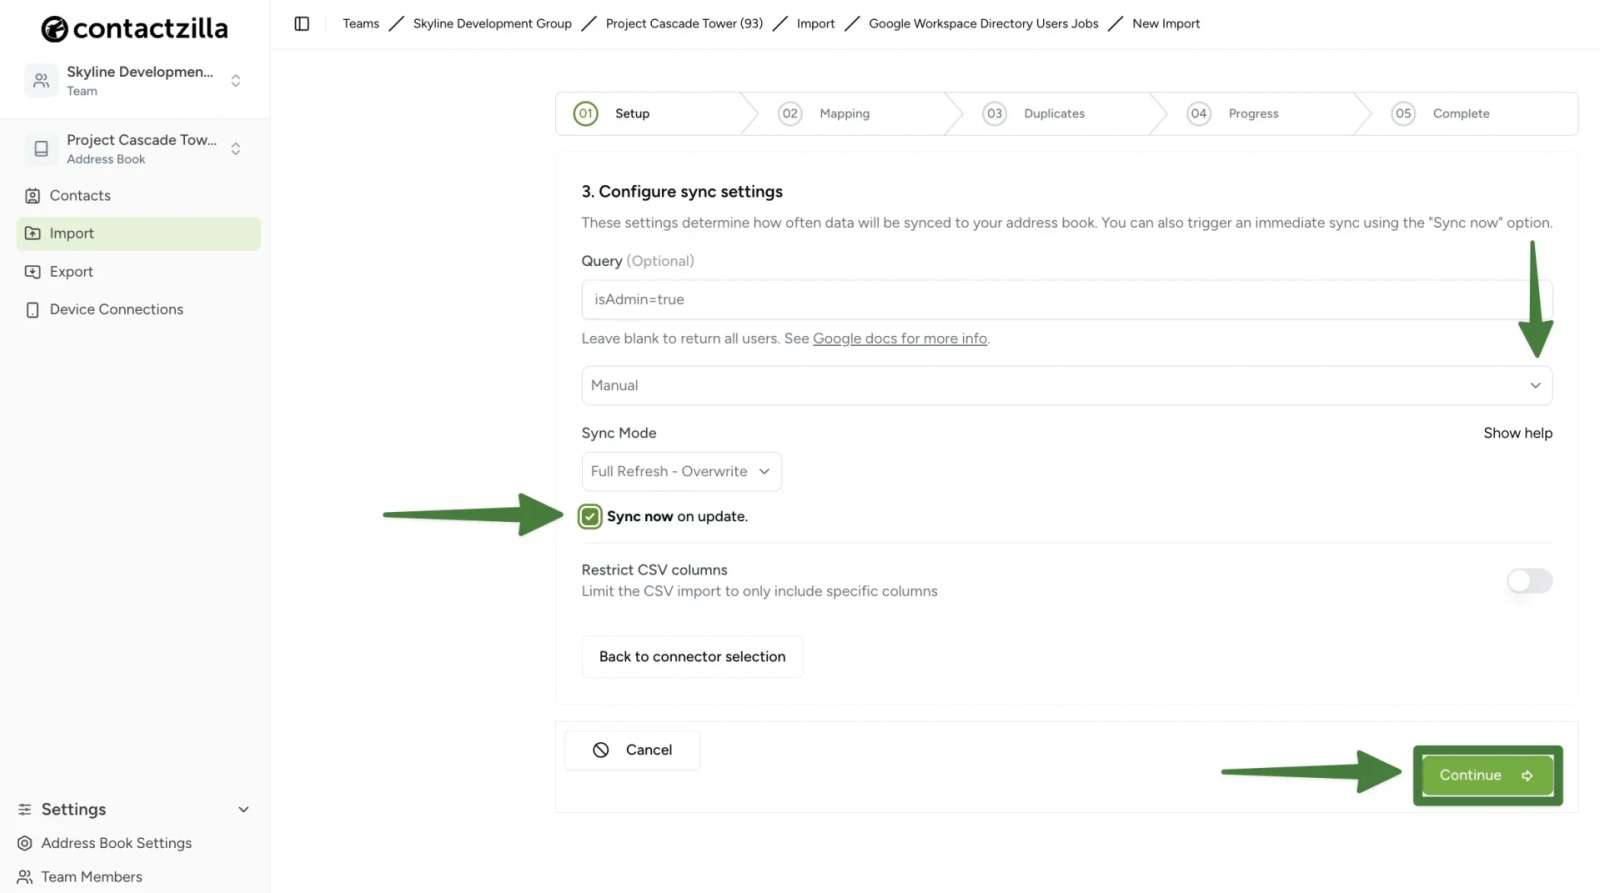
3) From the Sync settings screen that follows leave the first field (Query) blank to pull in your full workspace directory > Choose a sync frequency from the drop down to determine how often Contactzilla will update from your Google directory. We recommend for the first import you leave as manual, but this can be edited after setup
Leave sync mode as Full Refresh – Overwrite
Tick the Sync now on update check box.Limit the CSV import to only include certain columns if you need this option by using the toggle switch (optional)
Hit Continue.
In the next part of the import process you will map the import fields to Contactzilla fields.
We cover the mapping process in this Salesforce Help doc
Still need help?
Our support team is available to assist you with any questions or issues you may have.

