How can we help you?
Browse Categories
Setting Up CardDAV Connections
CardDAV connections allow you to sync contacts to devices. Each connection exists within a specific address book, allowing you to manage different sync configurations for different contact lists.
First, select the team and address book where you want to create the CardDAV connection. Then navigate to the CardDAV Connections section within that address book.

Creating a New Connection
1. Connection Type
Choose your device platform:
- iOS
- Android
- Other (for any CardDAV-compatible device)

2. Assigned Team Member
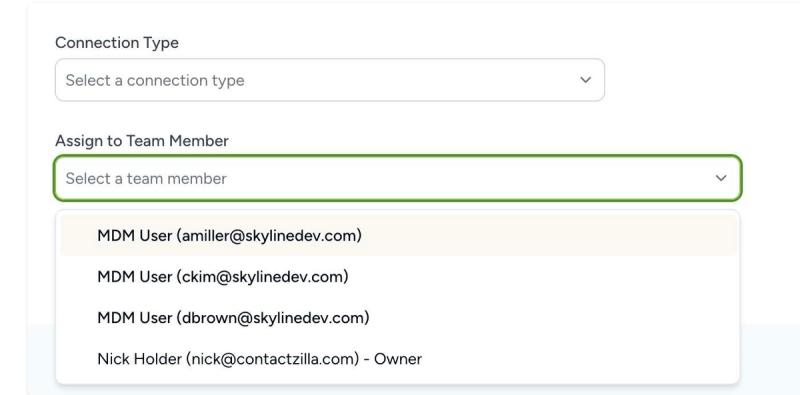
Select who the connection is for:
- Regular team members – for individual device synchronization – These can be adminstrators, owners and other types of team member
- MDM users – for large-scale device deployments
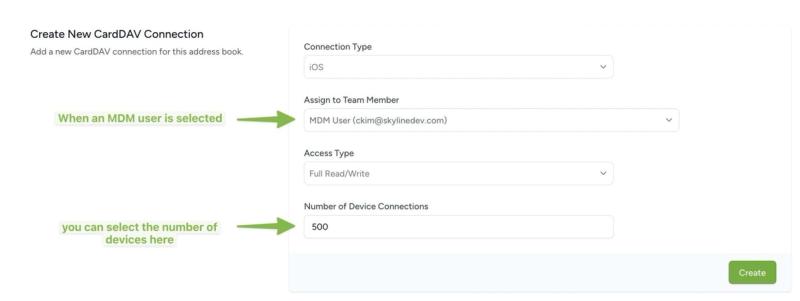
When assigning to an MDM user, a new input field appears for ‘Number of Device Connections’ where you can specify how many devices can use this connection (e.g., 500 devices).
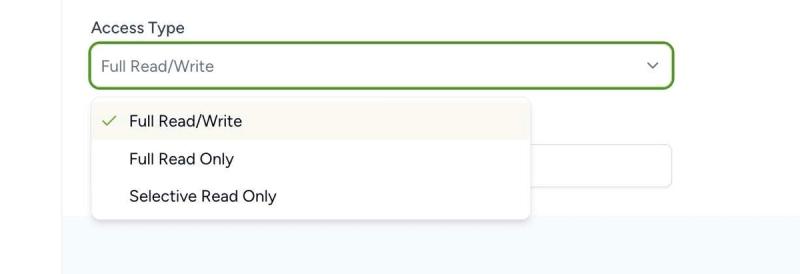
3. Access Type
Choose the level of access:
- Full Read/Write: Complete access to all contacts in the address book
- Full Read Only: View-only access to all contacts
- Selective Read Only: View-only access to contacts with specific labels
When selecting Selective Read Only:
- Choose which labels to include in the connection by clicking the label button
- Select 1 or more labels (as many as you wish) from the list.
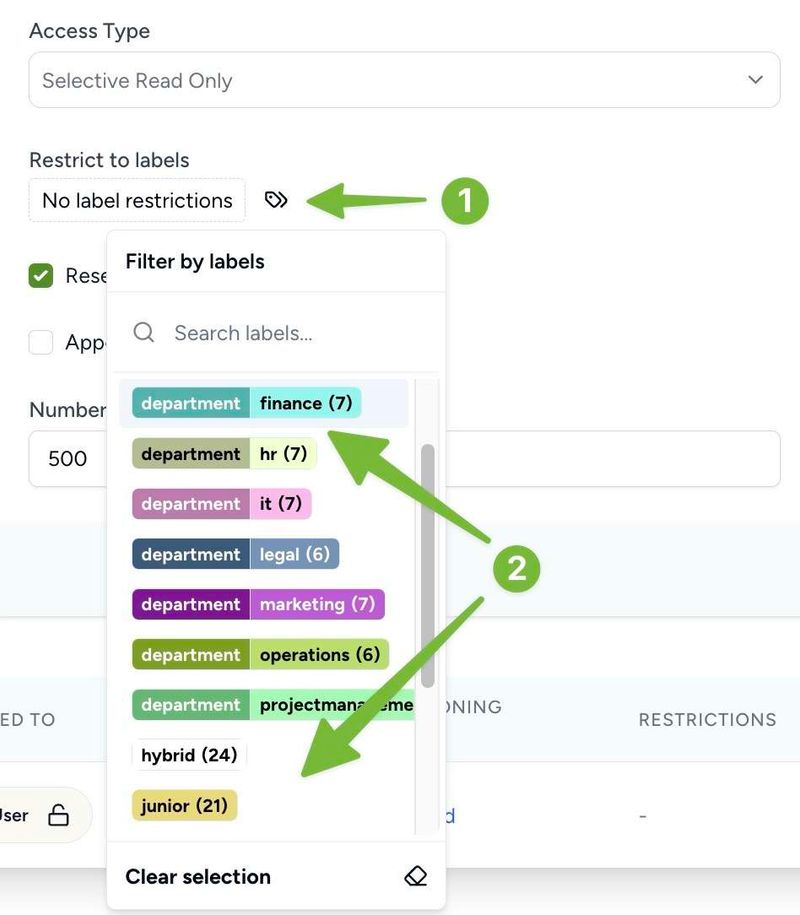
Only contacts with the labels you have chosen will sync to the device
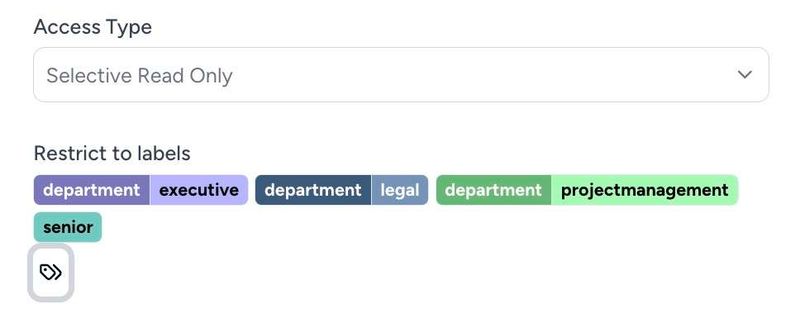
When selecting either Full Read Only or Selective Read Only access type, two additional options appear:

Reset Local Changes
This option prevents contacts from being permanently added on the device. While users can add contacts locally, these changes will be overwritten during the next sync with the server ensuring the device always maintains the authorized contact list from Contactzilla. Click here for our blog post on how the new Read-only features in Contactzilla work.
Append Lock Emoji
When enabled, this adds a lock symbol (🔒) to the end of each contact name on the device, providing a clear visual indicator that these contacts are read-only. This helps users understand they cannot permanently modify these contacts.
After Creating a CardDAV Connection
When you create a new connection, it appears in your list of CardDAV connections where you can monitor status, view connection details, adjust the number of device connections and download a provisioning profile to make setup on iOS devices incredibly simple. Each new connection generates a unique username and secure password for device authentication.
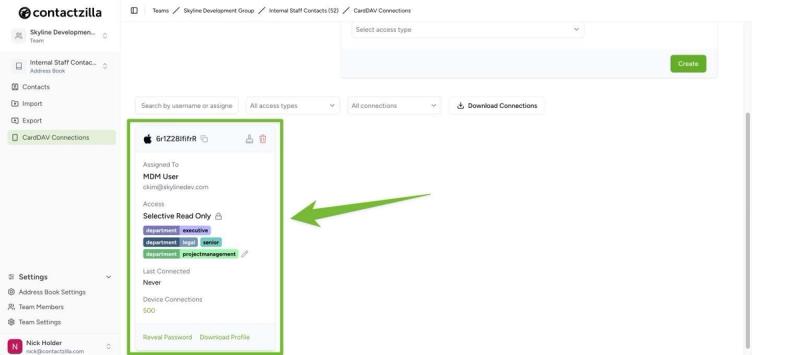
Important Notes About the Password
- The password is only revealed once
- You must save or use the password immediately
- Once the connection is first used, the password cannot be retrieved again
- If you need the password later, you’ll need to create a new connection
Connection Options
You can either use the generated username and password directly with your CardDAV client, or download the provisioning profile (a .mobileconfig file) which contains all necessary configuration settings. The provisioning profile can be installed by double-clicking on Apple devices and is perfect for bulk deployments via MDM solutions.
Tip 💡: Follow our Setting up MDM deployments guide here
Updated on February 17, 2026
Still need help?
Our support team is available to assist you with any questions or issues you may have.

