How can we help you?
Browse Categories
Adding a Contactzilla address book to OSX Contacts: Using the provisioning Profile
This guide explains how to set up a Contactzilla CardDAV account on macOS Contacts using a provisioning profile (.mobileconfig file). This method simplifies the process by automatically configuring all necessary settings, eliminating the need to manually input server details, usernames, and passwords.
Downloading the Provisioning Profile
1) From your CardDAV connections list in Contactzilla, locate the connection you want to use and click ‘Download profile’. This will download a .mobileconfig file to your Mac.
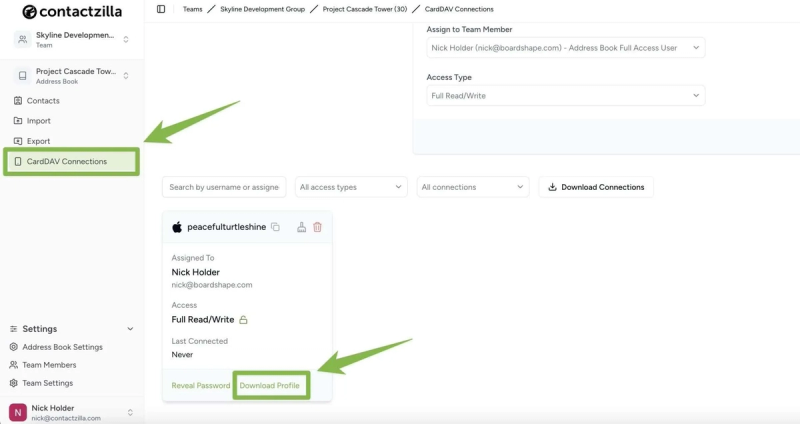
Tip 💡: If you’re unfamiliar with creating a CardDAV connection, check out our guide to setting up CardDAV connections for your Contactzilla address books.
Installing the Profile on macOS
1) Locate the .mobileconfig file you downloaded (usually in your Downloads folder).
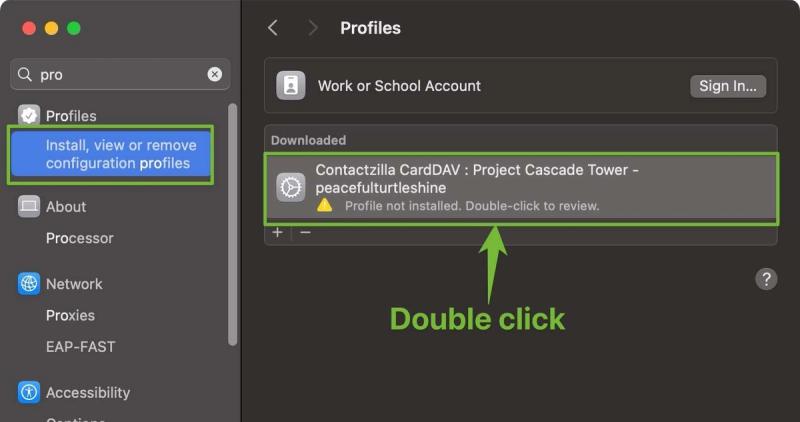
2) Double-click the .mobileconfig file. This will open the Profiles section in macOS System Settings. If not open Settings and search ‘Profile’ > Double click the Contactzilla CardDAV profile
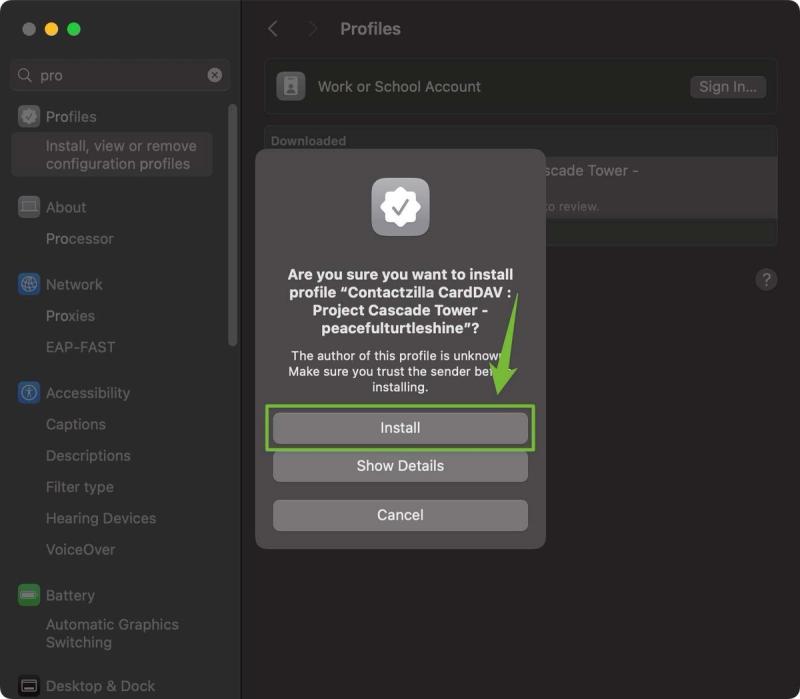
4) On the screen that follows, review the settings and hit ‘Install’.
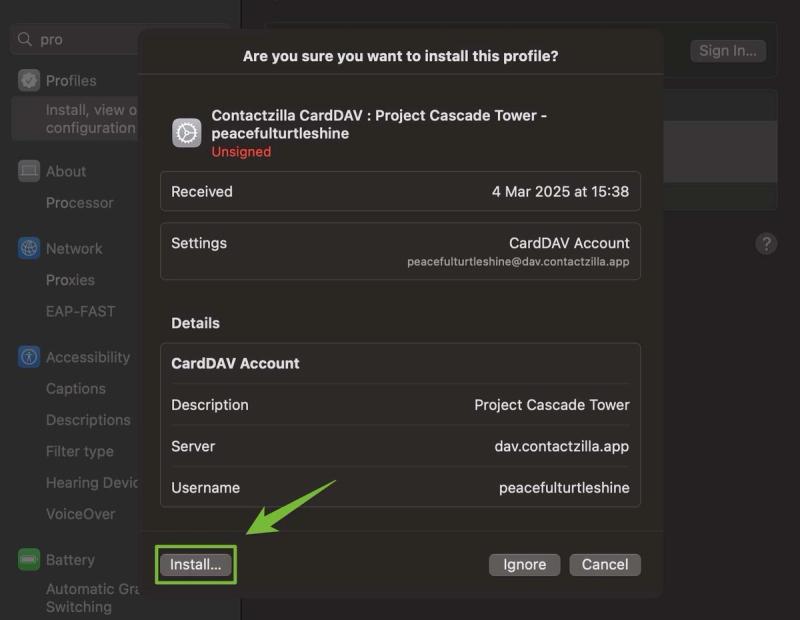
5) Confirm once again with ‘Install’
What Happens After Installation?
Once installed, the provisioning profile:
- Configures the CardDAV connection with your Contactzilla address book
- Automatically sets up all required server details
- Adds your Contactzilla address book to macOS Contacts
- Syncs your Contactzilla labels as lists in macOS Contacts
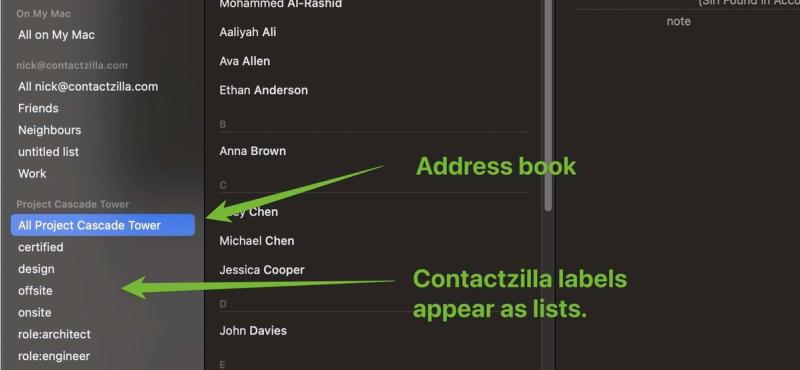
You can now access and manage your Contactzilla contacts directly from macOS Contacts.
Notes for IT Administrators
For MDM deployments, provisioning profiles can be distributed directly to devices using your preferred MDM solution.
Updated on February 17, 2026
Still need help?
Our support team is available to assist you with any questions or issues you may have.

