Push Shared Contacts to Every iPhone via Workspace ONE — In Minutes
Generate a CardDAV .mobileconfig in Contactzilla, upload it as an iOS device profile in Workspace ONE UEM, and watch your address book land in the native iPhone Contacts app — locked down and ready.
Rolling out a shared company address book to a fleet of iPhones used to mean asking every employee to install profiles by hand, or stitching together fragile scripts. With Workspace ONE UEM and Contactzilla, the entire process collapses to four moves: generate a .mobileconfig profile, upload it as an iOS device profile, assign it to a Smart Group, and hit Save and Publish. Within seconds, every enrolled iPhone in the group has the address book sitting in the native Contacts app, organised by label as on-device lists.
This walkthrough captures the exact path the Contactzilla team uses to deploy CardDAV via Workspace ONE. You'll set up an MDM user, pick the right access type (full read-only, full read/write, or selective read-only), download the mobile config, upload it into Workspace ONE as a device profile, and assign it to a device Smart Group. We also cover the post-deploy verification — editing a contact in the Contactzilla dashboard and watching the change propagate to the iPhone in real time.
By the end of this guide you'll have a repeatable Workspace ONE rollout pattern you can use for additional address books — each generated profile is uniquely named so you can stack departmental contact lists onto the same Smart Group without confusion.
Step 1: Confirm your Workspace ONE device group and Contactzilla address book
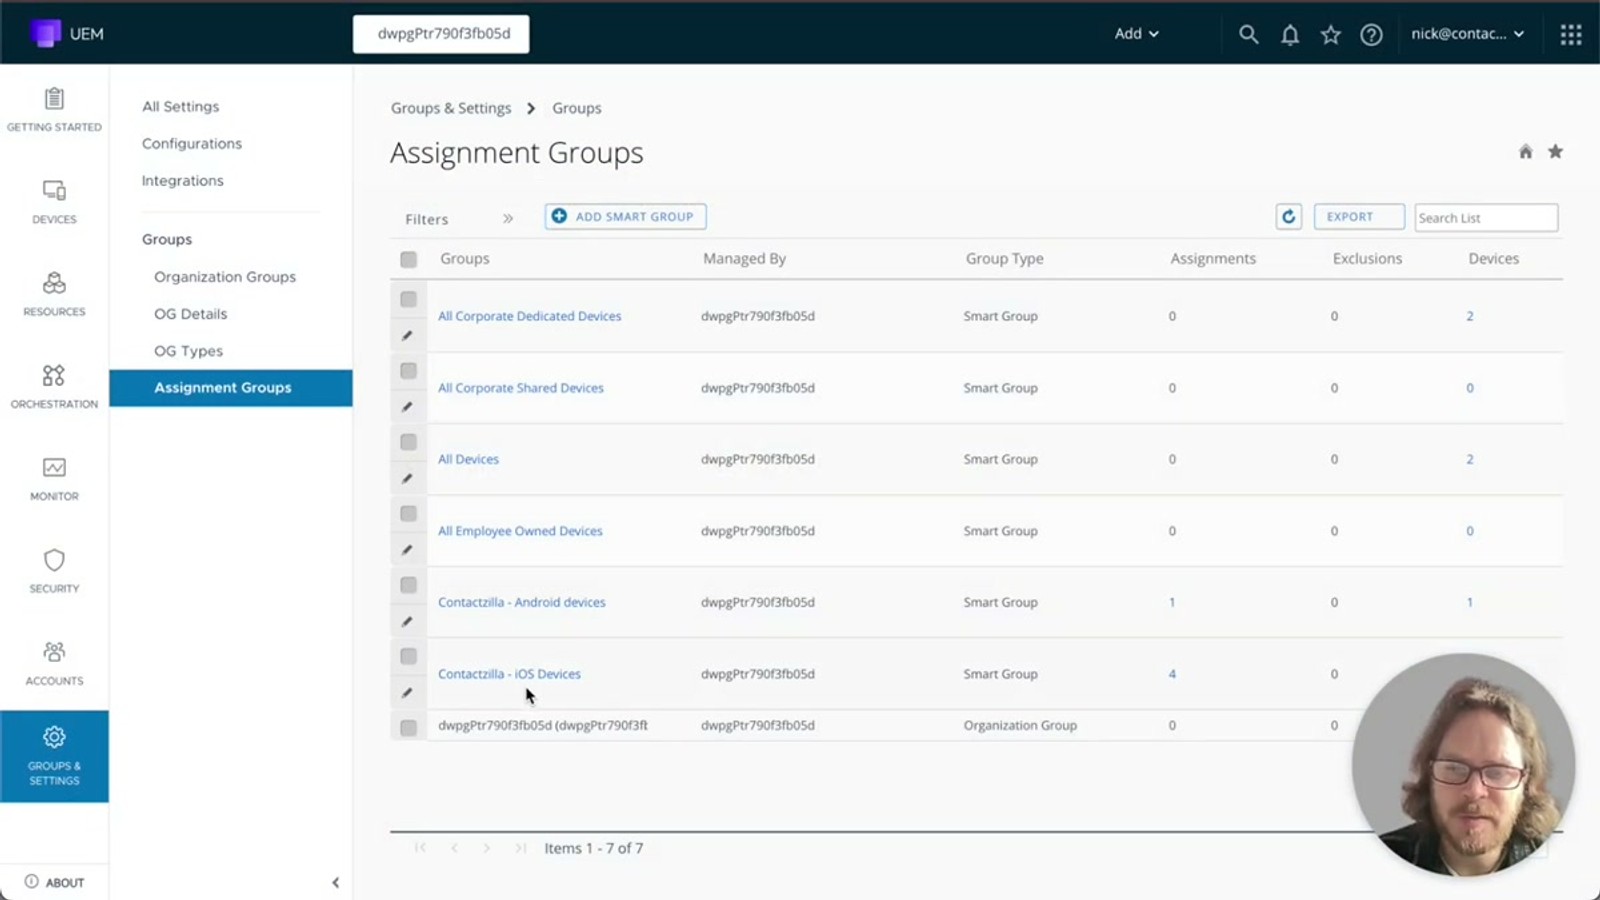
Before generating any profiles, make sure both ends of the pipeline are ready. In Workspace ONE UEM, you should already have an iOS device group (called a Smart Group) containing the iPhones you want to target. In the demo this is set up as a dedicated iOS devices group ready to receive the profile.
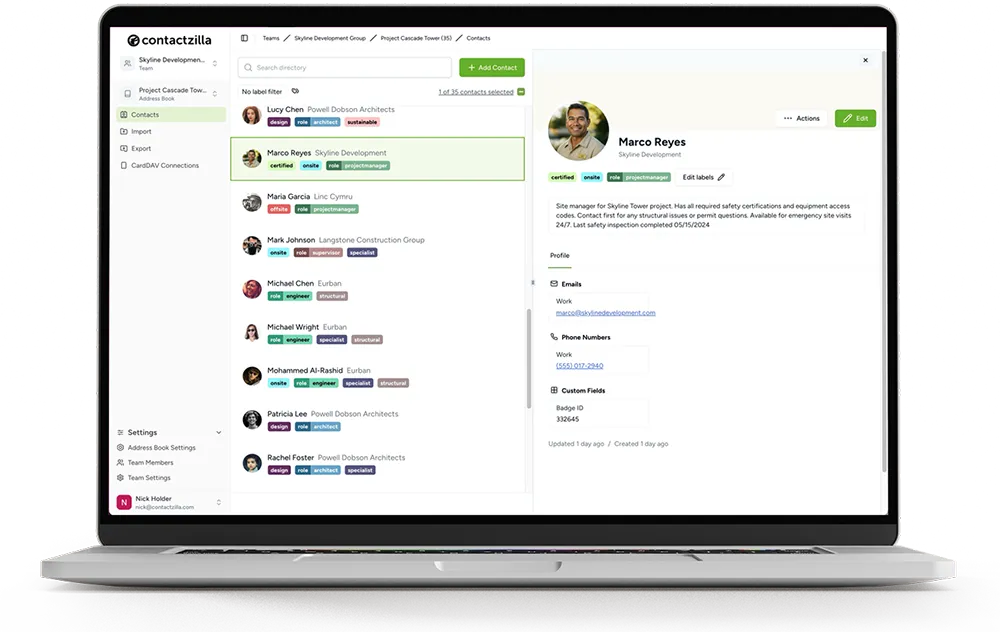
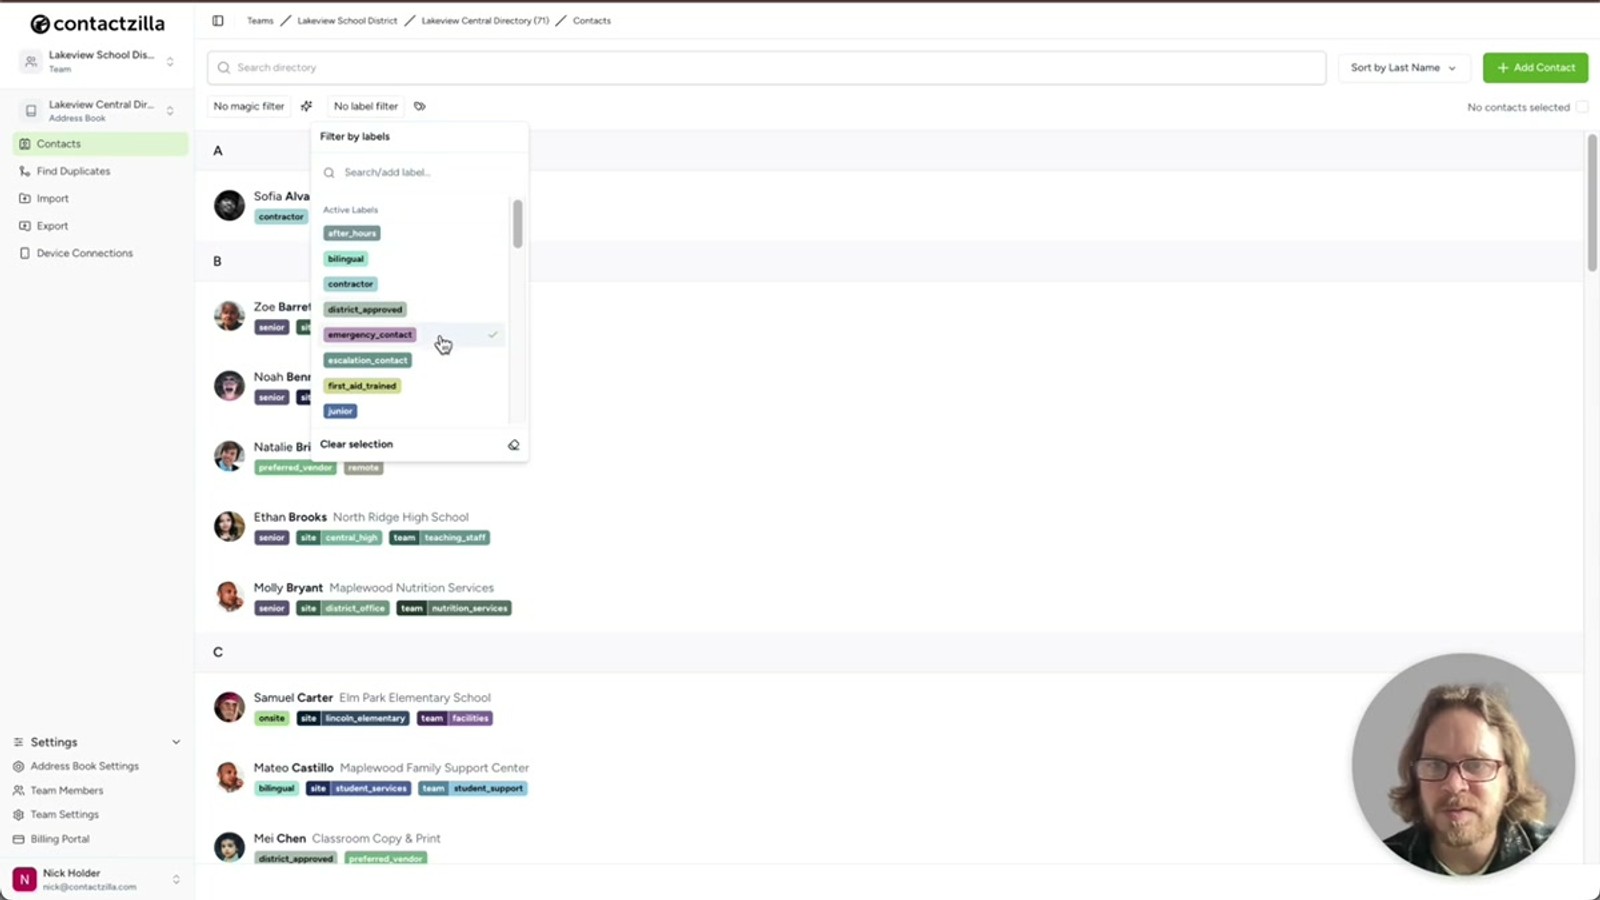
Over in Contactzilla, open the contact list you want to push out. Contactzilla can pull contacts from a wide range of sources, so you're not stuck with a single starting point. The dashboard contact list is what becomes the on-device address book — labels in Contactzilla translate directly to lists inside the iPhone Contacts app for natural organisation.
- Workspace ONE: confirm your iOS device Smart Group exists and contains enrolled iPhones
- Contactzilla: open the address book you intend to deploy
- Supported import sources include Microsoft Entra, Workspace directory, Google, CRM importers, CSV files and vCards
- Contactzilla labels become on-device lists, so organise your labels before rollout for the cleanest result
If you're planning multiple address books (e.g. emergency contacts, sales team, suppliers), name your Contactzilla labels carefully now — they show up verbatim as lists on every iPhone.
Step 2: Create an MDM user in Contactzilla
For an MDM rollout (as opposed to per-user QR-code install), you need a dedicated MDM user that owns the device connection. If you don't have one yet, head to Team Members in the bottom-left of Contactzilla and add a new member.
From the Role dropdown choose MDM User – Device Only Access. The email address here is arbitrary — it's never used for login or notifications, so enter anything that makes sense as a label (for example mdm-ios@yourcompany.com). Hit Add and the MDM user appears in your team list, ready to be selected when you create the device connection in the next step.
- Navigate to Team Members in the bottom-left of Contactzilla
- Click to add a new team member
- Set Role to
MDM User – Device Only Access - Enter any descriptive email address — it's arbitrary and never used for sign-in
- Click Add to create the user
Use a clear label like mdm-ios@yourcompany.com so future admins immediately know this account is for device-level MDM rollouts, not a real person.
Step 3: Create the iOS device connection in Contactzilla
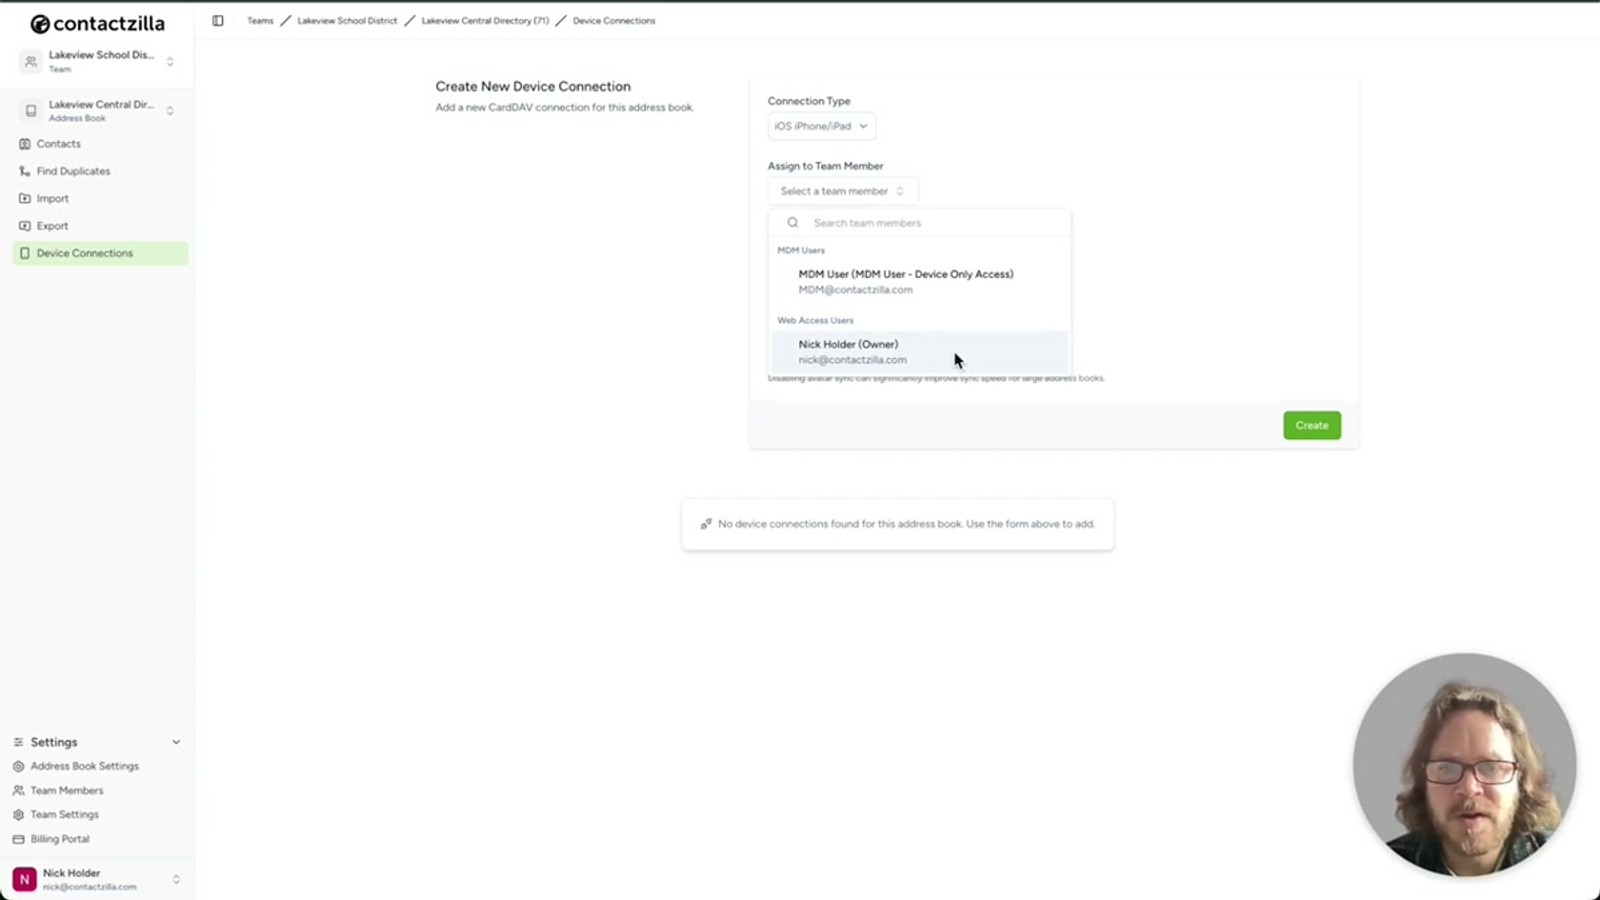
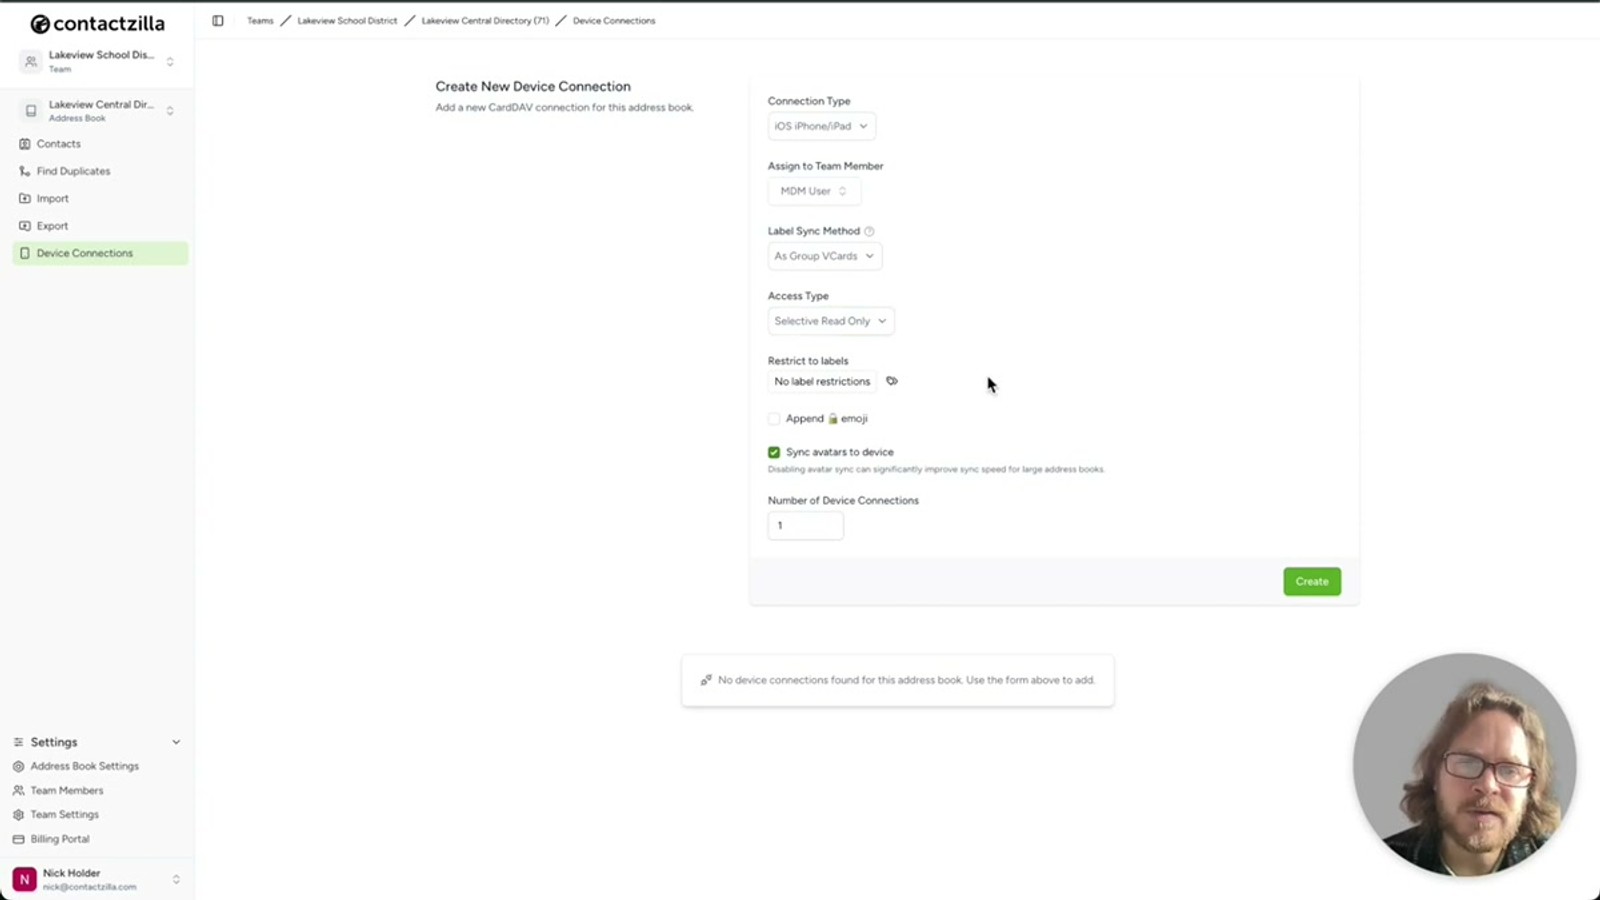
Open Device Connections in Contactzilla and start a new connection. For Connection Type choose iOS — this generates a CardDAV .mobileconfig profile that Workspace ONE understands natively.
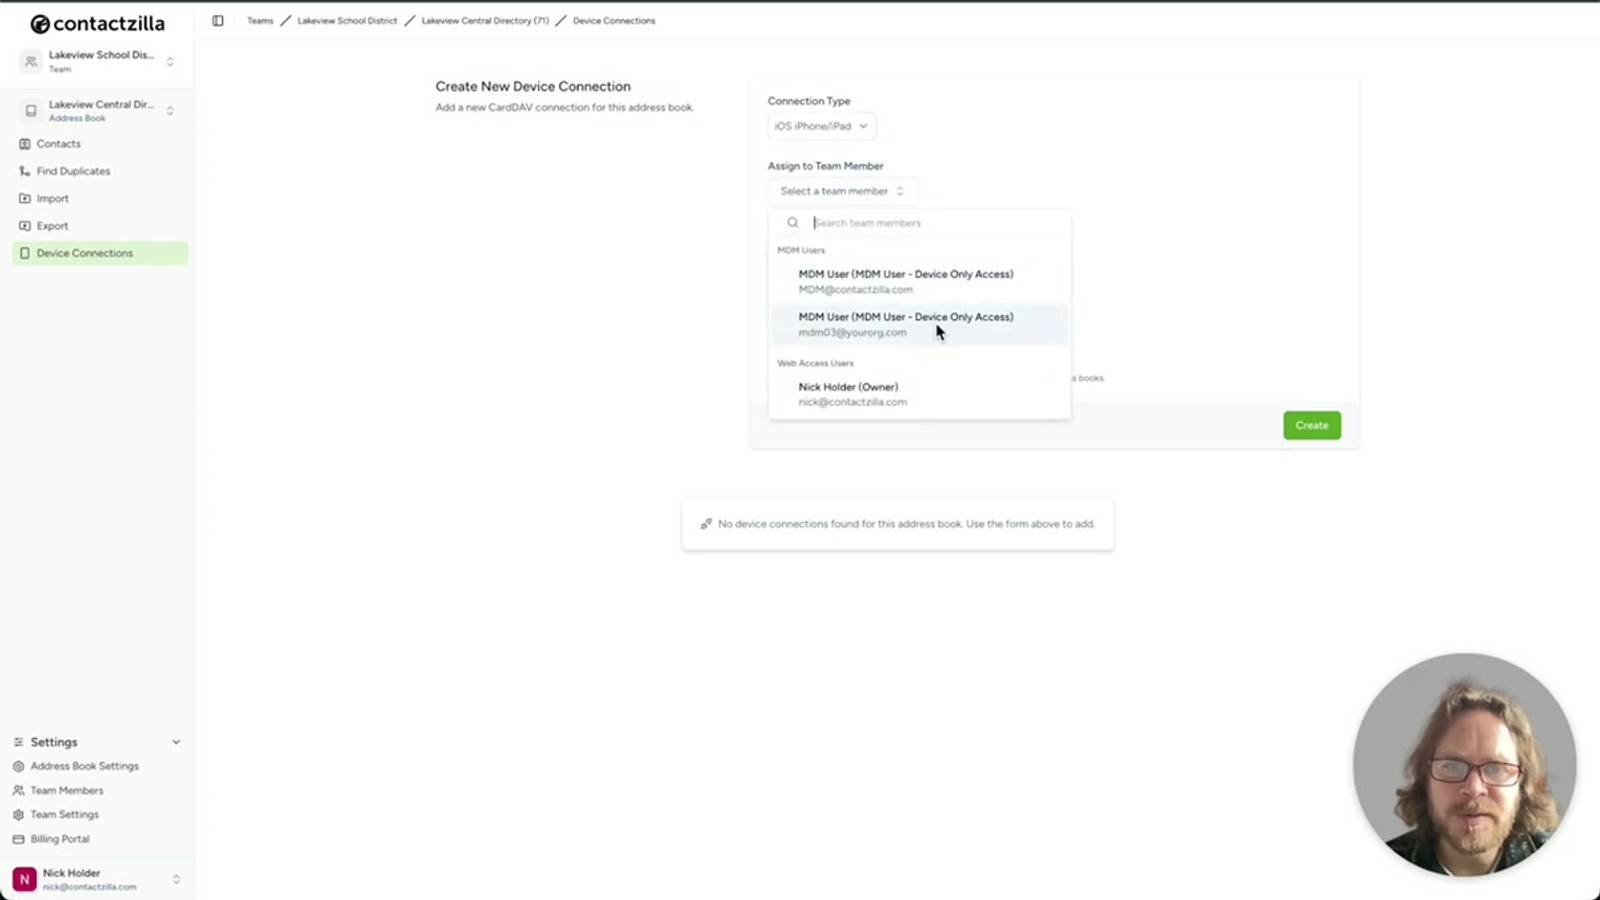
Next, assign the connection to your newly-created MDM user (rather than an individual team member, which is the path you'd take for personal QR-code installs). Leave Label Sync Method at its default value — it works out of the box for the vast majority of rollouts.
The critical decision is Access Type. The presenter walks through all three options so you can pick the right one for your security posture.
- Go to Device Connections in Contactzilla
- Set Connection Type to
iOS - Assign to the MDM user you created in Step 2 (not an individual team member)
- Leave Label Sync Method at the default
- Choose your Access Type (covered in Step 4)
Individual team-member assignments are for self-service QR-code installs on personal devices. For any fleet rollout via Workspace ONE, always pick the MDM user.
Step 4: Choose the right Access Type
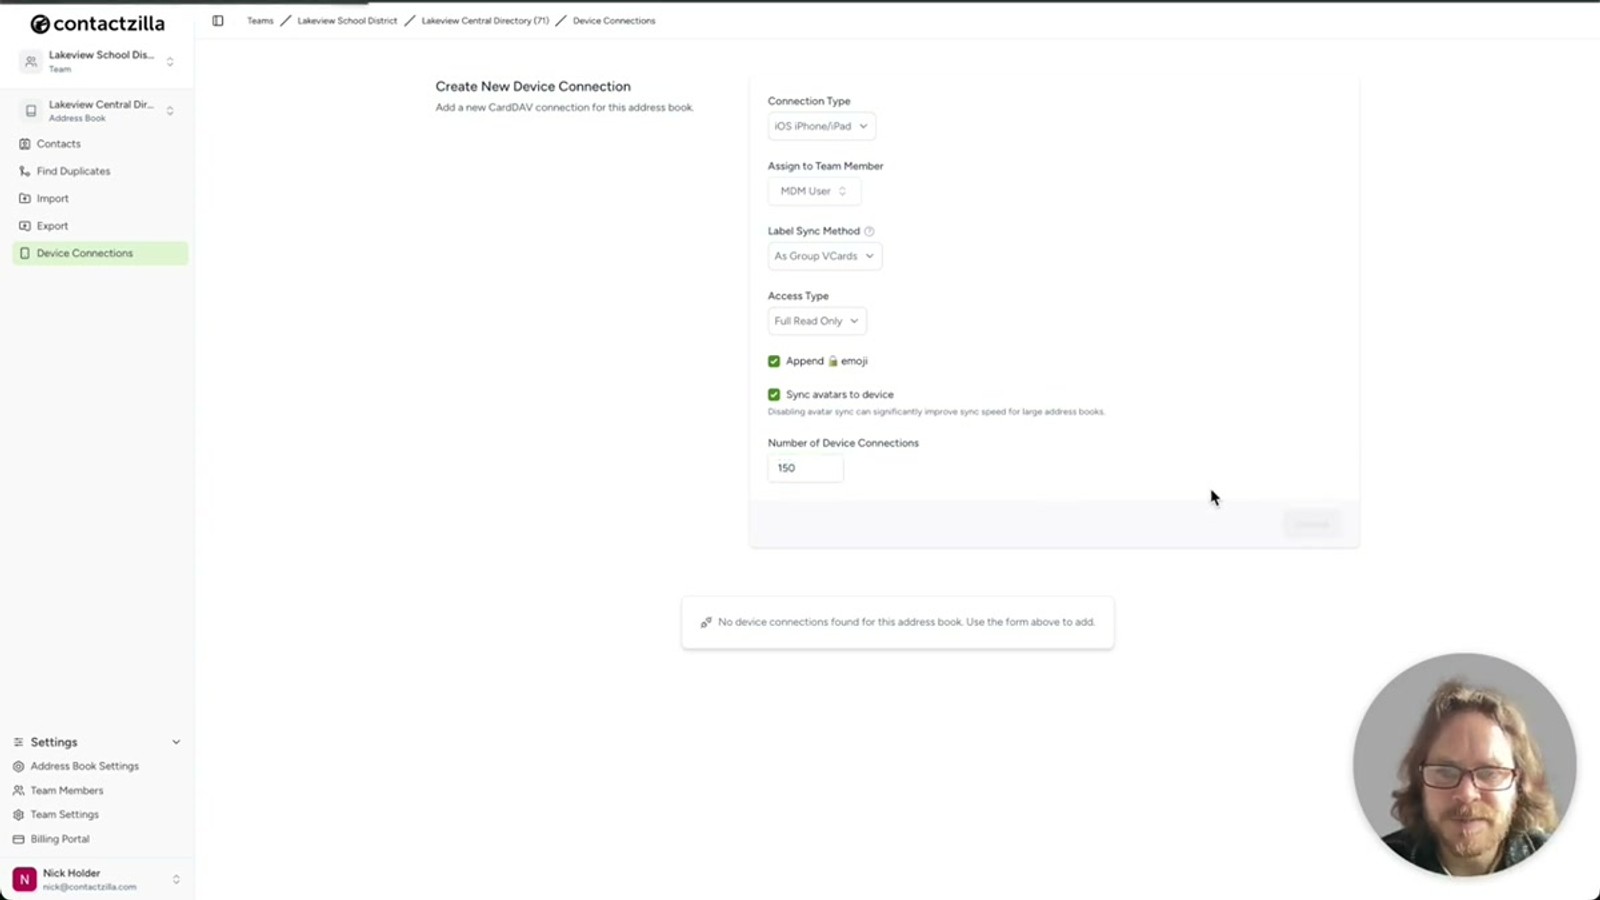
Contactzilla offers three access modes, each with different trade-offs between user freedom and admin control. The presenter calls Full Read Only the most popular choice — contacts are locked down on the device so nobody can edit or delete them, which is ideal for a curated company directory.
Full Read/Write gives end users the ability to add new contacts and edit existing numbers — useful when you want the address book to evolve from the field. If you pick this, there's an additional Block Delete option that prevents users from removing contacts entirely, which is a sensible safety net.
Selective Read Only is the most surgical: instead of pushing the whole address book, you nominate one or more labels and only contacts tagged with those labels land on the device. Perfect for sending the sales team only sales contacts, or pushing emergency contacts to all-hands while keeping internal-only lists private.
- Full Read Only — contacts are locked, no edits or deletes (most popular choice)
- Full Read/Write — end users can add contacts and edit numbers
- Block Delete — extra option available with Read/Write to prevent deletions
- Selective Read Only — only push contacts matching specific labels you choose
- You can pick as many labels as you want for selective mode
Append a 🔒 lock emoji to the connection label when using Read Only — the presenter does this to give end users an immediate visual cue that the contacts are uneditable.
Step 5: Set device count and download the mobile config
Enter the Number of Devices you're rolling out to — this should match how many iPhones are in your Workspace ONE Smart Group. Don't worry about getting this exactly right; you can come back and edit the number later as your fleet grows or shrinks.
Click Create and Contactzilla generates the device connection. Your new connection appears in the list with a Download action — click it to grab the .mobileconfig file. This file lands in your browser's default downloads folder and is what you'll upload to Workspace ONE in the next step.
- Enter the iPhone count in Number of Devices
- Click Create to generate the device connection
- The connection appears in your device connections list
- Click Download to save the
.mobileconfigprofile to your computer - The device count is editable later — no need to be exact upfront
Keep the downloaded .mobileconfig in a known location — you'll be uploading it directly into Workspace ONE in the next step, and you may want to retain it for audit purposes.
Step 6: Upload the profile into Workspace ONE UEM
Switch back to Workspace ONE UEM. From the left navigation, go to Resources → Profiles. Click the Add dropdown and choose Upload Profile.
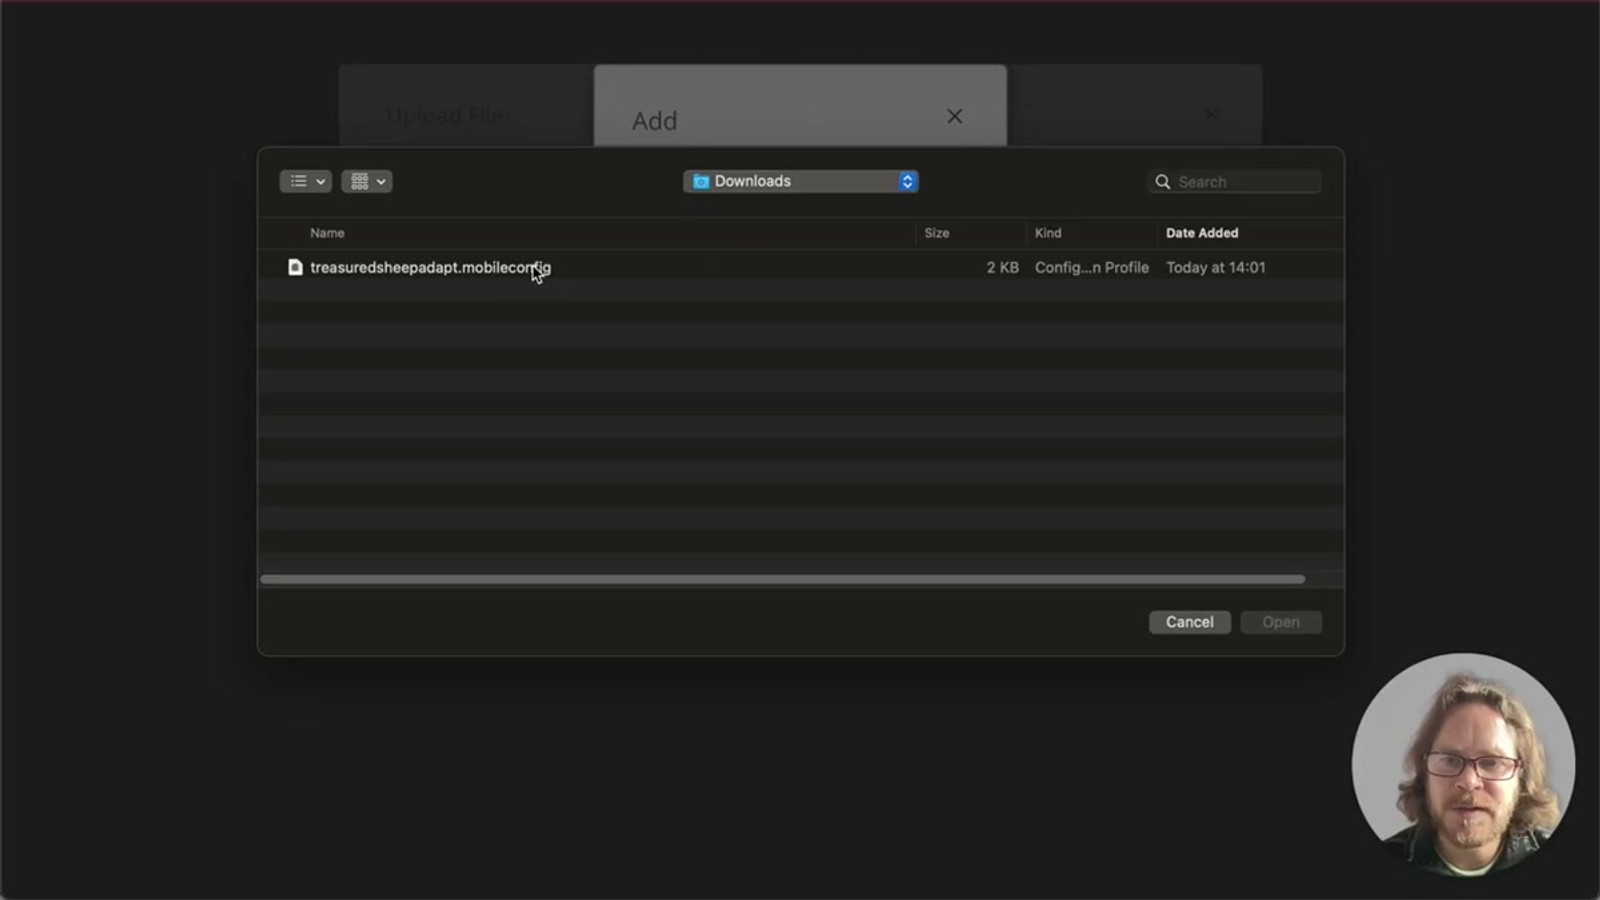
When prompted for the profile type, pick iOS and then Device Profile. Click Choose File and select the .mobileconfig you just downloaded from Contactzilla — it'll be sitting in your downloads folder. Click Save, then Continue.
Workspace ONE automatically generates a profile name that includes your Contactzilla address book name — this is genuinely useful if you plan to roll out multiple address books later, because each profile is uniquely identifiable at a glance.
- Navigate to Resources → Profiles in Workspace ONE UEM
- Click the Add dropdown and select Upload Profile
- Choose iOS as the platform
- Select Device Profile (not user profile)
- Click Choose File and select the
.mobileconfigfrom your downloads - Click Save, then Continue
The auto-generated profile name includes the address book name — leave it as-is when rolling out multiple address books so you can distinguish them in the Workspace ONE console.
Step 7: Assign the profile to your Smart Group and publish
On the profile configuration screen, the one thing you must do is assign the profile to your device Smart Group. Add your Contactzilla iOS devices group (or whatever you've named your iOS Smart Group) in the assignment field.
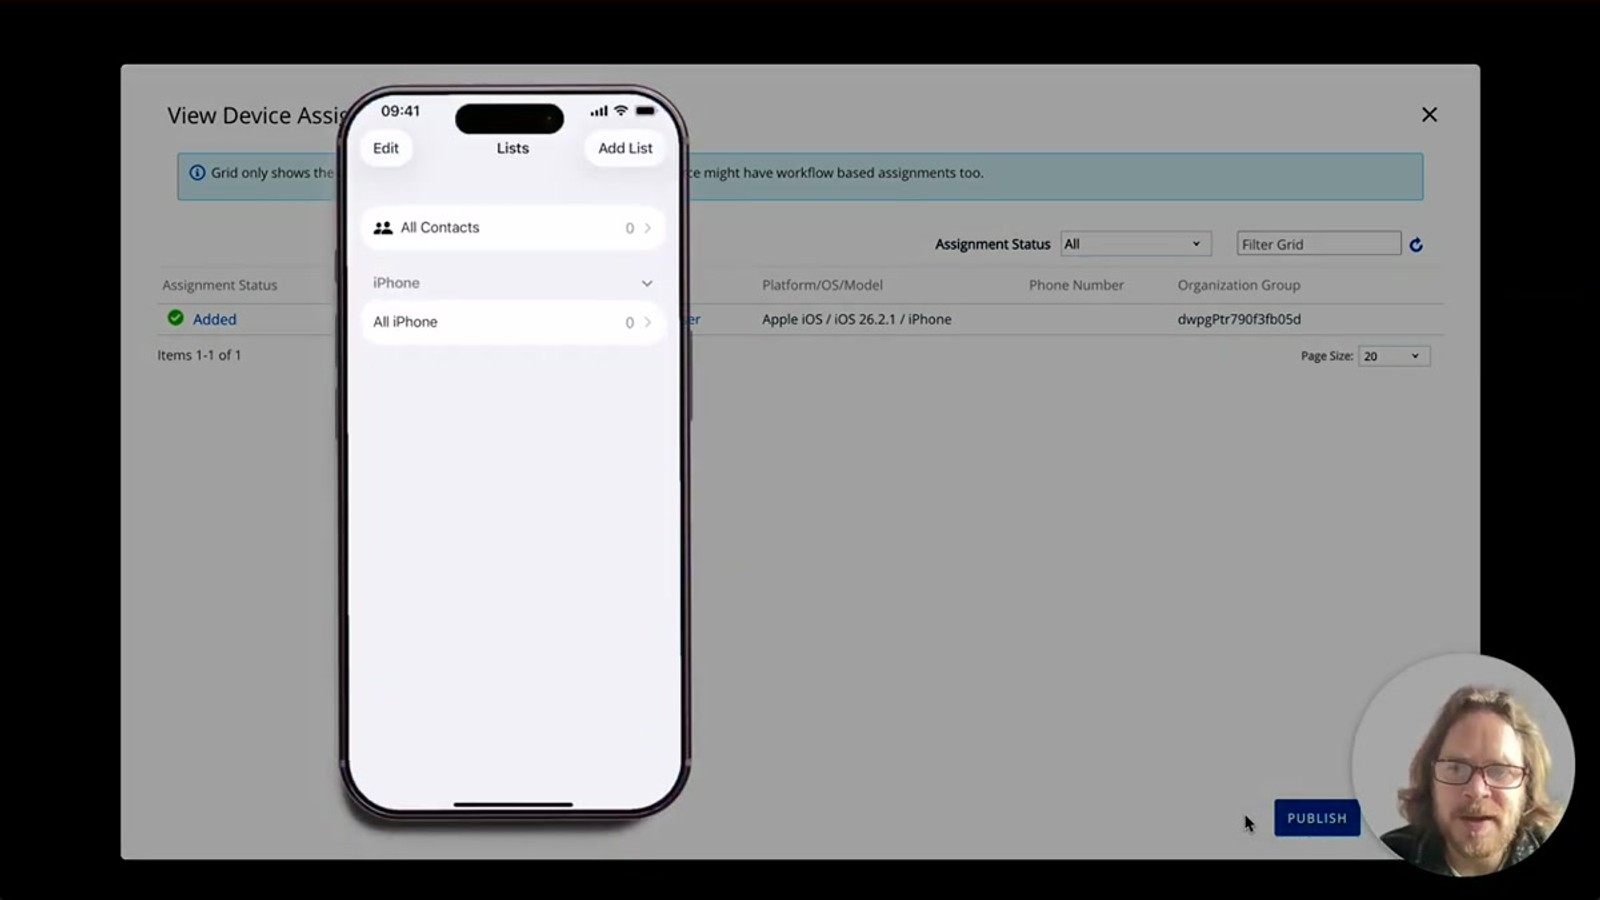
Click Save and Publish. The profile pushes out to every enrolled iPhone in the Smart Group, and within seconds those devices receive the CardDAV configuration. The native Contacts app on each iPhone starts populating immediately — contacts arrive organised into lists that mirror your Contactzilla labels.
- Add your iOS Smart Group to the profile's assignment field
- Click Save and Publish
- Profile pushes to all enrolled iPhones in the Smart Group
- Contacts appear in the native iPhone Contacts app within seconds
- Contactzilla labels appear as lists in the Contacts app
Pull up an iPhone screen before you hit publish so you can watch the contacts populate in real time — it's a great way to demo the rollout to stakeholders.
Step 8: Verify live two-way sync
Once the profile is deployed, the sync stays live — any edit you make in the Contactzilla dashboard propagates automatically to every device. To prove it in the demo, the presenter opens the Emergency Contact list on the iPhone, then jumps back to Contactzilla, filters to the same group, opens a contact, and adds something to the name field.
After clicking Save in Contactzilla, returning to the managed device shows the change has already updated. No re-sync, no re-publish, no manual refresh — the Workspace ONE-managed iPhone reflects the new contact data automatically. This is the moment that proves the rollout is complete: Contactzilla is now the single source of truth for company contacts on every managed iPhone.
- Open a list (e.g. Emergency Contacts) on a deployed iPhone to confirm contacts have arrived
- Filter to the same group in the Contactzilla dashboard
- Edit a contact and click Save
- Return to the iPhone — the change is already reflected
- No manual refresh or re-publish required
Live sync makes Contactzilla your single source of truth — train your team to update contacts in the Contactzilla dashboard, never directly on a device.
.mobileconfig in Contactzilla → upload to Workspace ONE → assign to Smart Group → Save and Publish