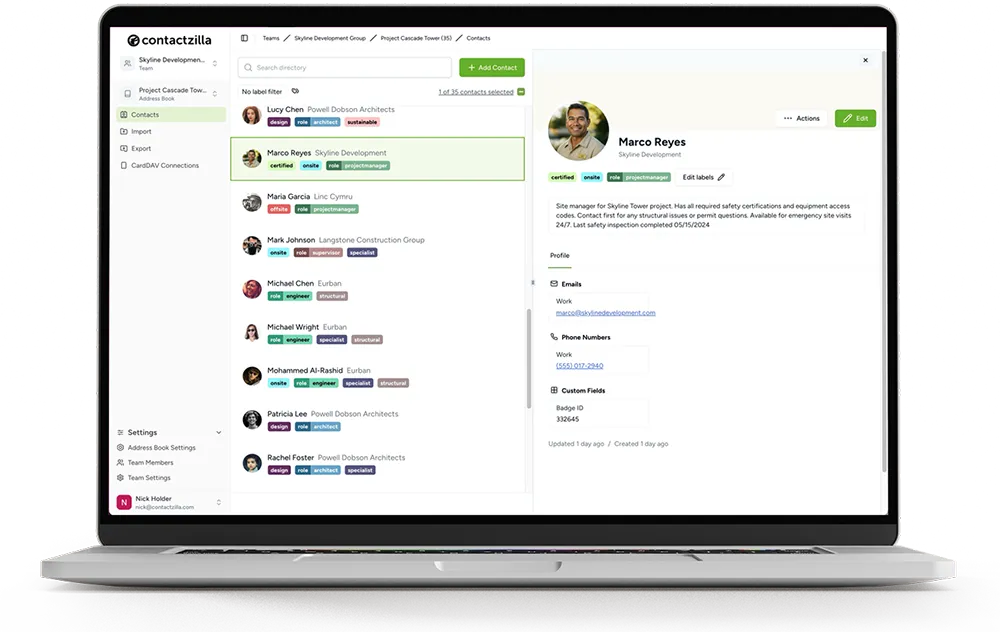
Tag, Filter, and Deploy — Send Only the Right Contacts to Every Device
Use standard labels for free-form tagging and group labels for mutually-exclusive categories like sites or departments. Then deploy a filtered slice of your address book to any iOS or Android device.
Labels in Contactzilla do more than just tidy up your address book — they're the foundation for filtering contacts, segmenting them by role, department, or location, and controlling exactly which contacts land on which devices when you deploy via MDM or CardDAV. This walkthrough covers both standard labels (apply as many as you like) and group labels (mutually exclusive, perfect for site or department membership).
By the end of this guide you'll know how to add labels to one contact or many at once, filter the address book using AND or OR logic across multiple labels, and configure a selective read-only device connection so a particular phone only ever receives the contacts you intend it to see. That last piece is what makes labels so powerful for frontline teams, shared devices, and departmental phones — you stop sending the entire address book everywhere and instead deliver exactly the right slice.
Everything shown works identically on iOS and Android: labels appear as lists on the device, and selective read-only sync keeps each phone scoped to its assigned label set.
Add a label to a single contact
Open any contact and click Edit labels. From here you have two options: pick an existing label from the dropdown list, or create a brand new one on the fly without leaving the contact.
To create a new label inline, just type the label name into the input. You can also pick a color for the label at the same time — colors make it easier to scan the contact list visually once you have several labels in play. Click Add label to commit it, and the new label is now both attached to this contact and available to apply to any other contact in the address book.
Labels created this way are standard labels: a single contact can carry as many of them as you want. This is the right pattern for tags that overlap, like facilities, emergency contact, or vendor.
- Click Edit labels on any contact to open the label picker
- Type a new label name to create it on the fly — no separate admin screen needed
- Pick a color when creating the label for visual scanning
- Click Add label to attach it to the current contact and add it to the global label list
Standard labels stack — a contact can have any number of them at once. Use them whenever a contact might legitimately fit multiple categories.
Filter contacts by one or more labels
To find every contact carrying a given label, open the label filter at the top of the address book and select the label. The list immediately narrows to only contacts that have it.
You can stack multiple labels into the filter. By default the filter uses OR logic — so picking facilities and emergency contact shows every contact tagged with either label. To switch to AND logic, change the operator in the filter so the list only shows contacts that carry both labels at once.
This is the fastest way to answer questions like "who's on the emergency contact list for the facilities team?" without writing a query or exporting a CSV.
- Open the label filter above the contact list and click a label to apply it
- Add a second label to the same filter to combine conditions
- Default logic is OR — match contacts with any of the selected labels
- Switch to AND to require contacts to carry every selected label
- Use the Clear option to reset the filter before moving on
Create group labels for mutually-exclusive categories
Standard labels let a contact belong to many at once — but sometimes you need single-membership categories, like which site a person works at or which department they're in. That's what group labels are for.
To create a group label, use a prefix:value format with a colon separating the two parts. For example, instead of two separate labels north campus and east campus, create site:north campus and site:east campus. The shared site: prefix tells Contactzilla these labels belong to the same group.
The magic happens when you apply a second label from the same group: the old one is automatically replaced rather than added alongside. So if a contact tagged site:north campus gets the site:east campus label applied, they end up only at east campus — never both. This is exactly the behavior you want for role, department, location, or any other field where a contact can only be in one bucket at a time.
- Format:
prefix:value— e.g.site:north campus,department:sales,role:manager - All labels sharing a prefix form a group
- Applying a new label from the same group replaces the existing one
- Perfect for sites, departments, roles, regions — anywhere single-membership matters
- Standard and group labels can coexist on the same contact
If you find yourself frequently having to remove a label before adding another from the same category, that's a signal you should convert those labels to a group label with a shared prefix.
Apply labels to multiple contacts at once
Labelling contacts one at a time gets old fast. To label in bulk, use multi-select: shift-click to select a range of adjacent contacts, or Cmd-click on Mac (Ctrl-click on PC) to select non-adjacent contacts individually.
Once you've selected your contacts, click the multi select link at the top of the list. Your selection moves to the right-hand panel, where you can apply a label to every selected contact in one operation. This is how you go from an unlabeled address book to a fully tagged one in minutes rather than hours.
The same bulk action respects group labels — apply a group label to a multi-selection and each contact's prior group membership gets replaced, not duplicated.
- Shift-click to select a range of contacts
- Cmd-click (Mac) or Ctrl-click (PC) to pick non-adjacent contacts
- Click the multi select link at the top to confirm the selection
- Selected contacts appear in the right-hand panel for bulk actions
- Apply a label and it's added to every selected contact at once
Set up a selective read-only device connection
This is where labels really earn their keep. Open Device connections in the left sidebar — you can now create a connection that sends only a subset of the address book to specific devices, instead of pushing every contact everywhere.
Start a new iOS device connection. Choose your deployment method — in the video this is set to MDM so the connection rolls out automatically to managed devices. For the access level, choose Selective read only. This is the setting that unlocks per-label filtering.
Next, pick the labels that define which contacts should be sent over this connection. Only contacts carrying one of the chosen labels will sync to the device. Finally, enter the number of devices you're deploying to so Contactzilla can provision the connection appropriately.
- Navigate to Device connections in the left sidebar
- Create a new iOS device connection (Android works the same way)
- Assign deployment method — MDM for managed rollouts
- Set access level to Selective read only
- Select the labels that scope this connection's contact set
- Enter the number of devices you're deploying to
Selective read-only is ideal for shared devices, frontline teams, departmental phones, or any situation where different groups need different contact lists from the same master address book.
Verify the deployment on iOS and Android
Once the selective read-only connection is in place, the device only ever sees the contacts that match the chosen labels. On iOS, the filtered contacts appear in the native Contacts app exactly as if they were the user's own contacts — but the user can't edit or delete them, which is what the read-only access level enforces.
On Android, Contactzilla deployments are fully supported as well, and the labels themselves show up as lists in the device's contact app. That means your end users get the same filtering and grouping experience on their phone that you set up in the Contactzilla admin.
This end-to-end flow — tag in Contactzilla, scope by label in the connection, deliver to device — is what lets you maintain a single master address book and still deliver tailored slices to dozens or hundreds of phones.
- iOS: contacts appear in the native Contacts app, read-only
- Android: labels surface as lists in the device's contact app
- Only contacts matching the connection's labels appear on the device
- Removing a label in Contactzilla removes the contact from the device on next sync
- One master address book → many tailored device deployments
Why label-driven sync matters
Organize once, deploy many times
Tag contacts once with the right labels and reuse those tags across every device connection — no duplicate address books to maintain.
Right contacts, right team
Frontline teams, departments, and shared devices each get only the contacts relevant to them, with no information overload.
Read-only by design
Selective read-only access keeps deployed contacts safe from accidental edits or deletions on end-user devices.
iOS and Android, identical workflow
The same labels and connections work across both platforms — Android even surfaces labels as native lists on-device.
Find anyone fast
Combine labels with AND/OR logic in the admin to answer questions like 'who's on-call for east campus facilities?' instantly.
Standard and group labels together
Mix flexible standard tags with mutually-exclusive group labels to model both overlapping attributes and strict categories.