Push Shared Contacts to Every iPhone — ManageEngine + Contactzilla
Upload a single mobileconfig file into ManageEngine MDM and watch your entire Contactzilla address book appear in the native iOS Contacts app across all managed devices — organized by label, syncing changes in real time.
ManageEngine Mobile Device Manager Plus is a popular MDM solution that works seamlessly with Contactzilla to deploy shared address books to iPhones. One reason it's gaining traction with smaller organizations is that it offers a fully featured free edition for up to 25 devices — quite unique in the MDM space.
In this walkthrough, you'll learn the complete process: generating a mobileconfig file from Contactzilla, uploading it as a custom iOS profile in ManageEngine, and assigning that profile to a device group. The result is your Contactzilla contacts appearing directly in the native iOS Contacts app, organized by label, with changes syncing automatically.
This guide assumes you already have iPhones enrolled in ManageEngine and a device group configured. If you haven't done that yet, set up your ManageEngine instance and enroll your devices first, then come back to follow these steps.
Select your address book and open Device Connections
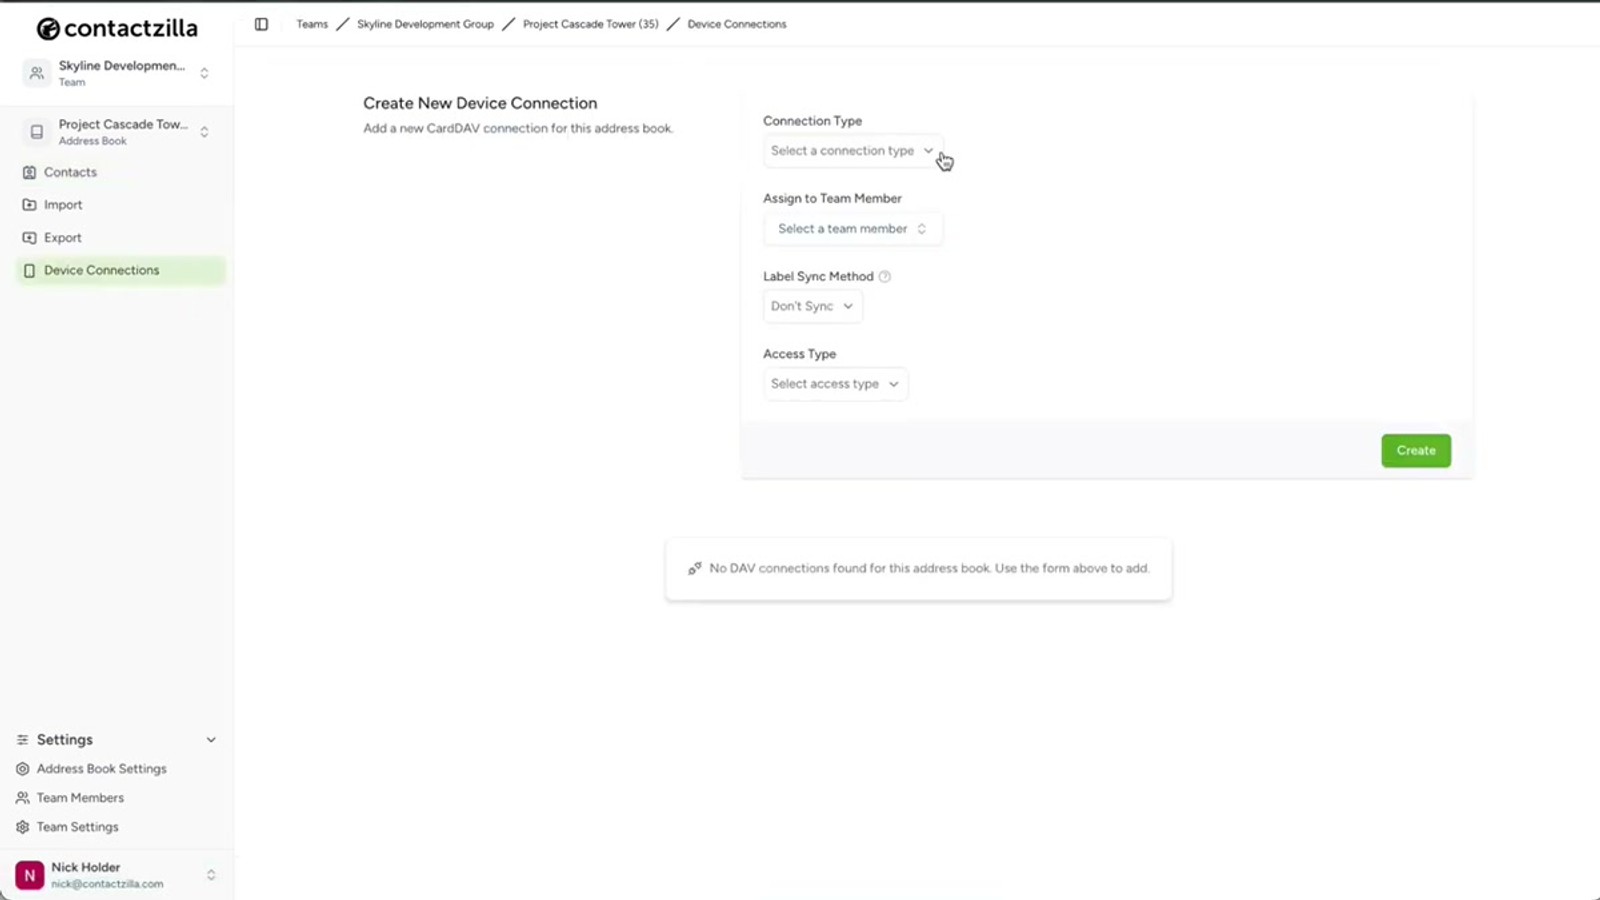
Start in the Contactzilla dashboard by clicking on the address book you want to deploy to your managed iPhones. In the video, the example address book is called Project Cascade Tower.
Once you're inside the address book, click on Device Connections. From the Connection Type dropdown, select iOS. This tells Contactzilla to generate an iOS-compatible mobileconfig file rather than a configuration for Android or another platform.
- Navigate to your Contactzilla dashboard
- Click the address book you want to deploy
- Click Device Connections
- Select iOS from the Connection Type dropdown
Create an MDM user for device-only access
The next step is to assign the connection to a team member. In Contactzilla, you can assign a connection directly to any individual team member — useful if they'll scan a QR code and set it up themselves. But for MDM rollouts, you need a special kind of user called an MDM user, which is a device-only account.
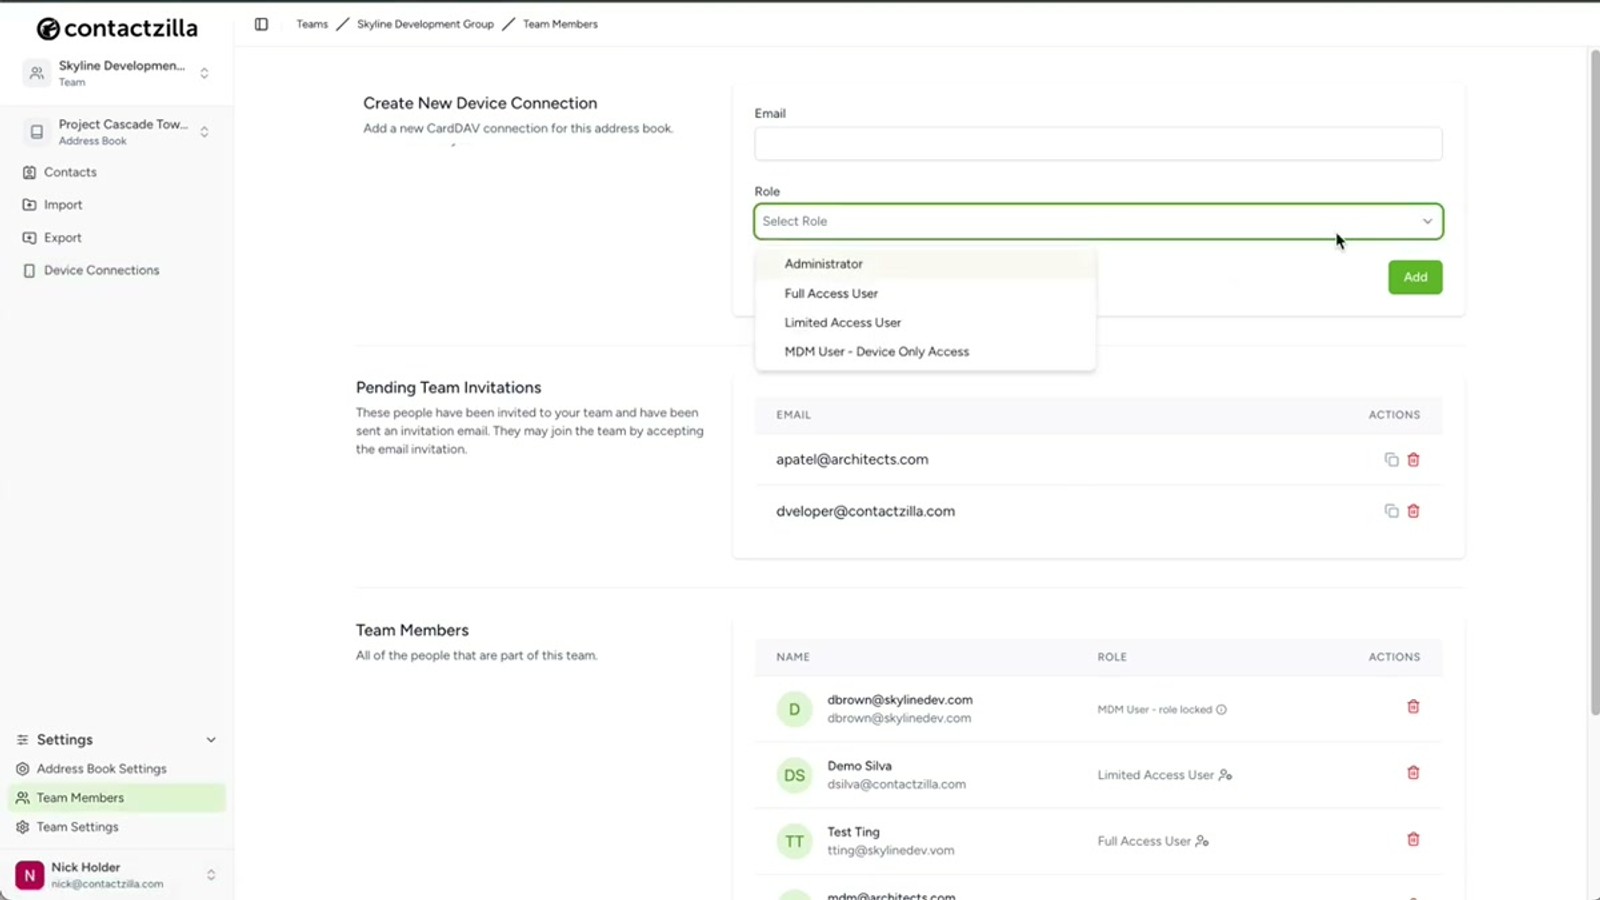
To create one, navigate to Team Members and click Add an MDM user (device only access). The email address field here is arbitrary — you can enter anything, as this isn't a real user account. It's just a placeholder for the device connection. Click Add and you'll see the MDM user appear under your team members list.
Head back to Device Connections and select the MDM user you just created from the user assignment dropdown.
- Go to Team Members in Contactzilla
- Click Add an MDM user (device only access)
- Enter any email address — it's arbitrary for MDM users
- Click Add to create the user
- Return to Device Connections and select your new MDM user
MDM users are device-only accounts designed specifically for managed rollouts. Don't assign a real team member's connection for MDM deployments — use a dedicated MDM user instead.
Choose the access level and configure label sync
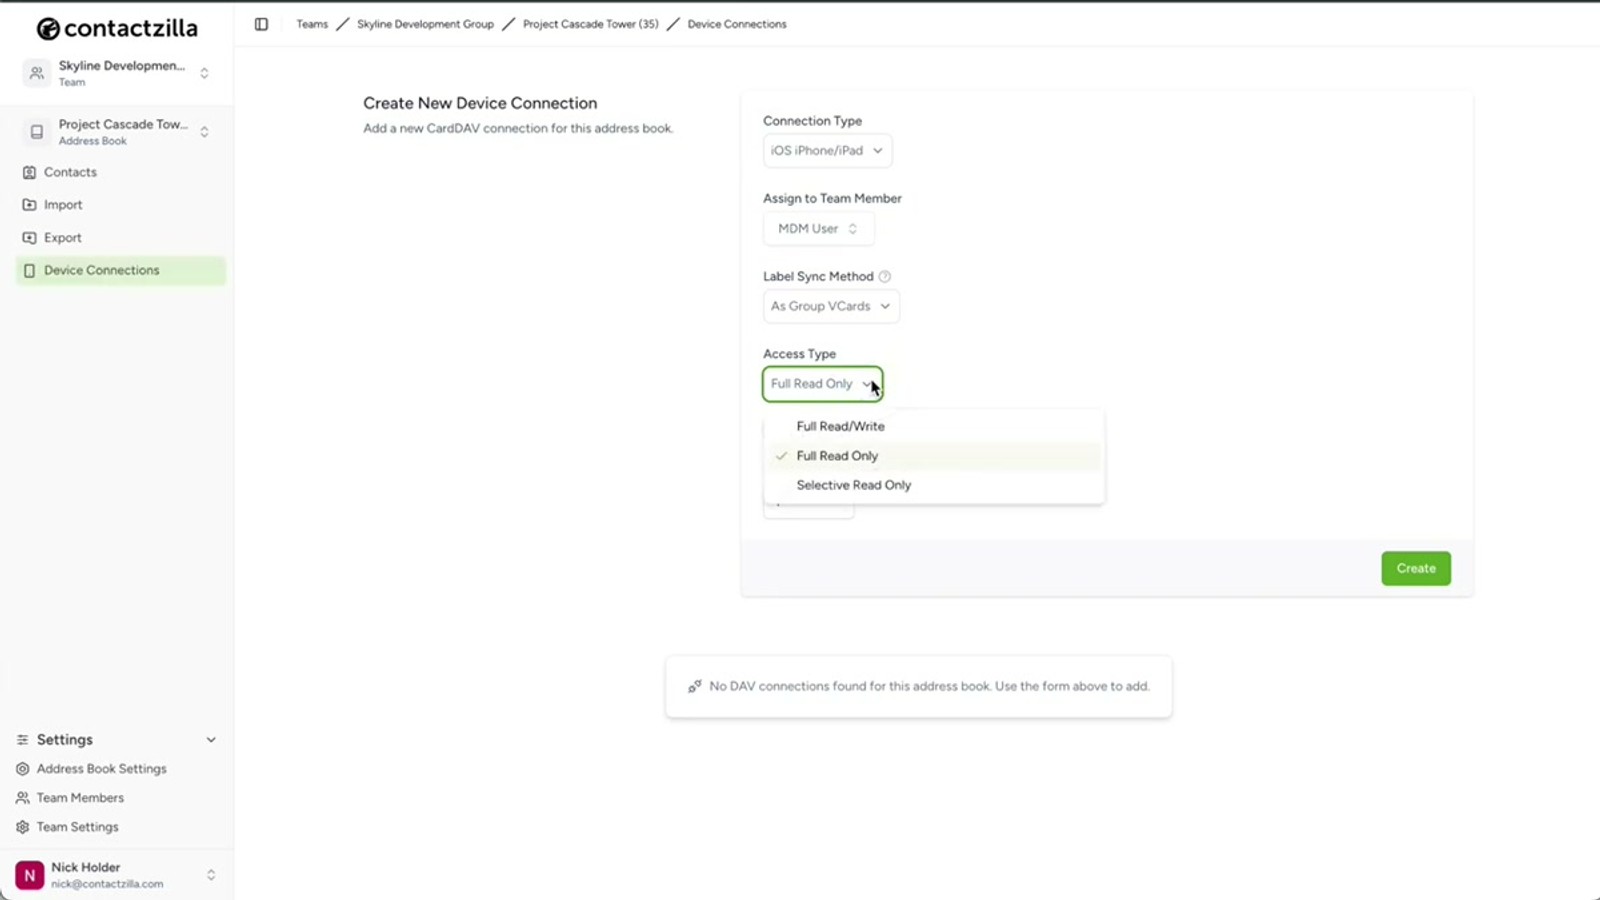
Leave Label Sync on the default setting. Next, choose the access level for end users on their devices. You have three options:
Full Read-Only is the most popular choice for managed rollouts because it prevents any accidental changes to your master contact list. Contacts appear on the device but users cannot edit or delete them.
Full Read-Write gives end users the ability to edit contacts on their devices. If you select this, Contactzilla offers a handy sub-option to allow editing but still prevent users from deleting contacts — a useful middle ground.
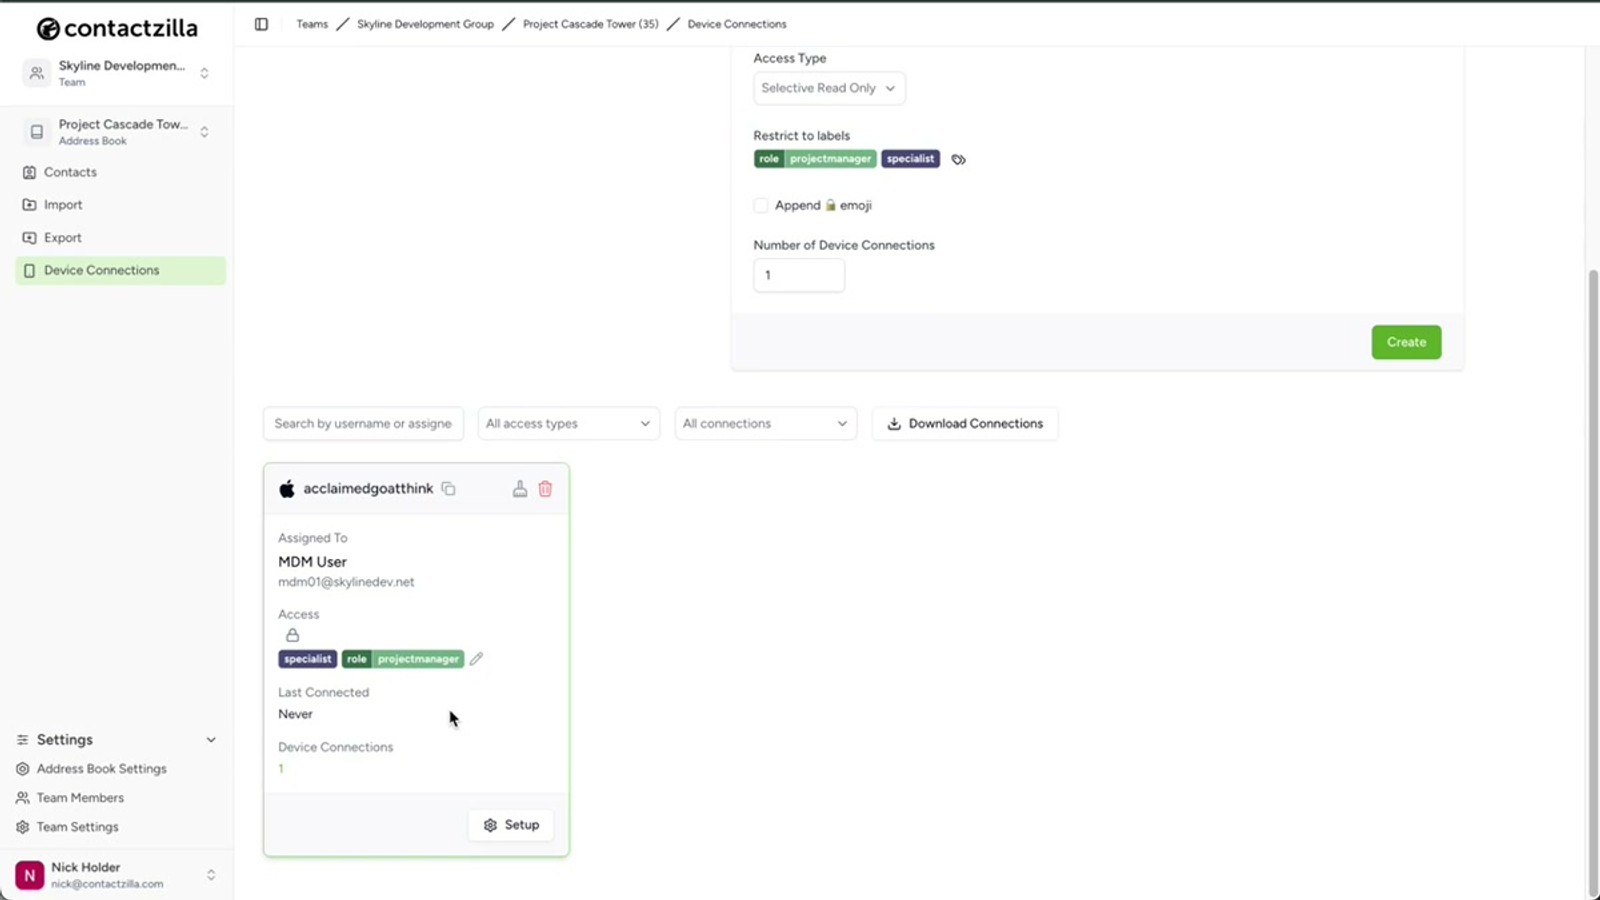
Selective Read-Only is a particularly powerful feature. Instead of deploying the entire address book, you can choose one or more labels and only contacts tagged with those labels are sent to devices. This lets you send different subsets of your address book to different device groups — for example, only field-relevant contacts to field workers.
- Leave Label Sync on default
- Full Read-Only — most common for MDM; prevents all changes
- Full Read-Write — allows editing; optional toggle to prevent deletions
- Selective Read-Only — deploy only contacts matching specific labels
- Choose your access level and click Create
Selective Read-Only is ideal when different teams need different contacts. Create separate device connections with different label filters, then assign each to the appropriate ManageEngine device group.
Set device connection count and download the mobileconfig file
Before creating the connection, set the number of device connections to match the size of your rollout. This should correspond to the number of devices you plan to deploy the address book to.
Click Create to generate the device connection. Under the newly created connection entry, click Setup. This reveals a download link for the mobileconfig file — the iOS configuration profile that contains everything ManageEngine needs to deploy your Contactzilla address book. Download this file and save it somewhere accessible; you'll upload it to ManageEngine in the next step.
- Set the number of device connections to match your device count
- Click Create to generate the connection
- Click Setup under the new device connection
- Download the mobileconfig file to your computer
Create a new iOS profile in ManageEngine
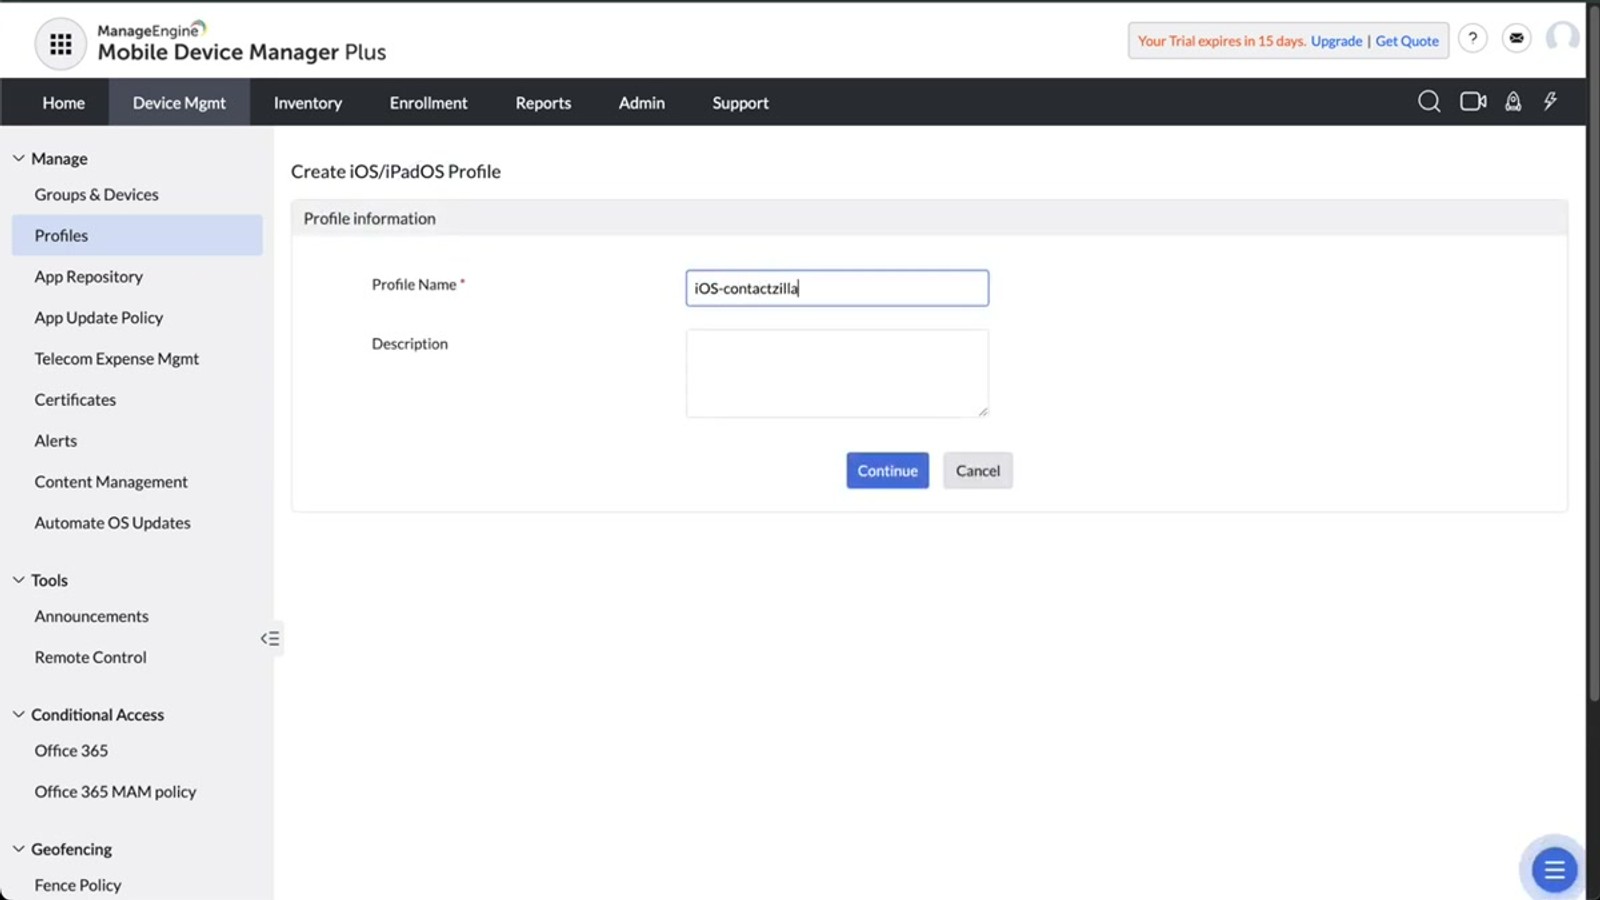
Switch over to ManageEngine Mobile Device Manager Plus. Navigate to the Device Management tab, then select Profiles from the left-hand menu. Click the Create Profile dropdown and choose iOS.
For the Profile Name, use a descriptive name that references the Contactzilla address book. In the video, the name used is iOS Contactzilla Project Cascade Tower. This naming convention is especially useful if you plan to roll out multiple address books later — you'll be able to tell them apart at a glance.
Click Continue to proceed to the profile configuration screen.
- Go to Device Management → Profiles in ManageEngine
- Click Create Profile → iOS
- Enter a descriptive Profile Name (e.g.,
iOS Contactzilla Project Cascade Tower) - Click Continue to proceed to configuration
Name your ManageEngine profiles after the Contactzilla address book they deploy. When you have multiple address books rolling out to different groups, clear naming saves confusion.
Upload the mobileconfig as a Custom Configuration
On the profile configuration screen, scroll all the way down the left-hand sidebar until you reach Custom Configuration. Click on it to open the custom profile upload area.
Here you can either drag and drop or browse to upload the Contactzilla mobileconfig file you downloaded earlier. ManageEngine may display an informational message after upload — you can safely disregard this info message.
Click Save to save the profile, then click Publish to make it available for assignment to device groups.
- Scroll to the bottom of the left sidebar to find Custom Configuration
- Upload or drag-and-drop the Contactzilla .mobileconfig file
- Disregard any informational message that appears after upload
- Click Save, then click Publish
Don't be alarmed by the info message ManageEngine shows after uploading the custom configuration — it's safe to ignore and proceed.
Associate the profile with your device group
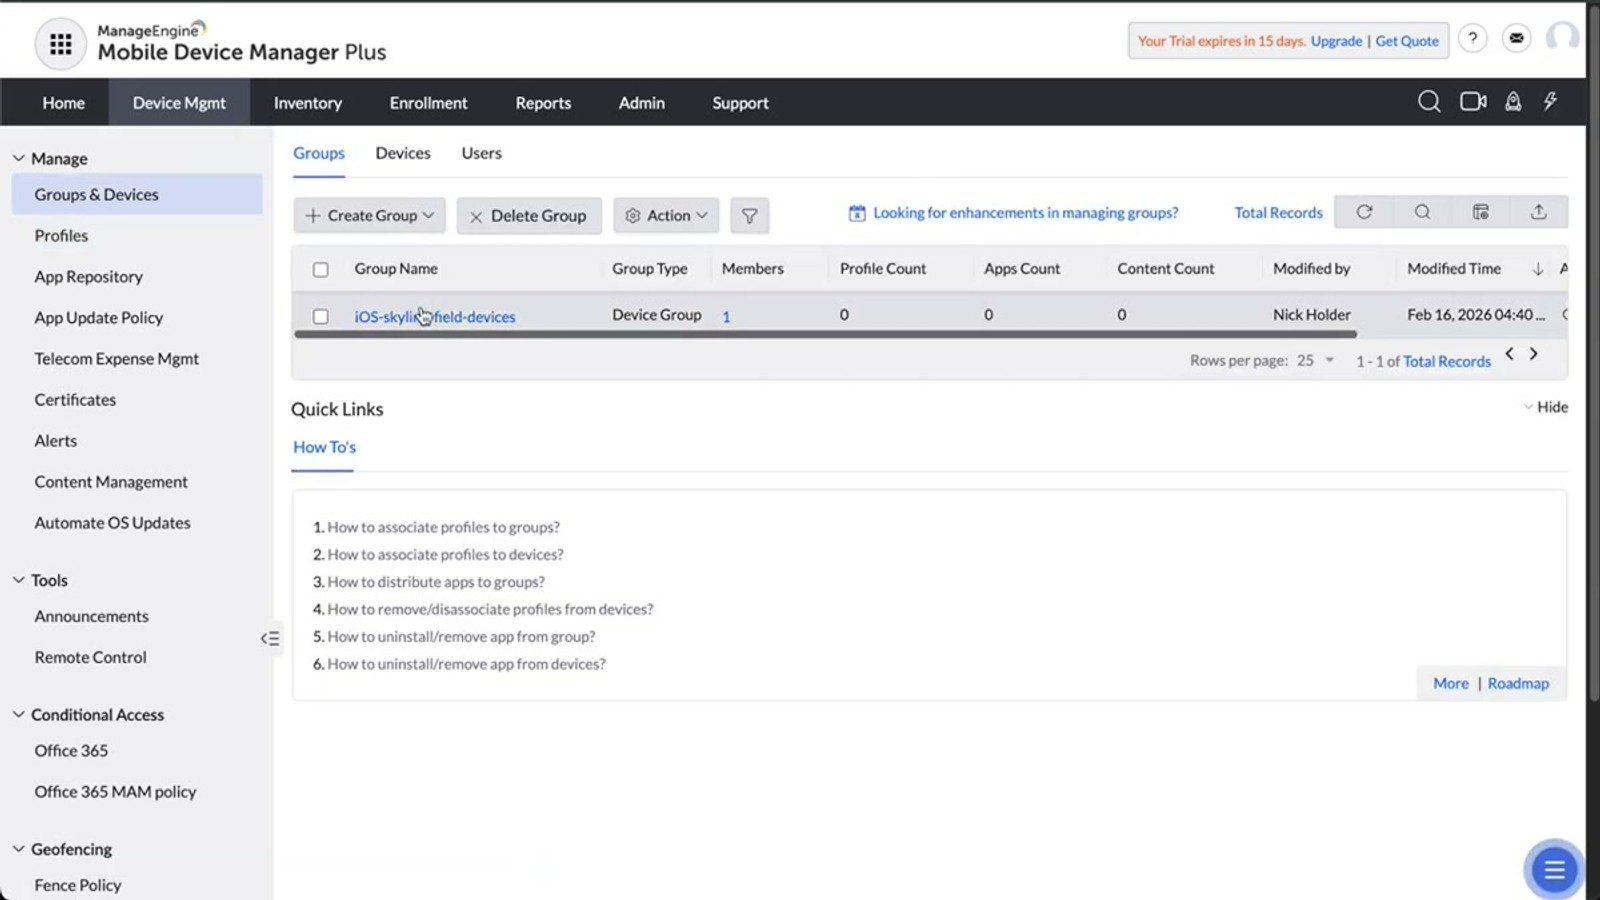
After publishing, ManageEngine presents an opportunity to associate the profile with a device group. Click the link at the top of the page to go to the group association screen.
Select your target device group — in the video this is called iOS Skyline Field Devices. From the Action dropdown, choose Associate Profile. On the next screen, select the profile you just created (e.g., iOS Contactzilla Project Cascade Tower).
Before clicking Associate, you can pull up one of the target iPhones to verify it currently has no Contactzilla address books or contacts. Click Associate and watch — the contacts will begin populating in the native iOS Contacts app almost instantly.
- Click the association link shown after publishing the profile
- Select your target device group
- From the Action dropdown, choose Associate Profile
- Select the Contactzilla profile you just created
- Click Associate to deploy
Verify contacts and test live sync on the iPhone
Once the profile is associated, the Contactzilla address book populates on the iPhone almost immediately. Open the native Contacts app on the device and you'll see your address book with all contacts present.
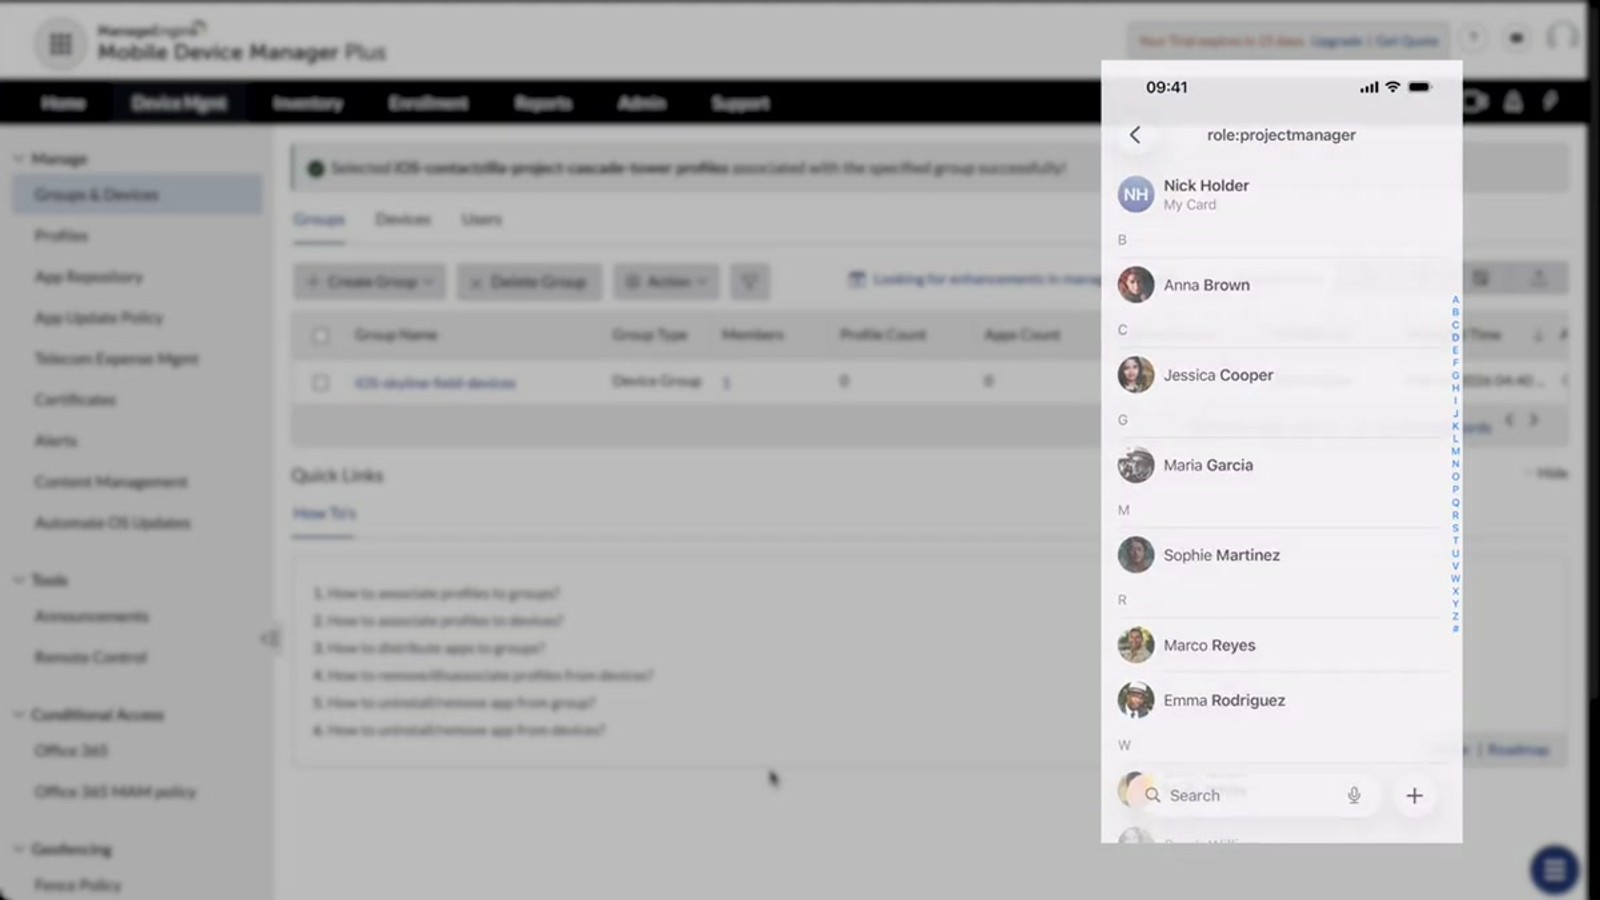
Contactzilla labels are presented as lists in the iOS Contacts app, so your contacts are organized exactly as they are in your Contactzilla dashboard. For example, a "Project Managers" label in Contactzilla becomes a "Project Managers" list on the phone.
To confirm live syncing works, go back to the Contactzilla dashboard, filter by a label (e.g., Project Managers), and make a change to a contact — such as editing Anna Brown's name. The change will deploy to all devices in the ManageEngine group automatically, and you'll see the update reflected on the iPhone almost immediately.
- Open the native Contacts app on the iPhone to verify
- Contactzilla labels appear as lists in iOS Contacts
- Contacts are organized by label just like in the Contactzilla dashboard
- Edit a contact in Contactzilla to verify real-time sync
- Changes propagate to all devices in the ManageEngine group automatically
Key Takeaways
iOS Contactzilla Project Cascade Tower) for clarity across multiple rollouts 
