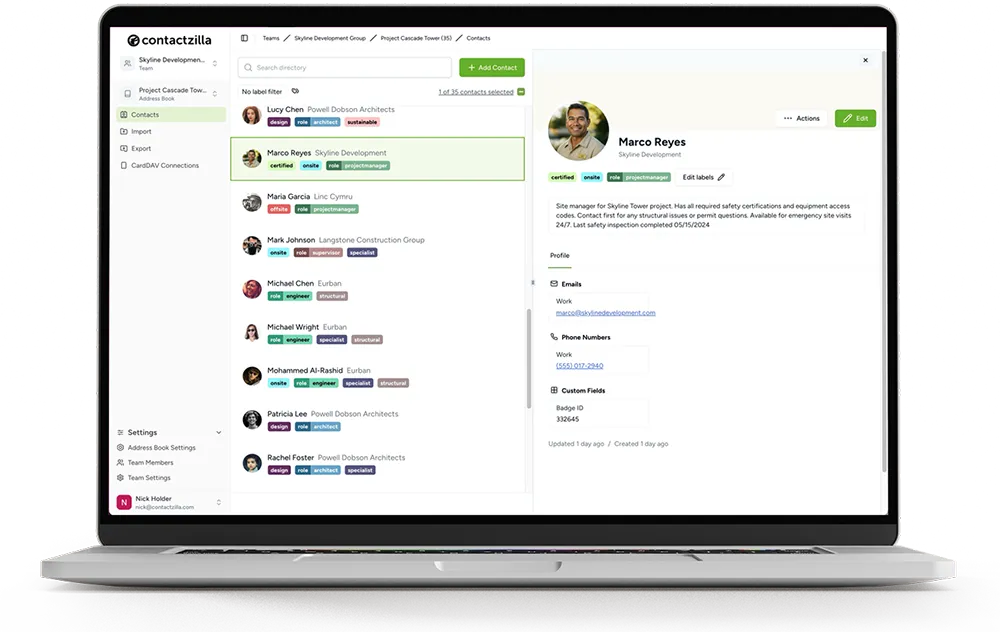
Turn Your Contact Directory Into a Drag-and-Drop Pipeline
Build lightweight CRM pipelines on top of your existing Contactzilla labels — no separate sales tool, no extra data silo, and every stage syncs straight to your team's phones.
Contactzilla's specialty is managing business contacts and deploying them to devices at scale — but the platform also includes a lightweight CRM view that lets you push those same contacts through a pipeline. There are no complex dashboards or sales analytics here. Instead, the CRM view gives your existing Contactzilla labels a second practical job: powering visual pipeline stages you can drag contacts across.
This walkthrough uses a real-world example — a school district address book tracking contractors and suppliers through an onboarding process — to demonstrate how to set up a pipeline, configure stages, move contacts between them, and verify that the labels created by the CRM view behave exactly like any other group label in your contact directory.
The key insight is that because every pipeline stage is just a standard label, anything you do in the CRM view immediately becomes visible in the contact directory and — critically — syncs to every mobile device connected to your Contactzilla account. That means a team member calling contractors from their iPhone sees the same Info Requested list that the admin built by dragging tiles on the dashboard.
Step 1: Open the CRM View and Create a New Pipeline
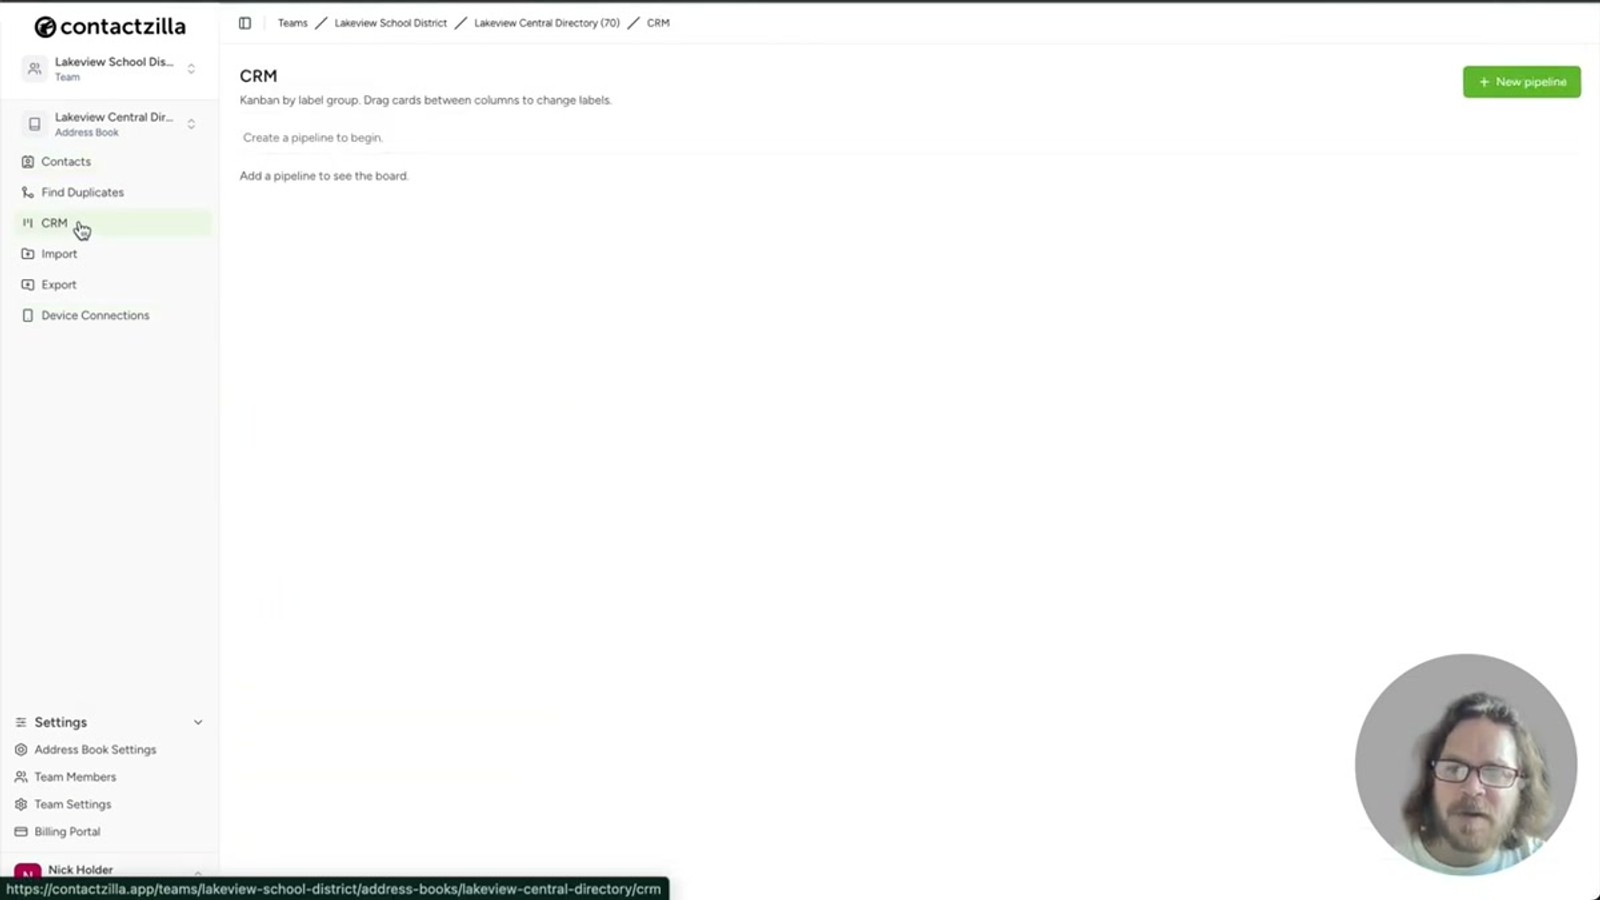
From the Contactzilla dashboard, navigate to the CRM view. This is where pipelines live — separate from your main contact directory but driven by the exact same underlying contacts and labels.
Click the New Pipeline button to start. In the example, the pipeline is named External Onboarding because it tracks contractors and suppliers being onboarded by a school district. Pick a name that reflects the workflow you're modeling (sales stages, recruitment pipeline, partner onboarding, etc.).
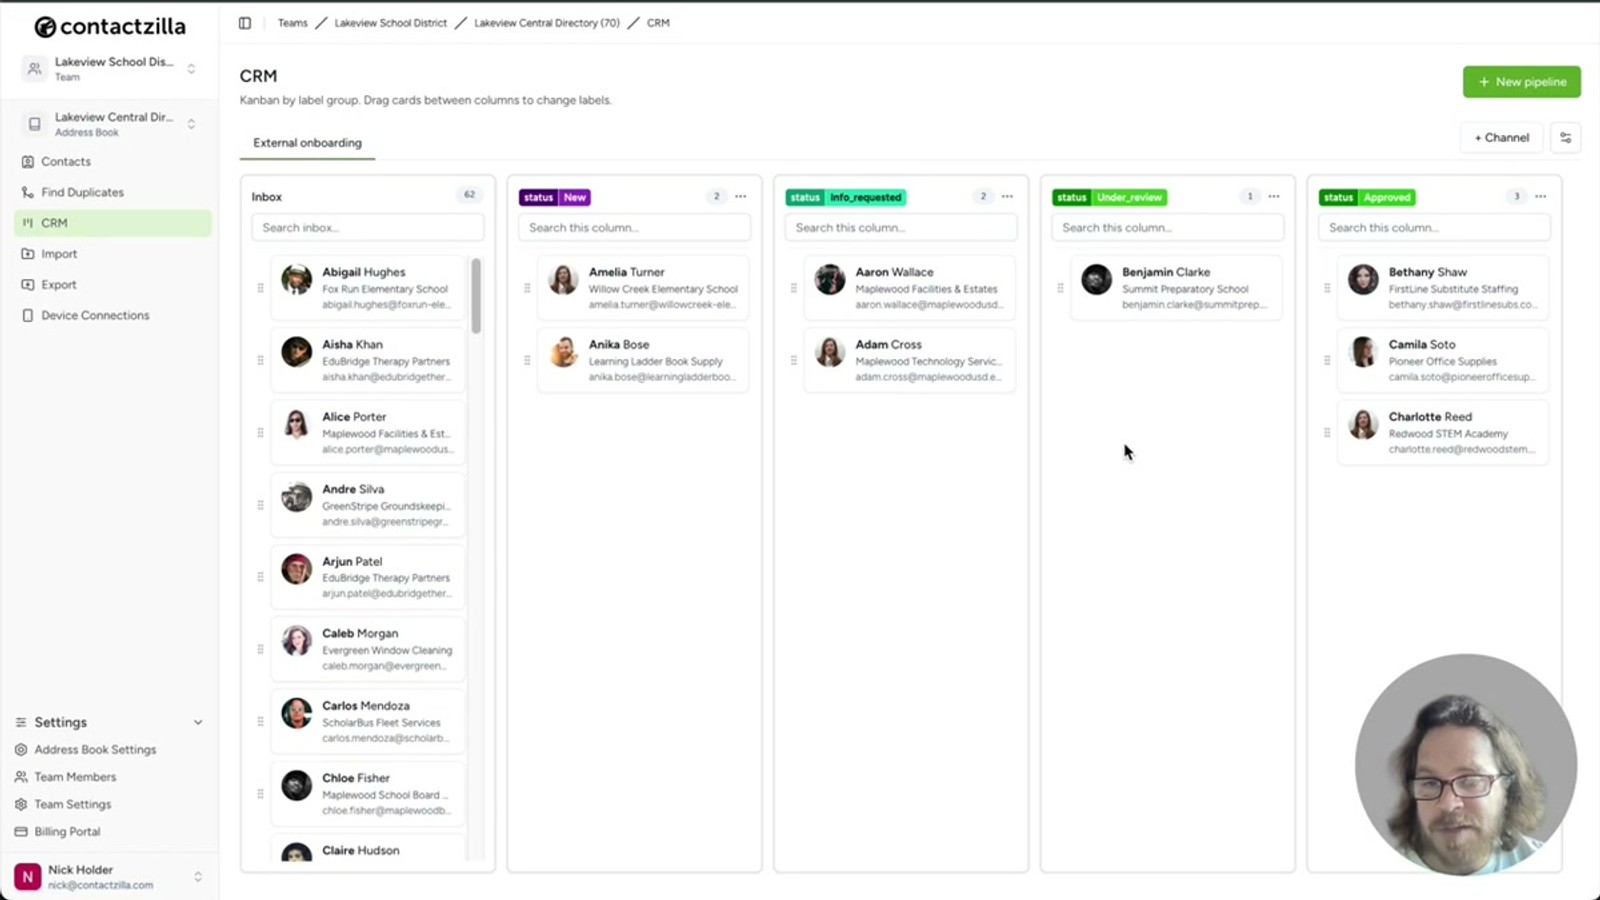
Next, you'll be asked to set a label prefix. The default prefix is status, and in most cases you should leave that as-is. The prefix is what every stage label will be namespaced under — so an Info Requested stage becomes a label like status:Info Requested in your directory, keeping CRM-generated labels grouped together and easy to find.
- Click New Pipeline to begin
- Name the pipeline after the workflow it represents (e.g.
External Onboarding) - Leave the label prefix as
statusunless you have a reason to change it - Every contact in your directory will appear in the Inbox column once the pipeline is created
The label prefix is what keeps your CRM stages tidy. Using status (the default) means all stage labels sort together in the directory, making them easy to find, filter on, and share with mobile devices.
Step 2: Add Channels to Represent Your Pipeline Stages
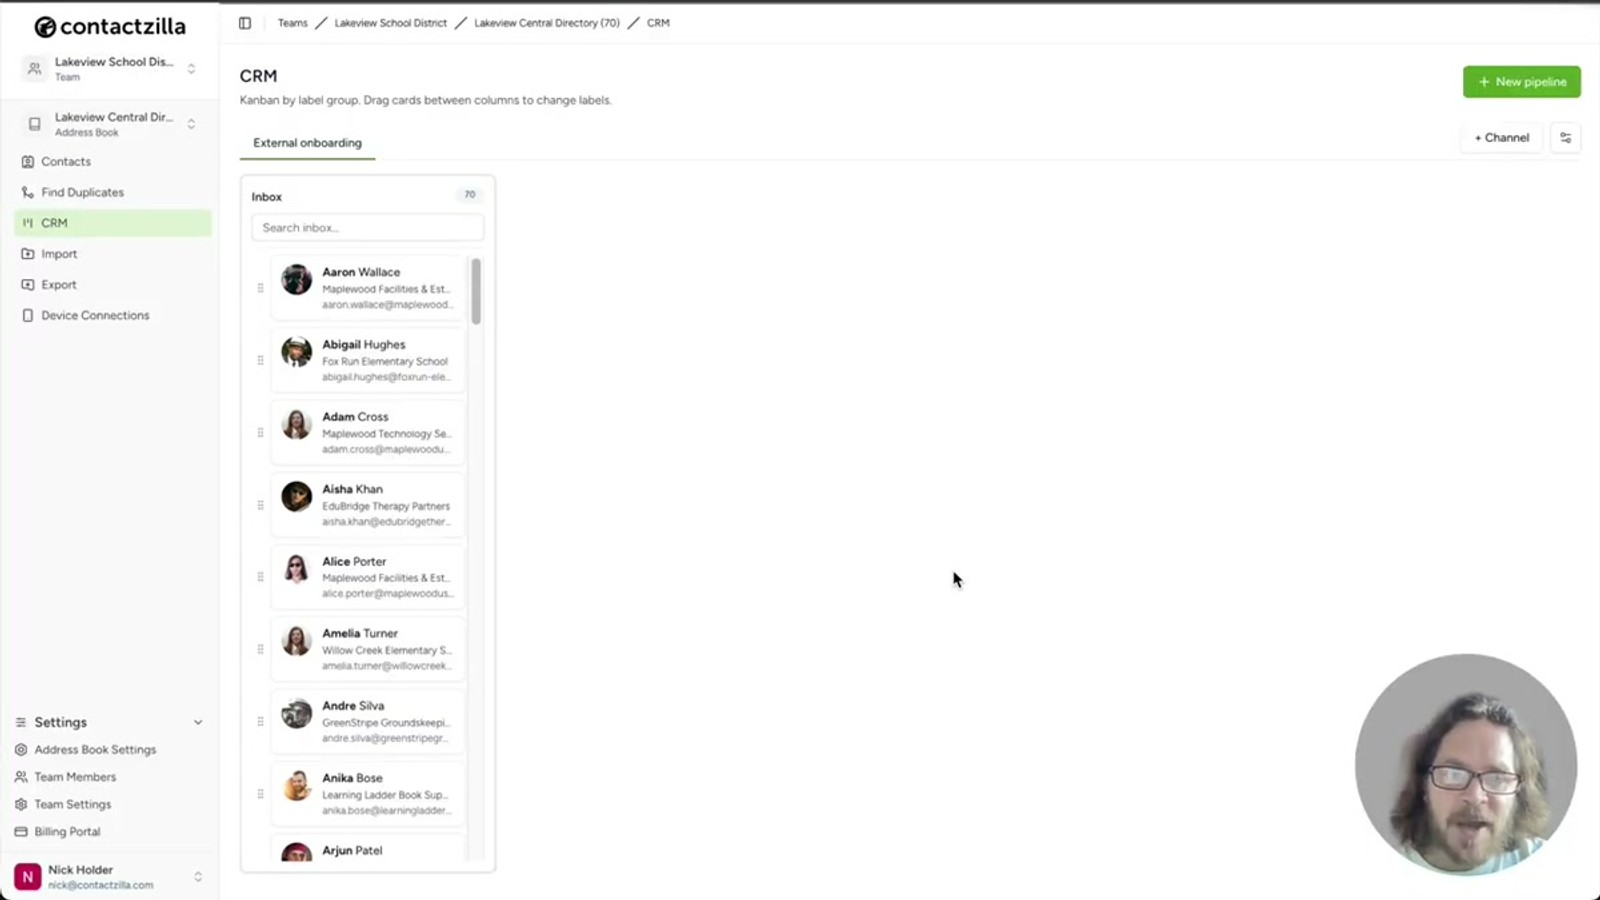
A fresh pipeline starts with a single Inbox column containing all your contacts. From there you build out the pipeline by adding channels — these are the columns that represent each stage of your workflow.
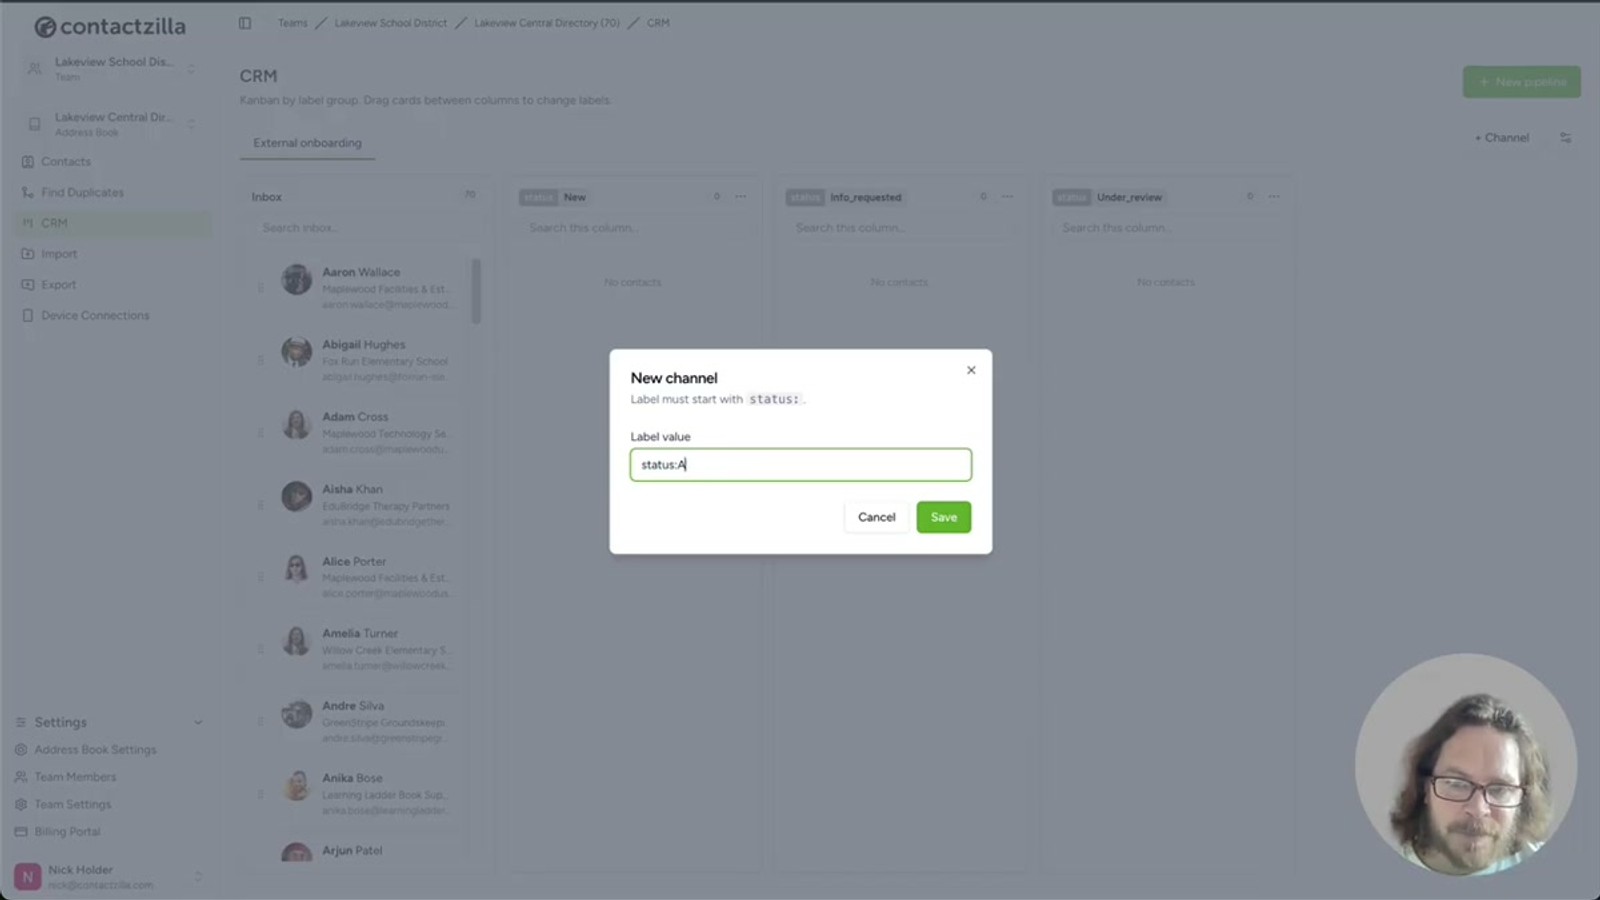
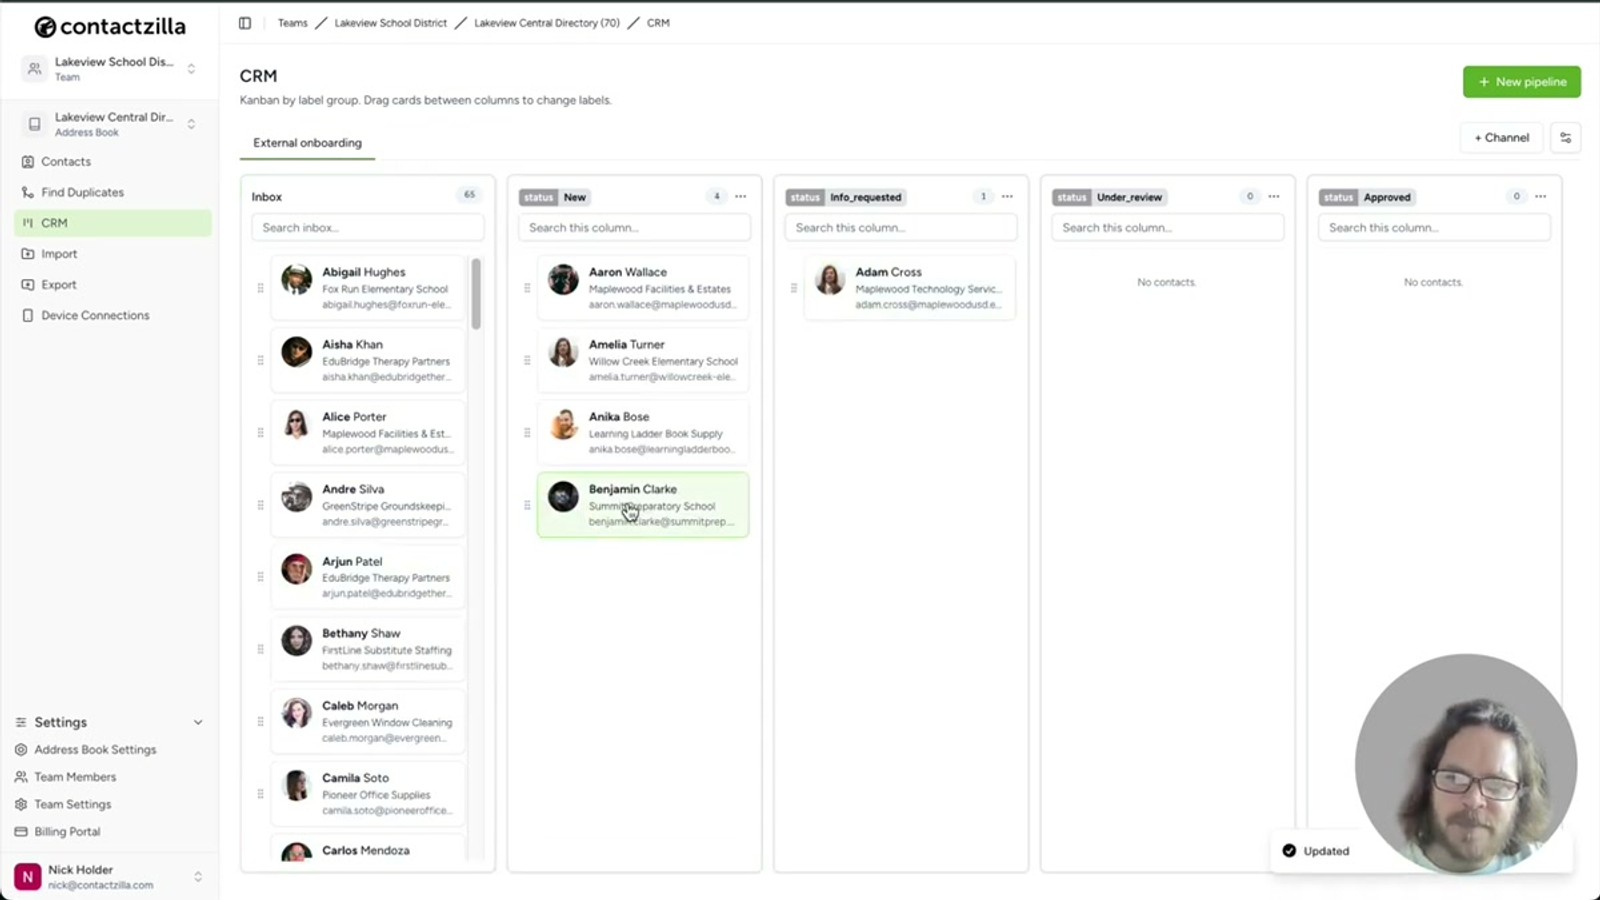
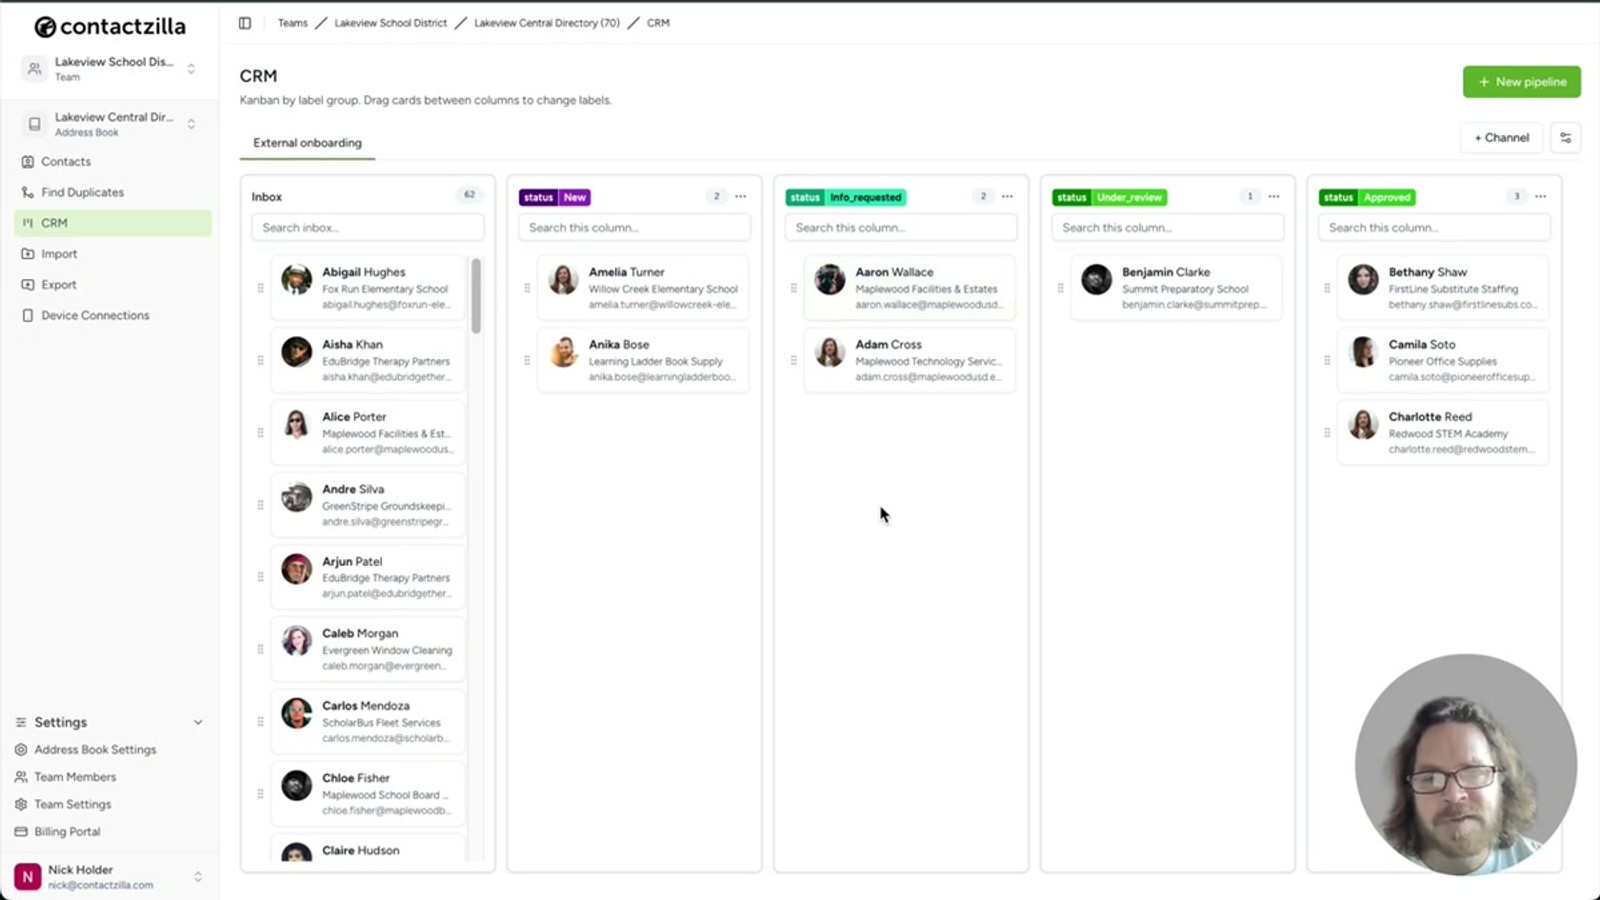
In the example, four channels are created for the External Onboarding pipeline: New, Information Requested, Under Review, and Approved. Each channel is added using the Add Channel button and named accordingly.
Think of channels as the visible labels of your workflow. They should map to clear, decision-driven states — "waiting on something specific", "ready for review", "complete" — rather than vague feelings. The cleaner your stages, the more useful the resulting labels are when you sync them to mobile or filter inside the directory.
- Pipelines start with an Inbox column holding every contact
- Use the Add Channel button to add each stage
- Example stages:
New,Information Requested,Under Review,Approved - Name channels after concrete workflow states, not vague statuses
Step 3: Drag Contacts Between Stages
Once your channels are set up, moving contacts through the pipeline is as simple as dragging the contact card from one column to another. There's no separate form, no status dropdown — just grab and drop.
In the example, Adam from Maplewood Technology has been asked to provide insurance documents that haven't arrived yet, so he's dragged into the Information Requested channel. Benjamin has returned all his paperwork but hasn't been assessed, so he moves into Under Review. Contacts that have completed every onboarding requirement get dragged into Approved.
Under the hood, every drag-and-drop applies the corresponding status:<channel-name> label to that contact and removes the previous one. This is why moves are instant and why the result is visible everywhere else in Contactzilla a moment later.
- Drag a contact card from any column into another to change its stage
- Each move re-applies the underlying group label (e.g.
status:Under Review) - Previous stage labels are removed automatically — a contact lives in exactly one channel
- Works well for sales pipelines, recruitment, onboarding, or any state-machine workflow
Step 4: Export Pipeline Data as CSV or vCard
If you need to share or back up the contacts in any pipeline stage, the CRM view supports exporting the data directly. You can choose between CSV — useful for spreadsheets, reporting, or importing into another system — or vCard, the standard contact format compatible with virtually every address-book app.
This is particularly handy when handing off a list of approved suppliers to procurement, or sending a snapshot of "under review" candidates to a hiring manager. The export respects whichever channel you're working with, so you only get the contacts relevant to that stage.
- Export options are available directly from the CRM view
- Choose CSV for spreadsheet workflows or reporting
- Choose vCard for importing into other address books
- Exports are scoped to the channel you're exporting from
Step 5: Jump From a Pipeline Card to the Full Contact Record
Pipeline cards intentionally show only a minimal view of the contact. When you need the full record — phone, email, custom fields, notes, all applied labels — click the contact card and then click the Open in Contacts View button.
This takes you to the standard contact directory entry. Here you can confirm that the CRM stage label has been applied as a regular group label — there's nothing special or hidden about CRM-created labels. You can edit, remove, or add labels manually from this view, and any change here is reflected back in the CRM pipeline immediately.
For example, changing the label on a contact's directory page to status:Approved will instantly move that contact's card into the Approved channel back in the CRM view. The two views are just different lenses on the same data.
- Click a card, then Open in Contacts View to jump to the full record
- CRM stage labels appear as ordinary group labels in the directory
- Editing the label from the contact view moves the card in the CRM view
- Useful for adding richer notes or editing other contact fields
Because CRM stages are just labels, you're never locked into the CRM interface. Power users can update stages from the directory, via CSV import, or from a mobile device — all paths converge on the same data.
Step 6: Sync Pipeline Stages to Mobile Devices
Because Contactzilla is designed to sync contacts to mobile devices, the labels generated by the CRM view show up on every connected phone as contact lists. This is what makes the CRM view genuinely useful beyond the dashboard.
In the example, the presenter pulls up an iPhone and shows the Information Requested list — populated with exactly the contractors currently in that channel. From the phone, they can start calling those contacts directly to chase down the outstanding paperwork. No copying lists between systems, no exporting CSVs to email, no separate CRM mobile app.
This works equally well on Android. Any team member with the address book synced to their device automatically sees pipeline stages as filterable contact lists — making the CRM view a true field tool rather than a desktop-only system.
- Pipeline stage labels appear on mobile as contact lists
- Works on both iPhone and Android out of the box
- Tap the list to see exactly the contacts in that pipeline stage
- Lets field staff act on pipeline state without ever opening the dashboard
This is the real payoff of building the CRM view on top of labels: the moment you drag a contact into Information Requested, the right person's phone has an up-to-date call list ready.
Step 7: Create Additional Pipelines for Other Workflows
You're not limited to one pipeline per address book. The same address book can host multiple, independent pipelines — each with its own set of channels and its own label prefix.
In the example, after building the External Onboarding pipeline, a second pipeline is created for Staff Development with a completely different set of channels. Both pipelines appear in the CRM view and operate independently — a single contact can sit in different stages of different pipelines simultaneously, because each pipeline's labels are namespaced by its own prefix.
This is a clean way to model unrelated processes — sales, recruitment, partner onboarding, certifications, internal training — without polluting one workflow with another's vocabulary.
- Click New Pipeline again to add another workflow
- Each pipeline has its own independent channels
- A single contact can appear in multiple pipelines at once
- Useful for separating processes like sales, recruitment, onboarding, training
status label prefix