This guide assumes you already have Microsoft Intune configured and iOS devices enrolled in your MDM system. We’ll walk you through creating the mobile configuration file in Contactzilla and deploying it via Intune.
What You’ll Need
- A Contactzilla account with an existing address book. Please see our getting started guide here
- An MDM team member created in your Contactzilla account (required prerequisite – see setup below)
- Microsoft Intune configured with enrolled iOS devices
- Admin access to your Intune admin center
Prerequisites – MDM Team Member Setup
⚠️ Important: Before you can create mobile configuration files for MDM deployment, you must first set up an MDM team member in your Contactzilla account. This creates the specialized user account needed for device deployments and generating the .mobileconfig file.
Complete setup guide: Setting Up MDM Deployments in Contactzilla
This prerequisite guide covers:
- Creating MDM team members with Device Only Access
- Setting up CardDAV connections for MDM deployment
You must create the MDM team member before proceeding with the Intune deployment steps below.
Creating the MDM CardDAV Connection in Contactzilla
Step One: Set Up Your MDM Connection
1) Login to Contactzilla and select the address book that you wish to deploy to your iOS devices.
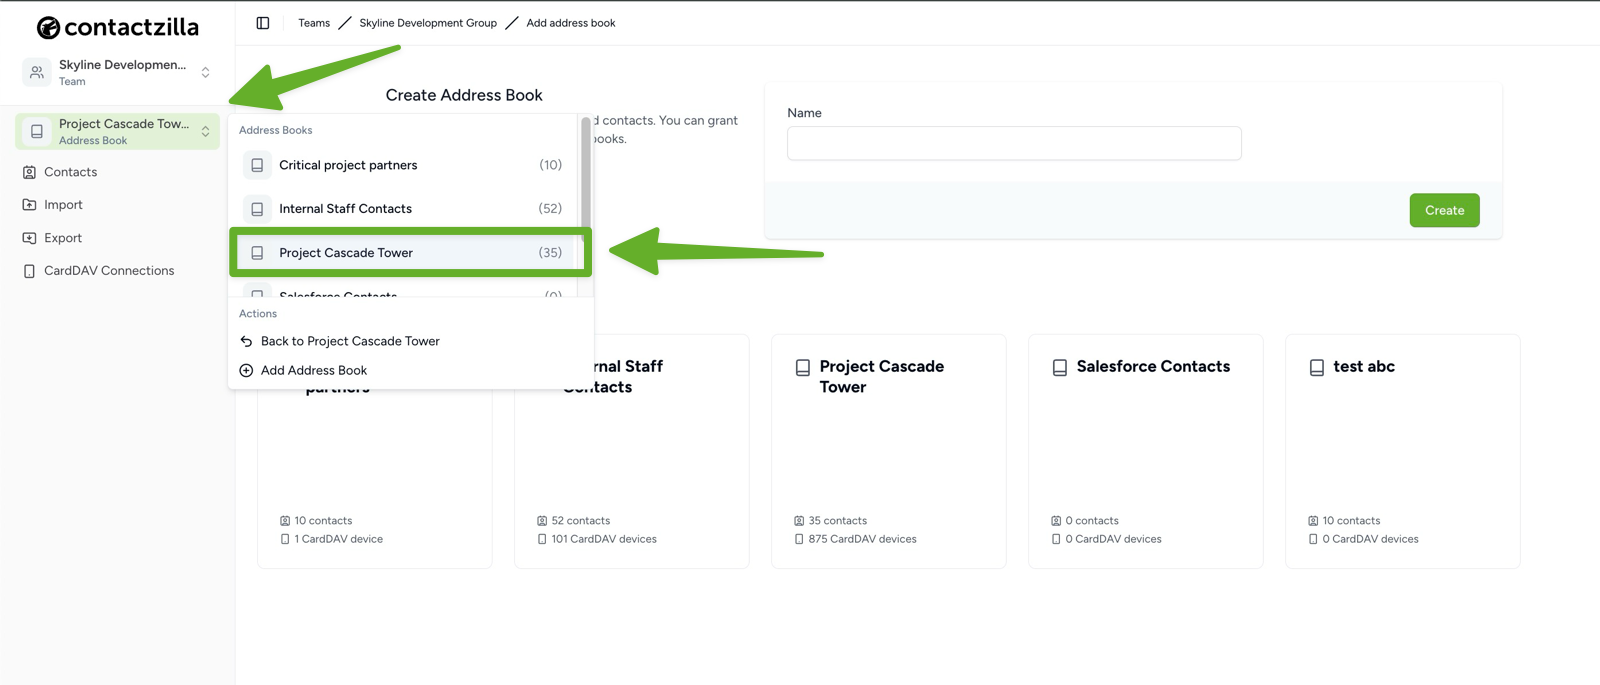
2) Click on ‘CardDAV Connections’. From here we will create a CardDAV connection specifically designed for MDM deployment.
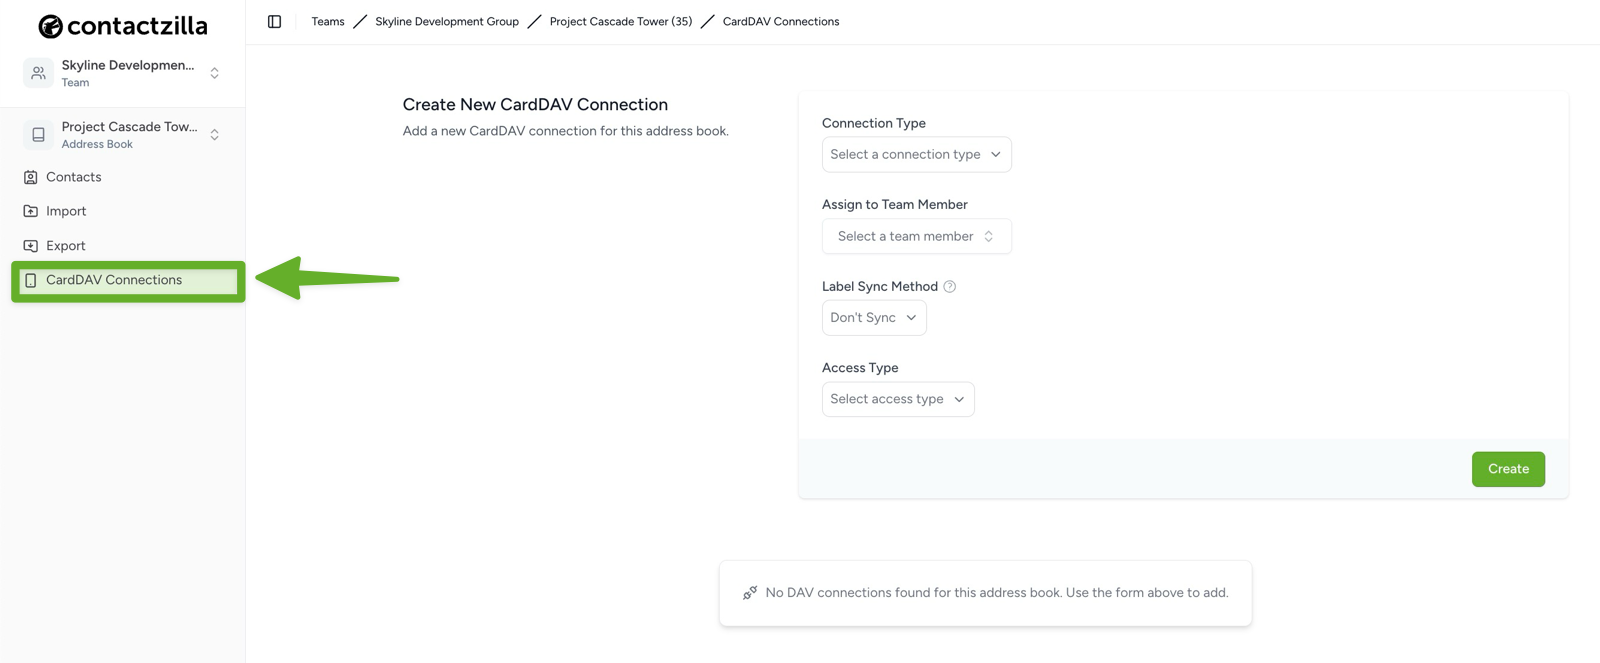
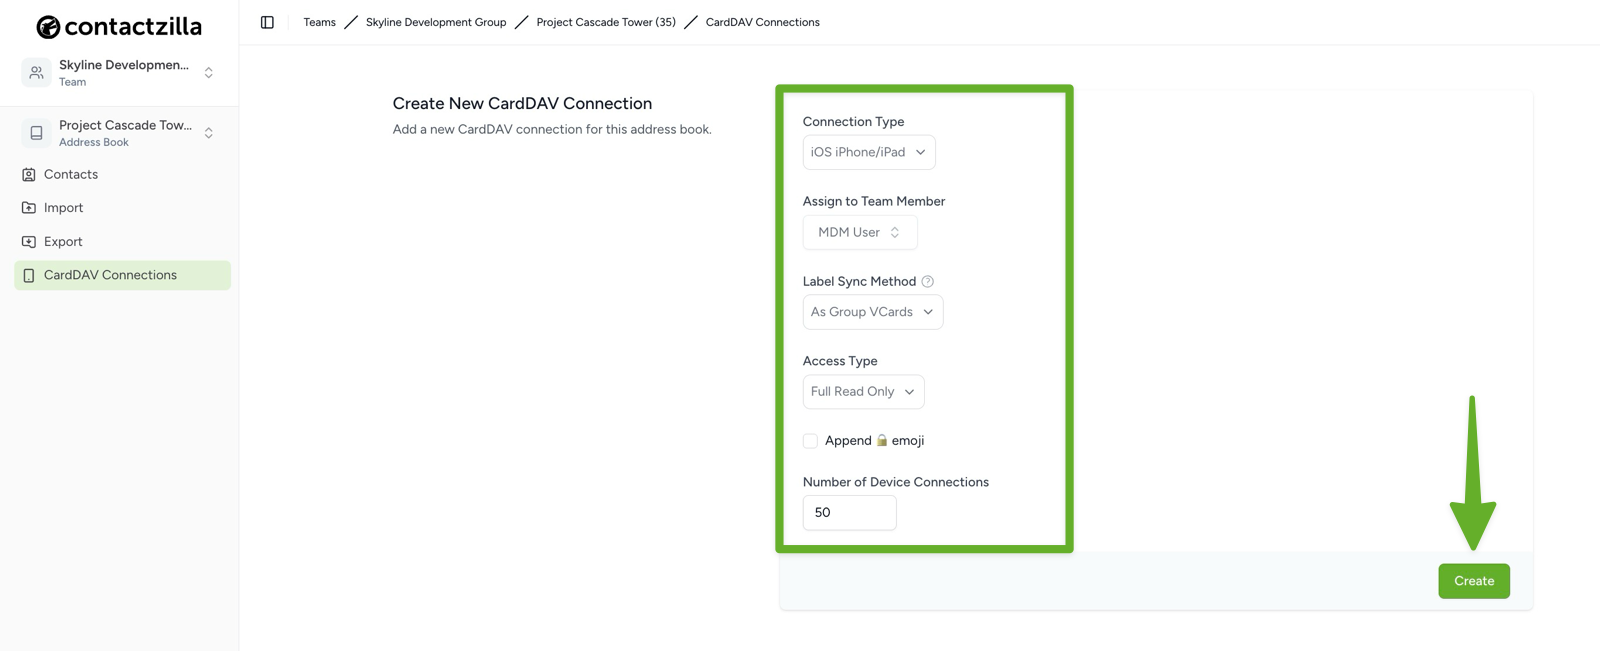
3) From the ‘Create New CardDAV Connection’ screen that follows configure the following settings from the dropdown menus:
Connection Type: ‘iOS’
Assign to Team Member: Select your MDM team member (created in the prerequisite setup above)
Label Sync Method: Leave as default ‘As Group VCards’
Access Type: Choose based on your needs
- ‘Full Read Only’ (recommended for managed devices to prevent accidental changes)
- ‘Selective Read Only’ (if you only want specific labeled contacts)
- ‘Full Read/Write’ (if devices need to add/edit contacts)
Tip 💡: For Read only deployments you have an option to append a lock emoji to each contact in the native contacts app to make it lear to a user that they can not make changes
Number of Device Connections: Set to the number of devices you plan to deploy to
Click the ‘Create’ button to generate your new CardDAV connection.
Step Two: Download the Mobile Configuration File
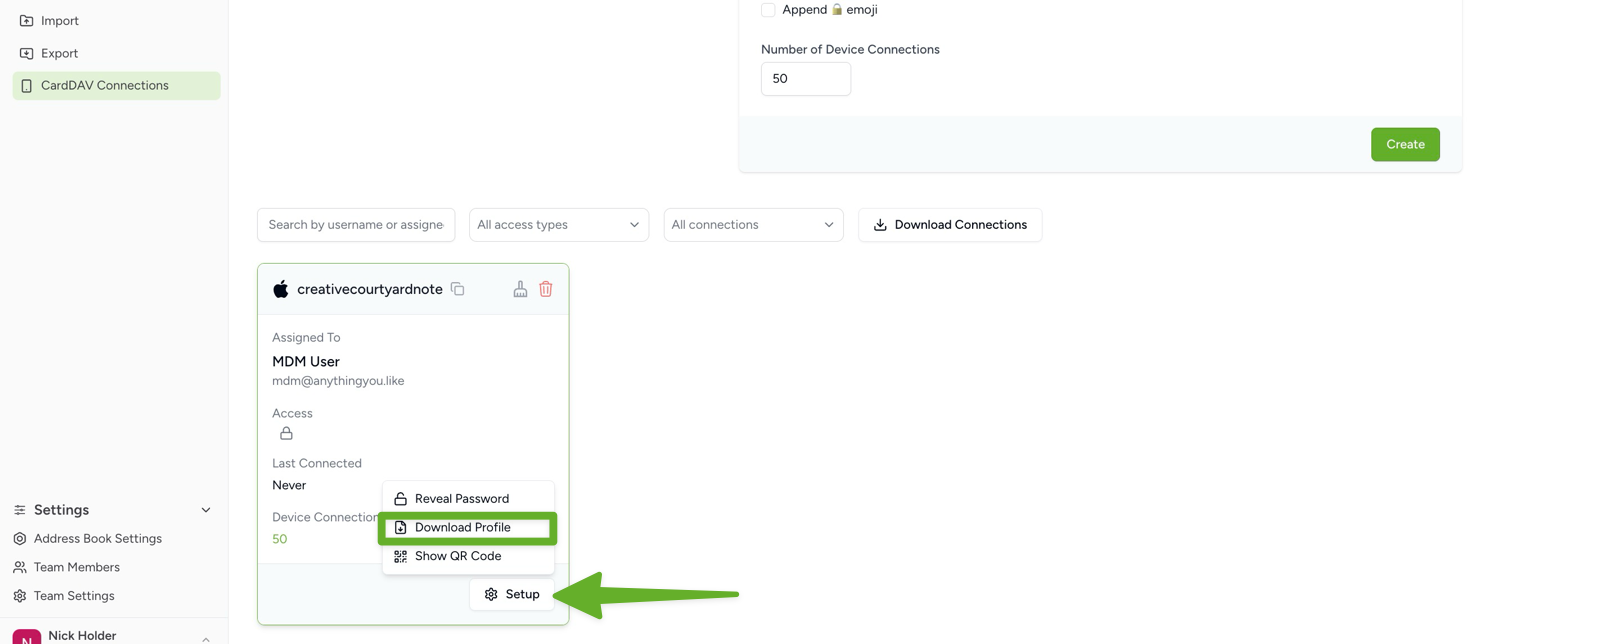
1) After clicking Create, you’ll see your new CardDAV connection listed in the connections panel. Click the ‘Setup’ button on your new connection and choose ‘Download Profile’.
Save the .mobileconfig file to your computer – you’ll need this file for the Intune deployment.
Step Three: Deploying the Configuration via Microsoft Intune
Create Custom Configuration Profile
1) Login to your Microsoft Intune admin center at intune.microsoft.com
2) Navigate to Devices → Manage devices → Configuration
3) Click Create → New policy
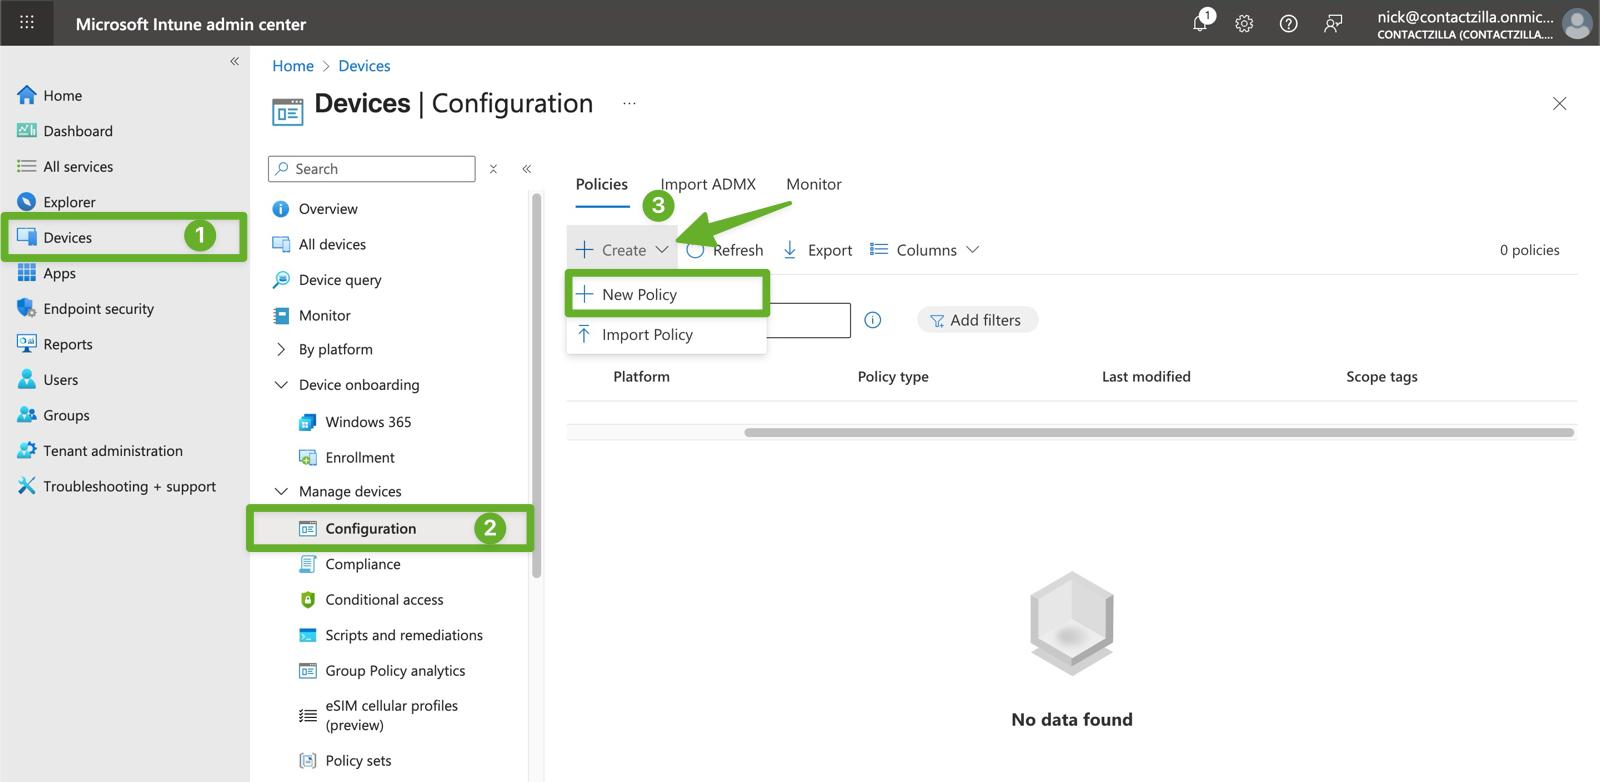
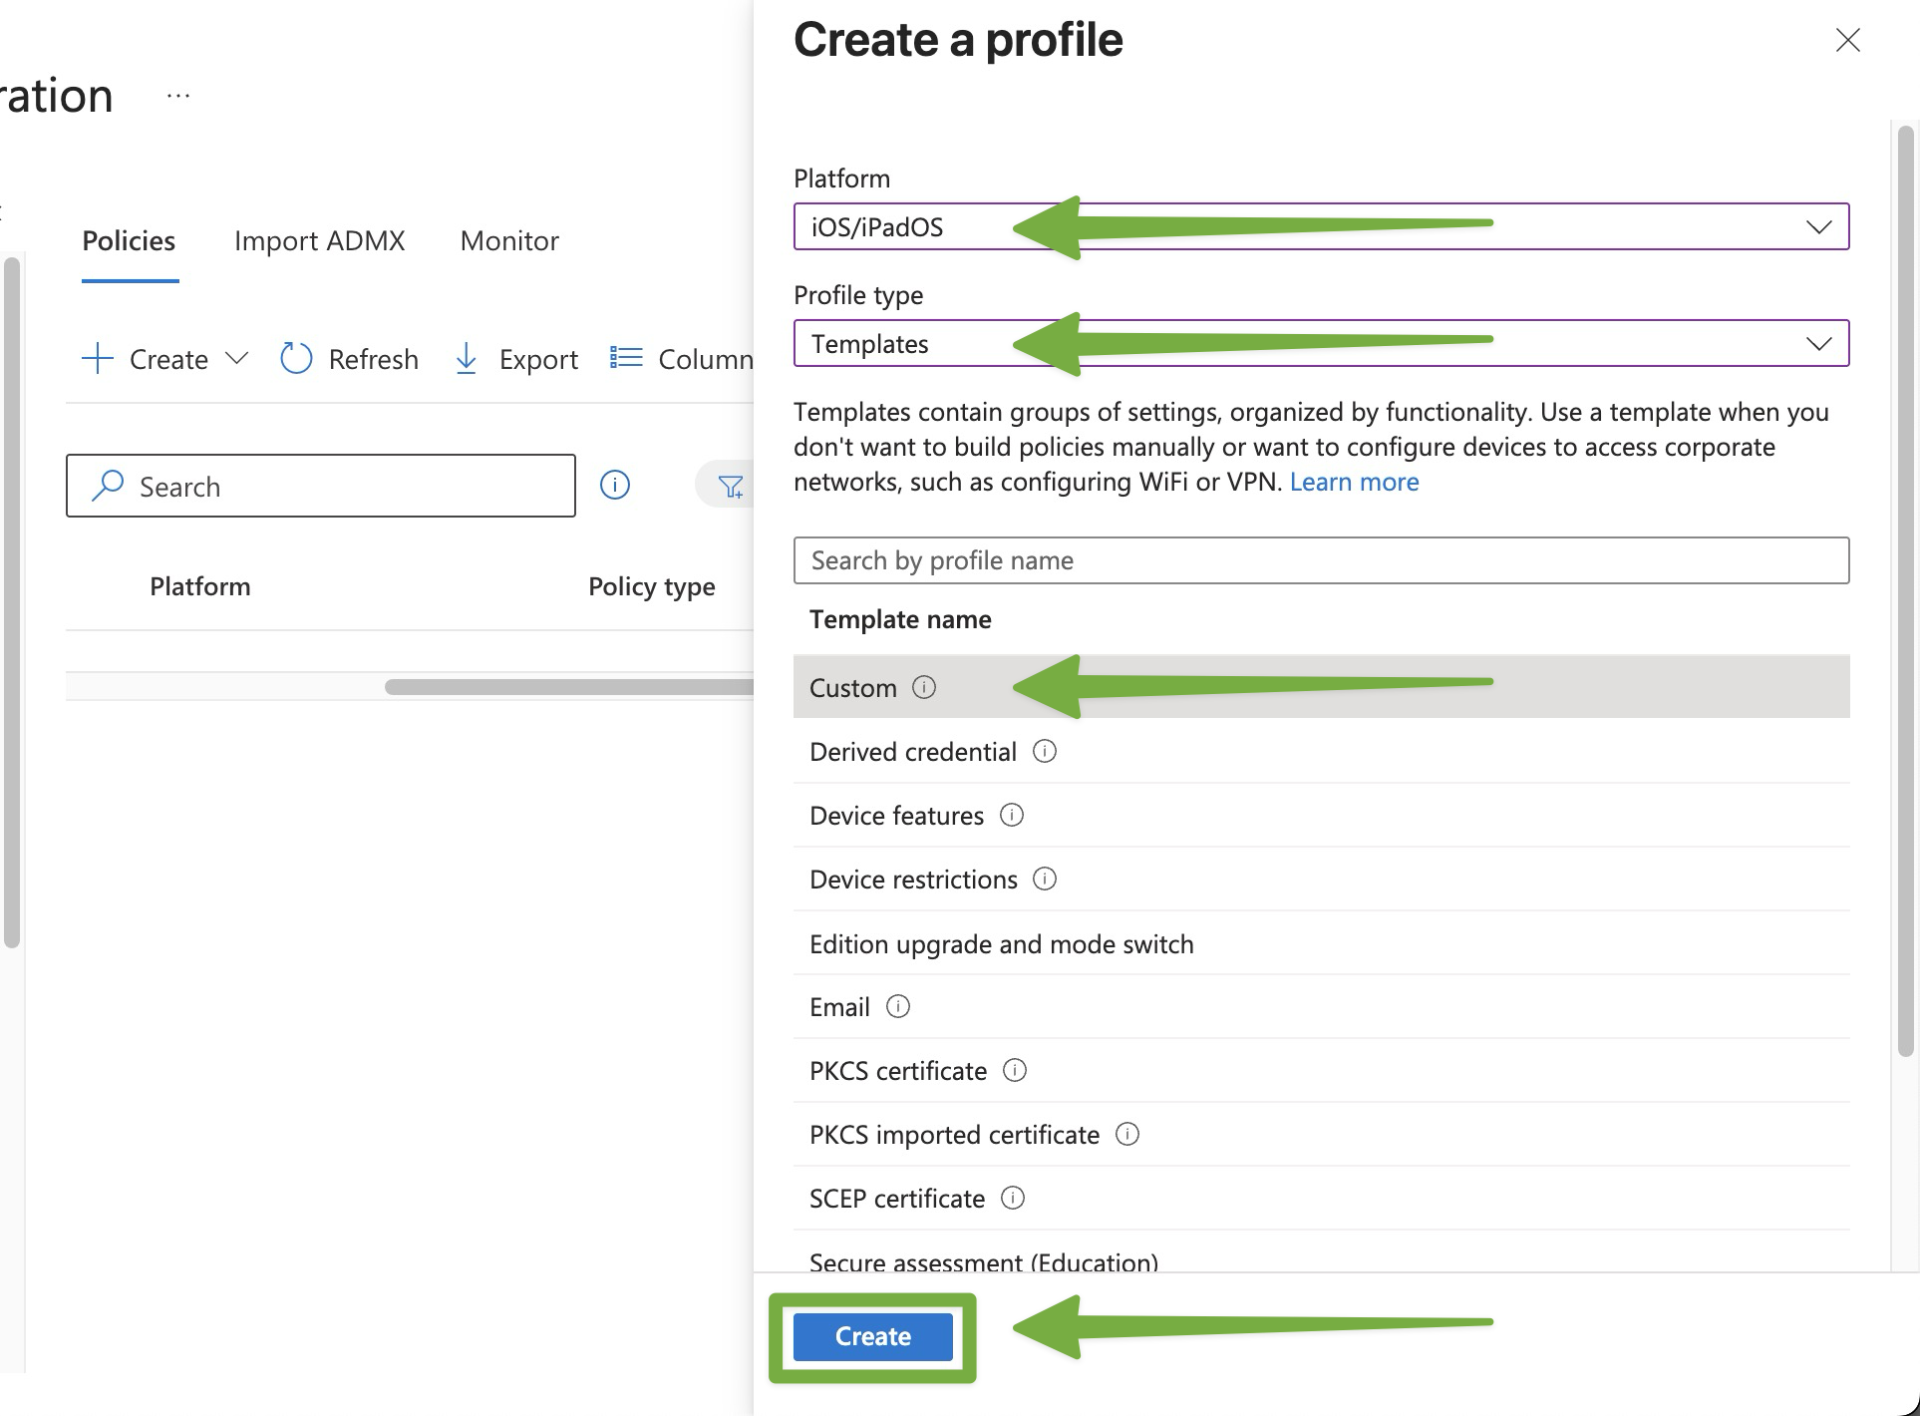
4) Select the following options:
- Platform: iOS/iPadOS
- Profile type: Templates
- Template: Custom
Click Create
Step Four: Upload Your Mobile Configuration
This step involves creating the Intune policy that will deploy your Contactzilla profile to devices.
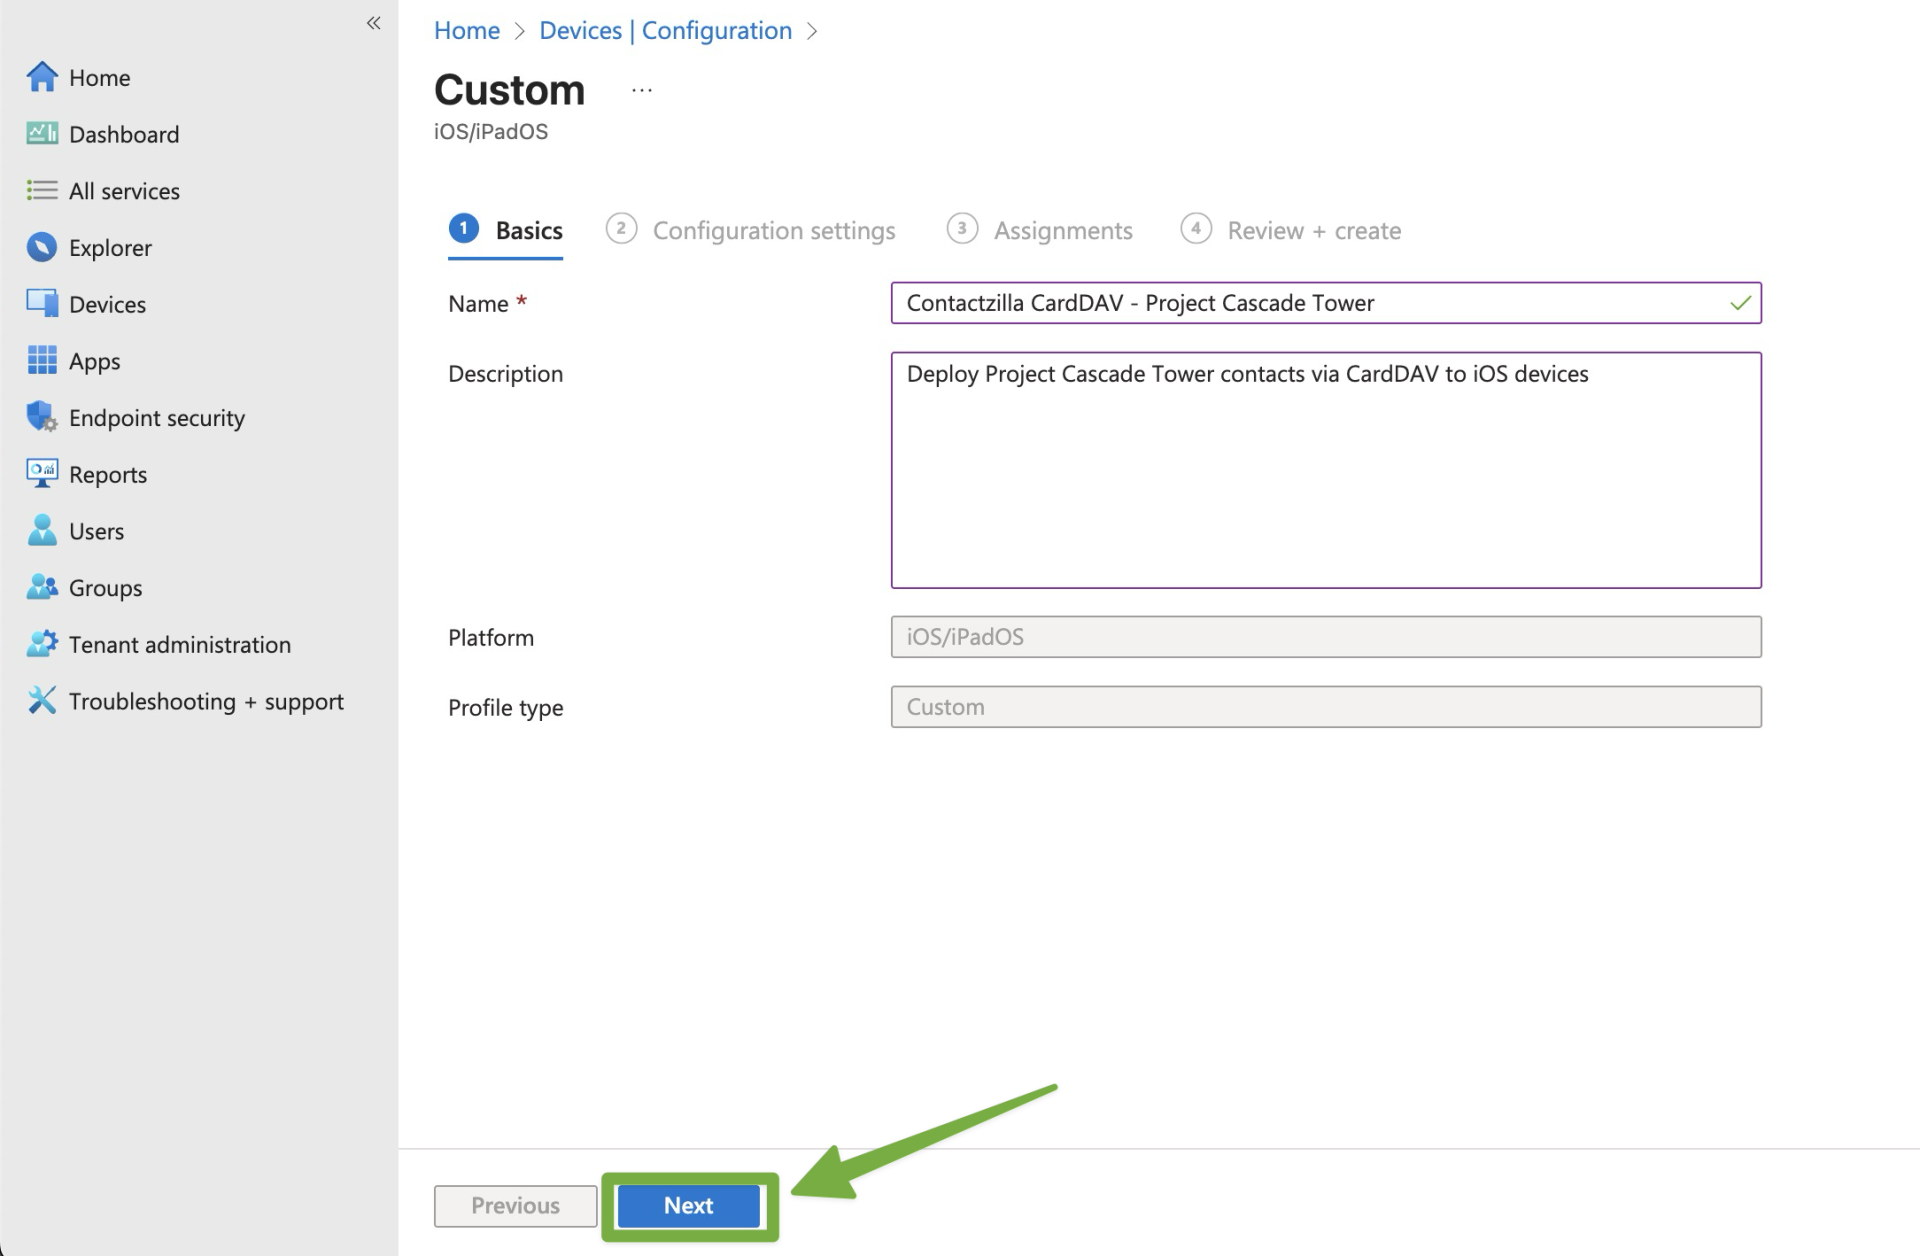
1) In the Basics tab, configure the policy identification:
Name: This is the policy name that appears in your Intune admin center for IT management – make it descriptive so you can easily identify it among other policies e.g:
“Contactzilla CardDAV – [Your Address Book Name]”
Description: “Deploy [Address Book Name] contacts via CardDAV to iOS devices”
Optional but recommended for documentation – helps other administrators understand what this policy does
Click Next.
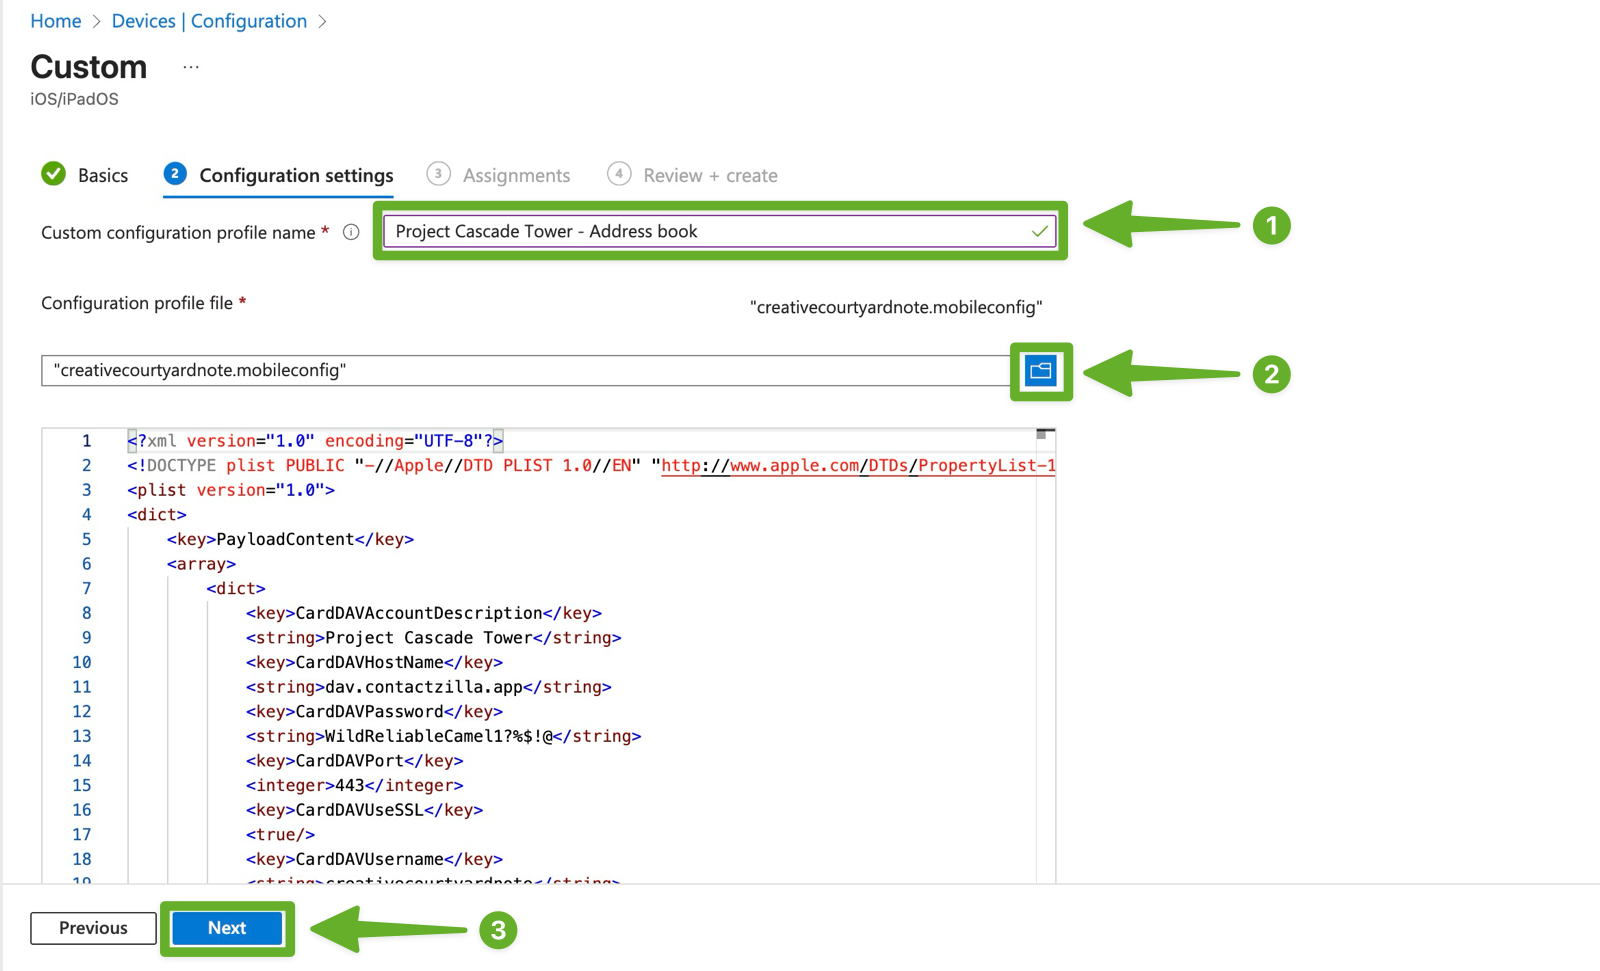
2) In the Configuration settings tab, configure the profile name displayed to users e.g
- Profile name: “[Your Address Book Name] – Address book”
This name may be visible to device users in certain iOS settings - Configuration profile file: Click Browse and select the
.mobileconfigfile you downloaded from Contactzilla
Click Next
Step Five: Assign to Your iOS Devices
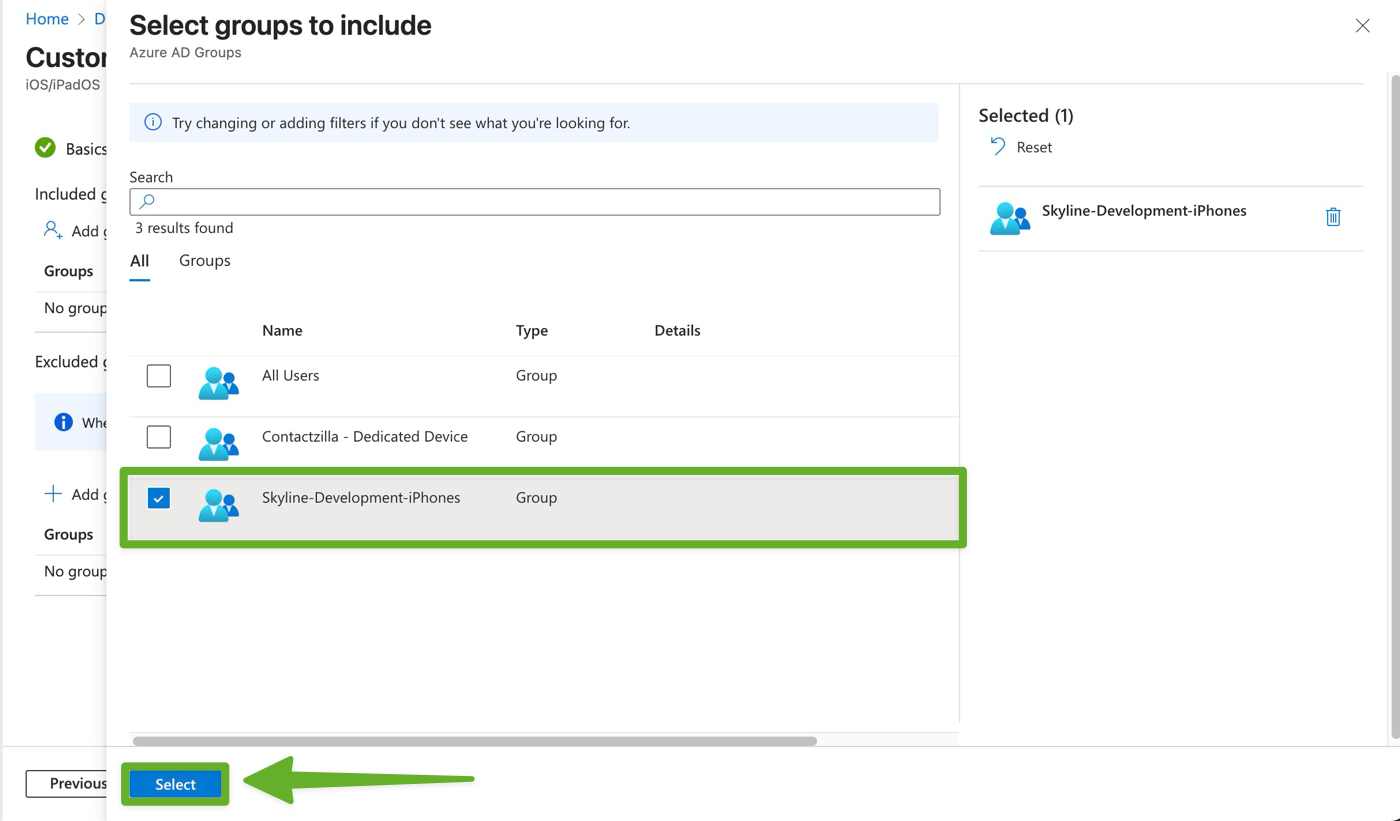
1) In the Assignments tab, click Add groups to select your Intune device group that will receive the Contactzilla address book
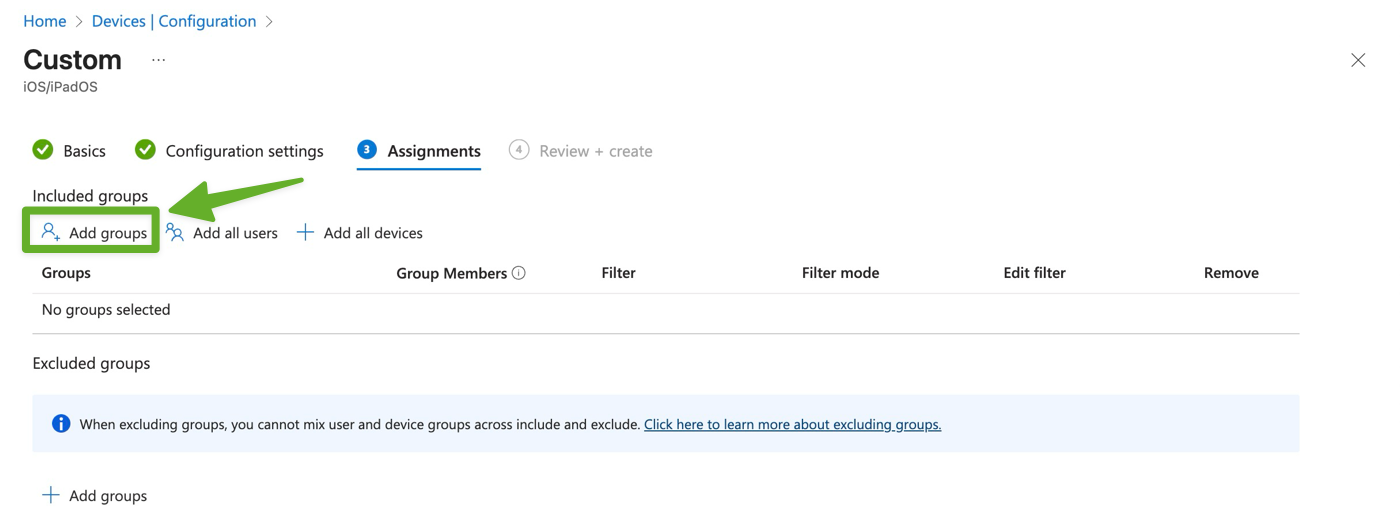
2) Select the device group(s) containing your iOS devices that should receive the Contactzilla address book
Click ‘Select‘ and then hit ‘Next‘ on the screen that follows
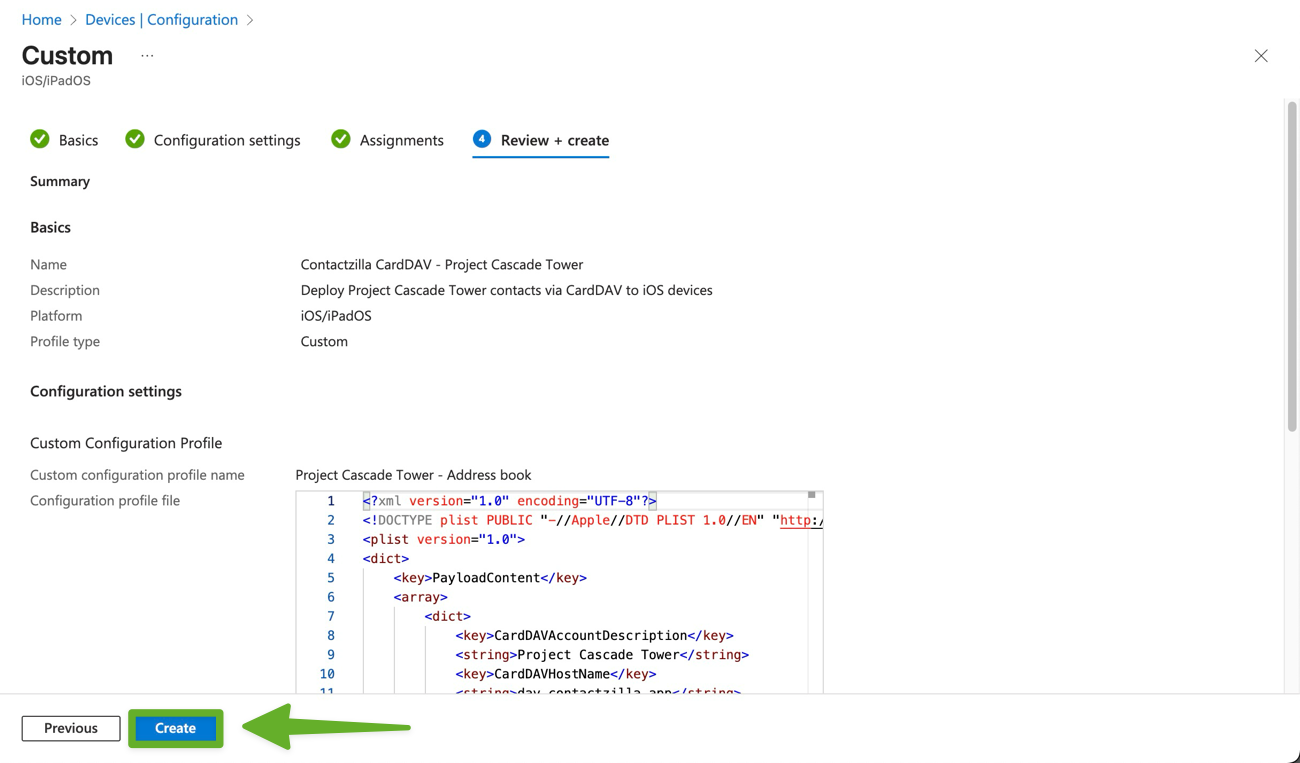
3) Review your configuration in the Review + create tab and click Create
Monitoring and Verification
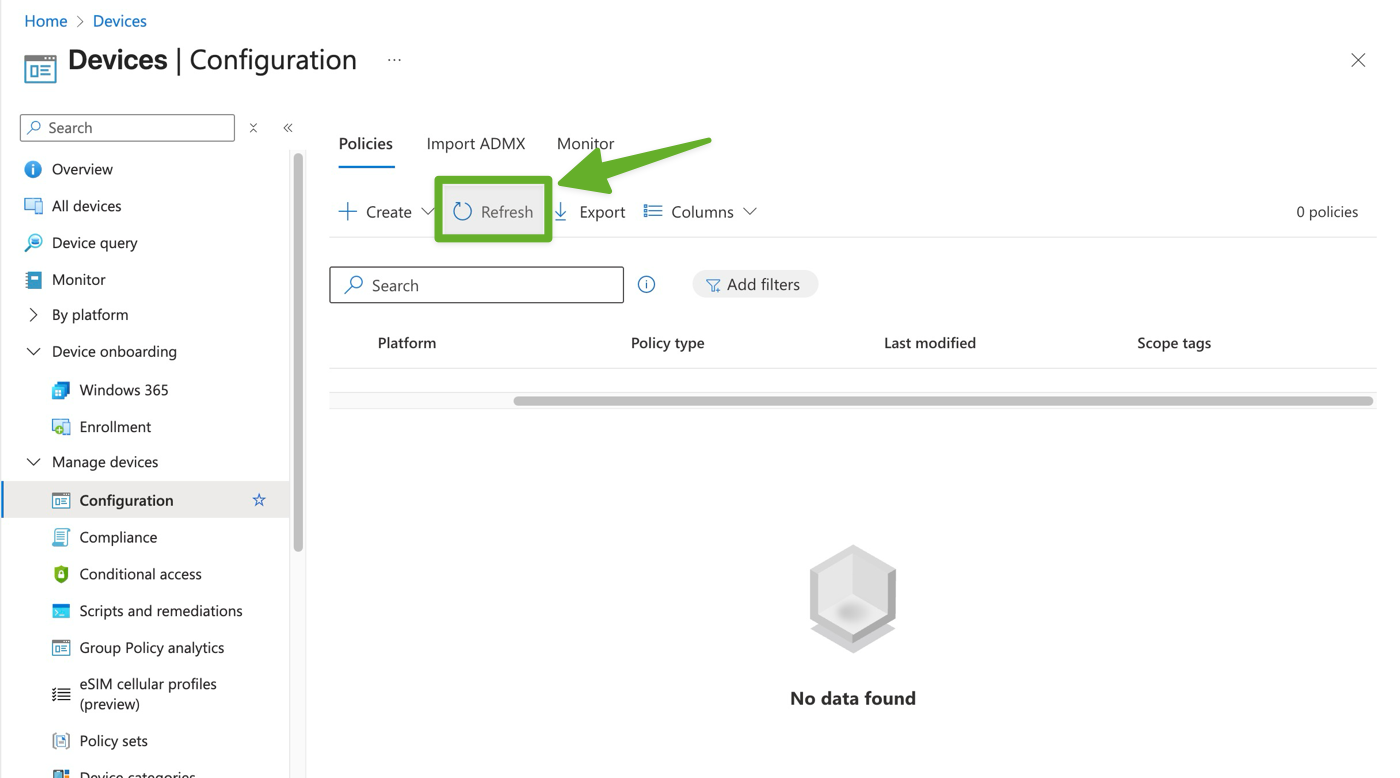
Step Six: Monitor Deployment Status
1) You will now arrive back at the Devices → Manage devices → Configuration in your Intune admin center. If you hit ‘Refresh’ your policy will appear.
2) Click on your newly created Contactzilla profile
- Click Device status to view the deployment progress
- Verify that target devices show “Succeeded” status
Timeline: Configuration profiles typically deploy within 15 minutes for newly enrolled devices, or up to 8 hours for existing devices during their automatic check-in cycle.
Step Seven: Verify Contact Synchronization on Devices
For Single Device Testing or BYOD Scenarios:
- If using Intune Company Portal for enrollment, you can force immediate deployment by opening Company Portal → Devices → Check Status to sync the device
- Open the native Contacts app and pull down to refresh to see your Contactzilla contacts

For Mass Enterprise Deployments (Without Company Portal):
For organizations deploying to hundreds of devices without requiring Company Portal on each device, profiles deploy automatically according to Intune’s standard schedule:
- Newly enrolled devices: Check-in every 15 minutes for the first 6 hours, then every 6-8 hours
- Existing devices: Automatic check-in every 6-8 hours for iOS devices
To expedite deployment without requiring users to install Company Portal:
- IT administrators can force sync remotely from Intune admin center:
- Navigate to Devices → All devices → Select target device → Click Sync
- Use Bulk Device Actions for multiple devices: Devices → iOS/iPadOS → iOS/iPadOS devices → Bulk Device Actions → Select Sync
- For Apple Business Manager/ADE enrolled devices: Configuration profiles typically deploy faster due to supervised device management
If you need to update the address book:
- Changes made in Contactzilla automatically sync to devices within 15 minutes
- No need to redeploy the configuration profile for contact updates
If you need the connection password again:
- The password is only shown once during initial setup
- If lost, you’ll need to create a new CardDAV connection
- Always save the
.mobileconfigfile as it contains the necessary credentials
Your Contactzilla address book is now successfully deployed to your iOS device fleet via Microsoft Intune, providing seamless contact synchronization across your organization.